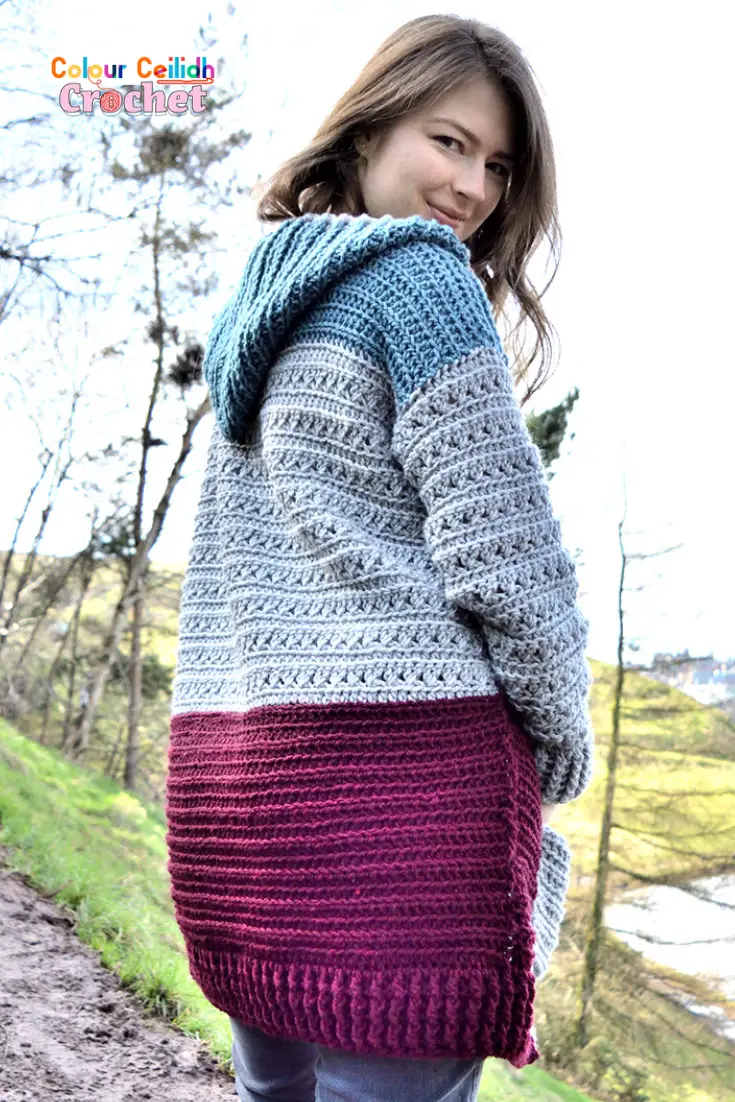
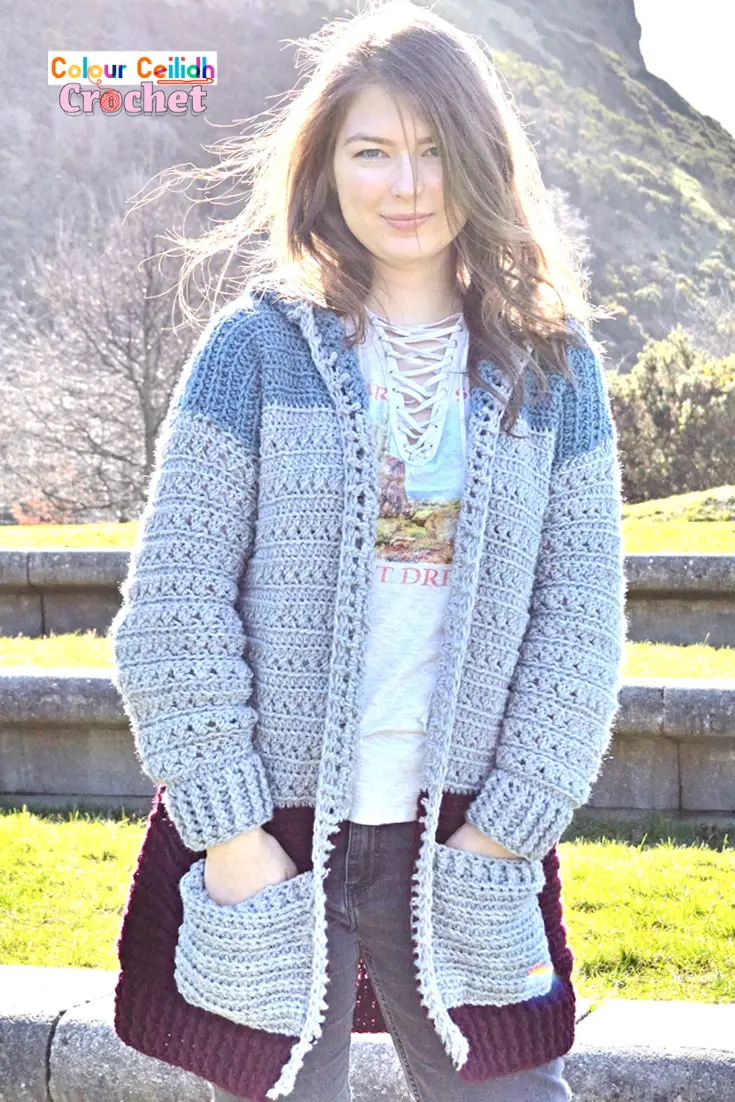
This Crochet Cross Stitch Hoodie is a free pattern for a long crochet cardigan pattern with an easy Youtube video tutorial.
Simply make 4 rectangles and the sleeves, seam and add ribbing!
This post contains affiliate links to products. I may receive a small commission for purchases made through these links.
Yarn
I’m using Lion Brand Vanna’s Choice in Burgundy, Silver Heather and Dusty Blue.
Stitches
This pattern uses the crossed double crochet stitch which is basically made of double crochet stitches. Other stitches in this pattern include the half double crochet front loop and back loop, as well as front and back post stitches for the ribbing.
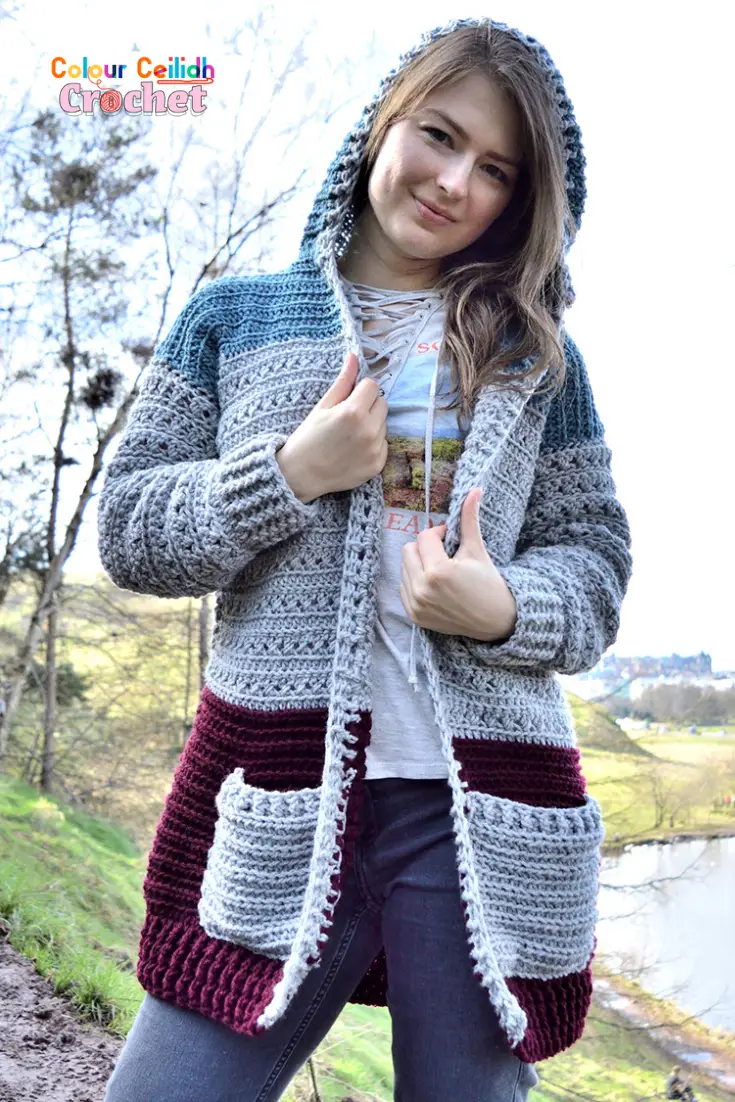
Crochet Cross Stitch Hoodie – Free Pattern
- PIN it for later.
- Add this pattern to your Ravelry queue.
- Ready to crochet but don’t want the ads in your way? PRINT it here*.
* a lovingly made print friendly version for a small fee.
Description
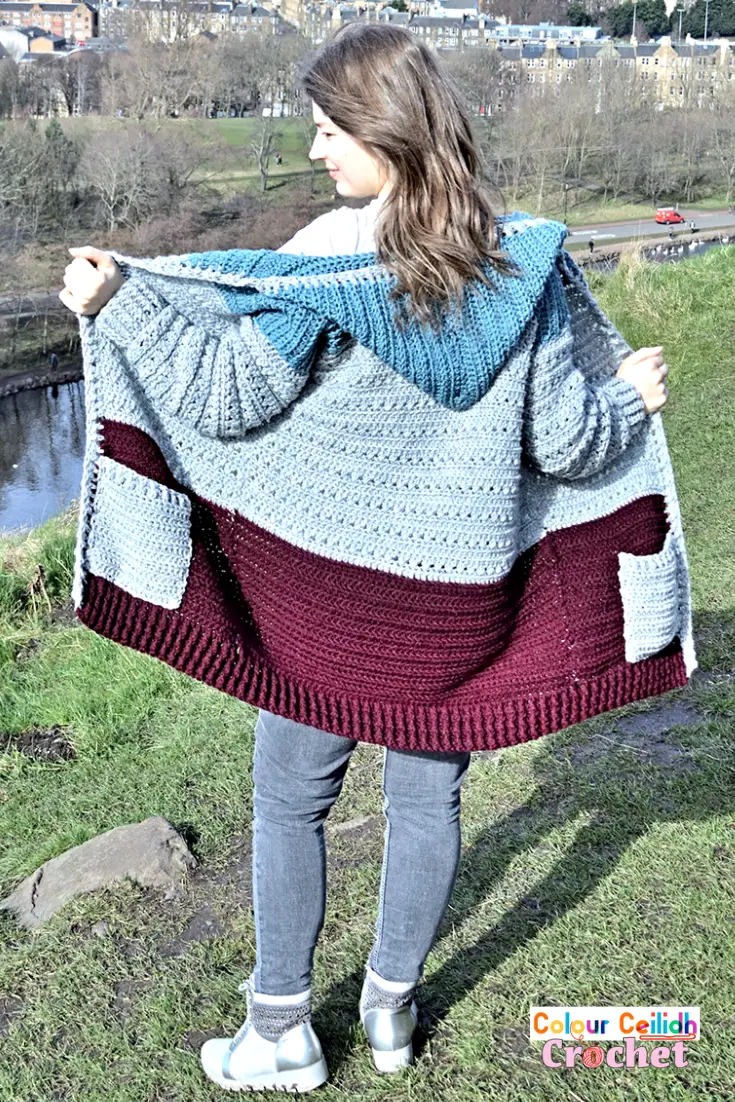
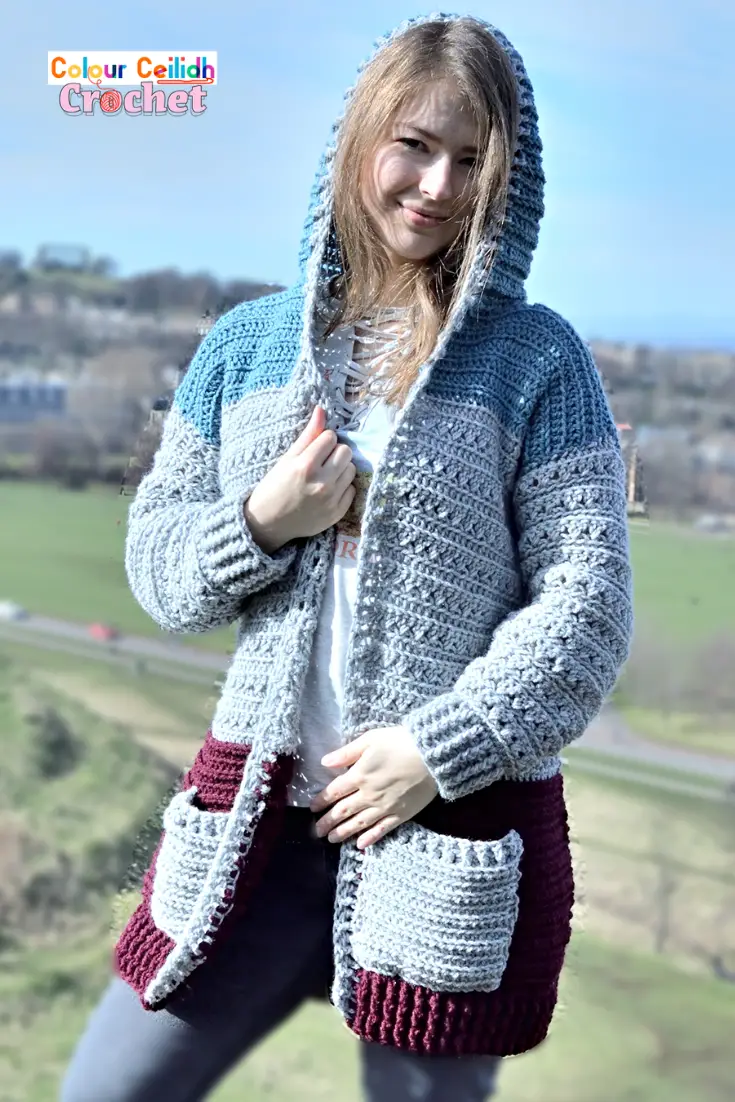
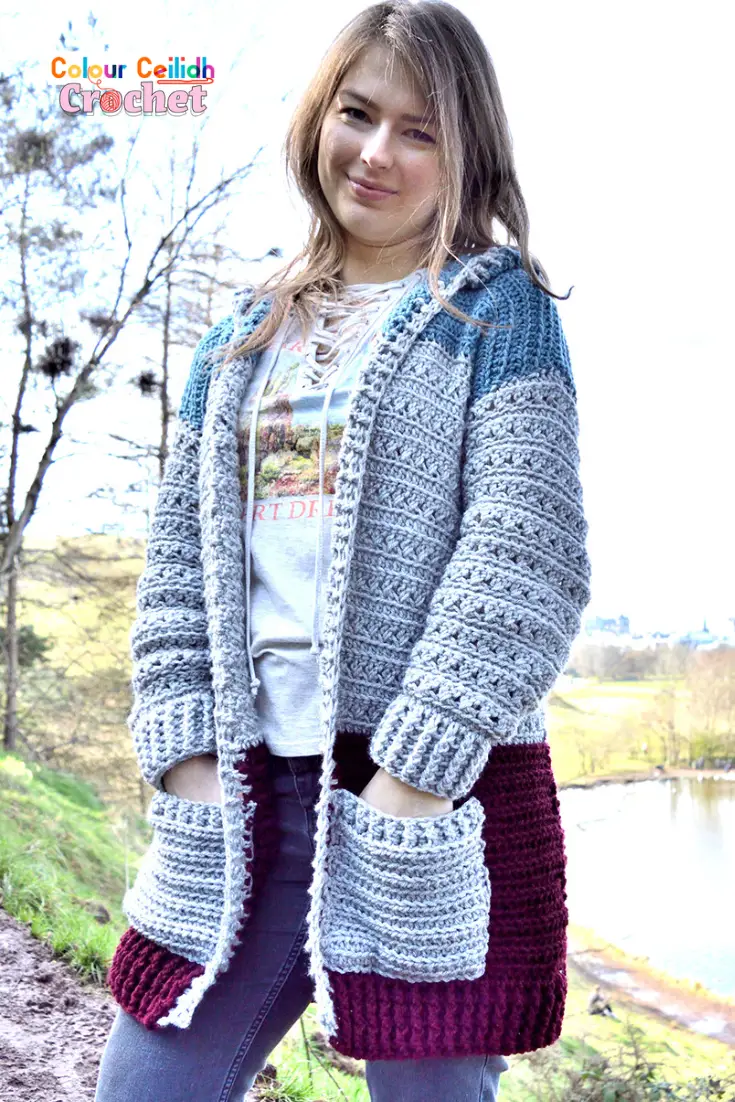
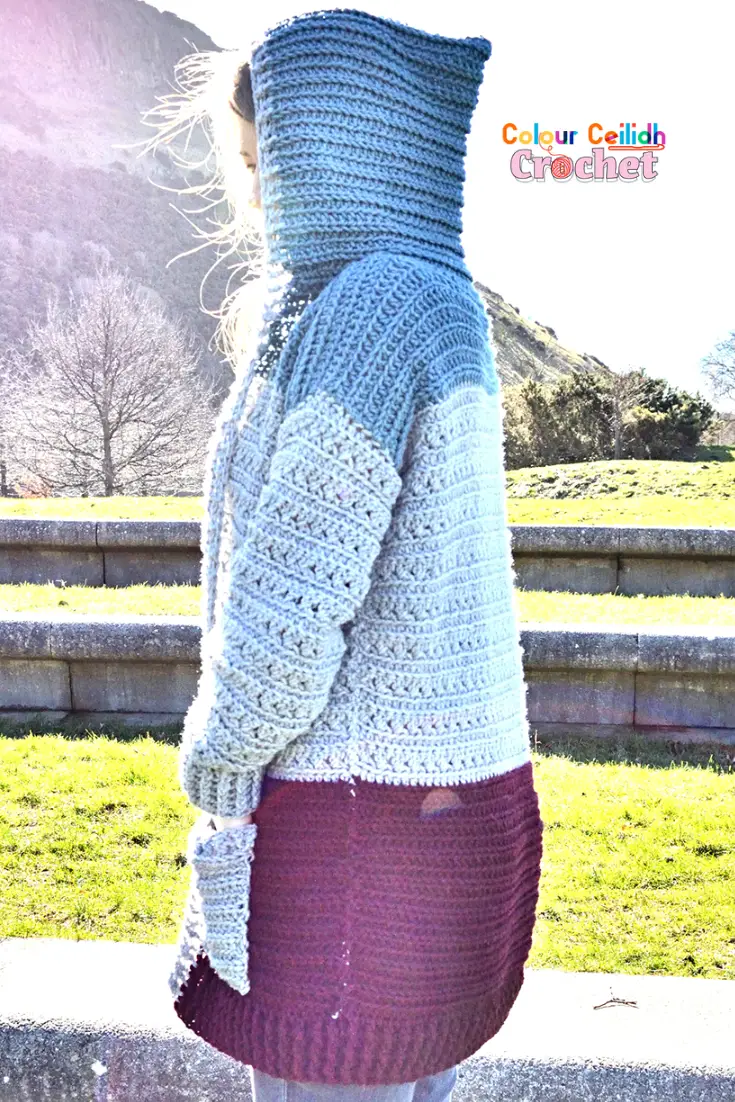
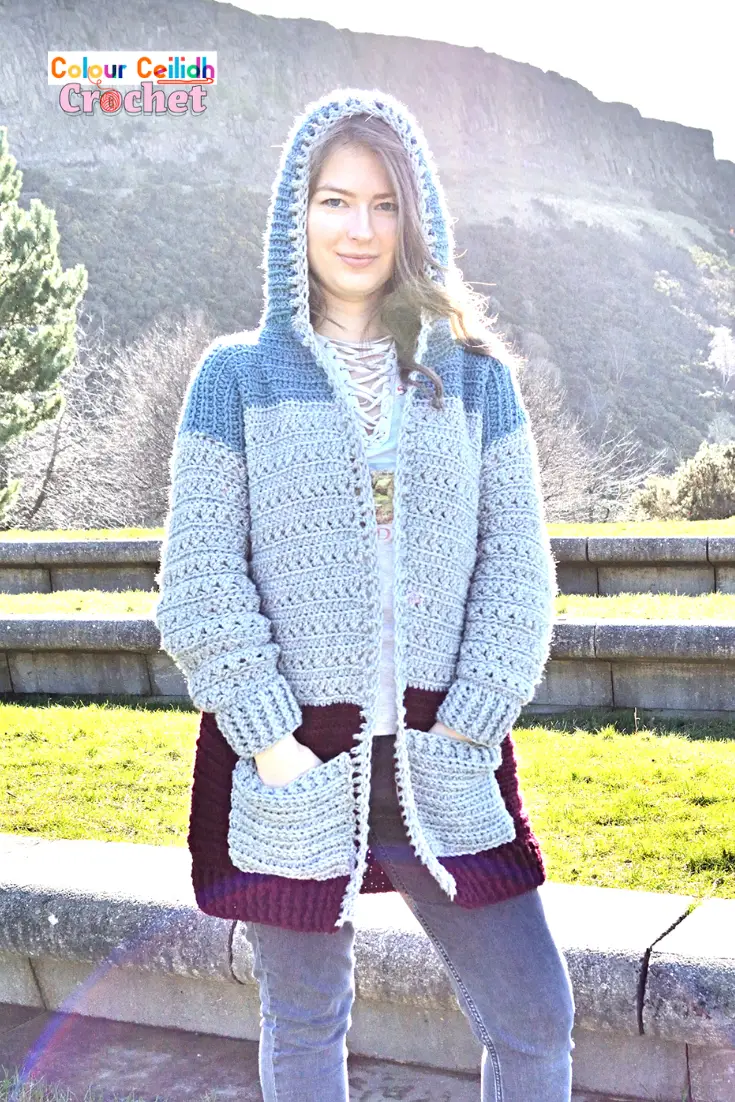
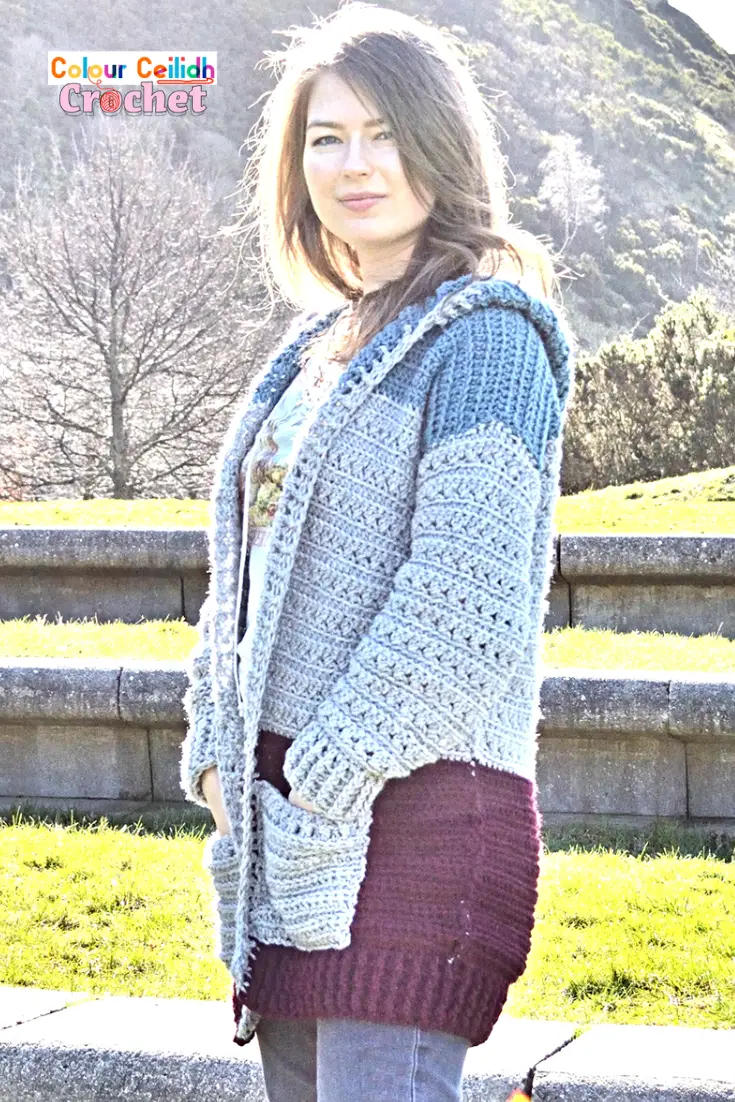
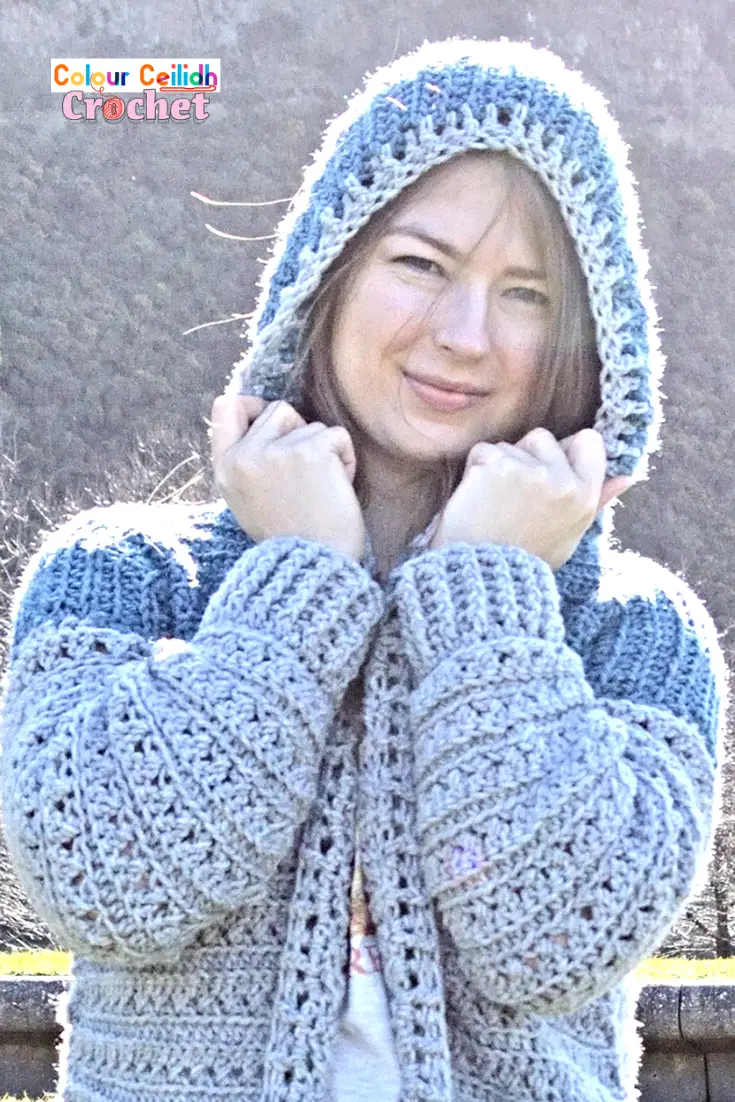
This Crochet Cross Stitch Hoodie free pattern is a long and comfortable womens hooded cardigan with practical pockets. The cross stitch is easy as it consists of only double crochet stitches. It adds beautiful texture and style to the garment. This crochet hoodie comes in 9 sizes and includes a video tutorial which shows you how I built this cardigan to make it easy.
Sizes
This cardigan is available in 9 sizes: XS, S, M, L, XL, 2X, 3X, 4X, 5X.
The cardigan is approx 29.5″ long. Model is 5’7″, wears and is a size M.
Care Instructions
The Lion Brand Vanna’s Choice yarn is a 100% acrylic. It’s machine washable at 30 C / 86 F.
Pattern Notes
- Project Level: Easy
- If you have any questions, check the video (link below).
- The long sequence of numbers in the pattern corresponds to the 9 sizes starting from XS and ending with 5X, with XS being placed first and then others arranged in ascending order in brackets and separated by commas.
- What I call the Bottom, Middle & Top Sections: it’s the Burgundy, Silver Heather & Dusty Blue parts of the hoodie, respectively.
Crochet Cross Stitch Hoodie Video Tutorial
Crochet Cross Stitch Hoodie | Easy Hooded Cardigan With Pockets For Women

Materials
- Lion Brand Vanna’s Choice (Burgundy & Dusty Blue: 4 / Medium / Aran weight, 100 g / 3.5 oz, 156 m / 170 yd, 100% acrylic; Silver Heather: 4 / Medium / Aran weight, 85 g / 3 oz, 133 m / 145 yd, 100% acrylic): 5 (6, 6, 7, 7, 8, 8, 9, 9) skeins in Silver Heather, 2 (3, 3, 3, 3, 3, 4, 4, 4) skeins in Burgundy & 2 (2, 2, 2, 2, 3, 3, 3, 3) skeins in Dusty Blue
- 9 mm hook
- Scissors
- Measuring tape
- Stitch markers (I use safety pins!)
Gauge
Middle Section pattern with the cross stitch in Silver Heather (ch an uneven number, then Pattern Repeat row1, then rep rows 4 & 5): approx 12 sts & 6.2 rows in 4 X 4″ square.
Or if you make the pocket in Silver Heather (pattern below): approx 11.3 sts & 7 rows in 4 X 4″ square.
Abbreviations (US Terms)
- blo: back loop only
- BPdc: back post double crochet
- ch: chain
- dc: double crochet
- flo: front loop only
- FPdc: front post double crochet
- hdc: half double crochet
- rep: repeat
- st: stitch
- t: turn
Pattern Overview
- Make the back rectangle, two front rectangles, hood rectangle & two sleeves.
- Mark the armholes, mid neck, shoulder seam.
- Seam the sides, shoulders, sleeves & hood.
- Add ribbing to the hoodie bottom, sleeve cuffs and the front including around the hood.
- Make and attach two pockets.
Pattern Repeat
Chain an uneven number of chains. Stitch count is base ch minus 1.
Row1 Hdc in 3rd ch from hook (counts as 2 hdc), hdc in next st and in every st, t.
Row2 Ch 2 (counts as hdc), hdc-flo in same st and in every st, t.
Row3 Ch 2 (counts as hdc), hdc-blo in same st and in every st, t.
Row4 Ch 3 (counts as dc), skip crocheting in same st, *dc-flo in next st, dc-flo in the skipped st, skip next st; rep from *, dc-flo in last st, t.
Row5 Ch 2 (counts as hdc), skip crocheting in same st, hdc-blo in next st and in every st, hdc to top of ch-3, t.
What Pattern To Use For Different Sections?
Bottom Section / Hood / Pocket / Gauge: Row1, rep rows 2 & 3, end with an even number of rows.
Middle Section: Row3, rep rows 4 & 5, end with an uneven number of rows.
Top Section: Rep rows 2 & 3, end with any number of rows.
Sleeve / Gauge: Row1, rep rows 4 & 5, end preferably with an uneven number of rows.
1. Make 4 Rectangles & 2 Sleeves.
Make the back rectangle, two front rectangles, hood rectangle & two sleeves.
Back Rectangle & 2 Front Rectangles
For the back rectangle: with Burgundy, ch 57 (61, 67, 73, 77, 85, 87, 91, 97). For the front rectangles: with Burgundy, ch 29 (31, 33, 37, 39, 43, 43, 45, 49).
Follow Pattern Repeat for the Bottom Section until you have 16 rows.
With Silver Heather, follow Pattern Repeat for the Middle Section until you have 19 (19, 19, 19, 19, 21, 21, 21, 21) rows in the Middle Section.
With Dusty Blue, follow the Pattern Repeat for the Top Section until you have 7 (7, 7, 7, 7, 7, 7, 8, 8) rows in the Top Section, fasten off.
Hood Rectangle
With Dusty Blue, ch 55 (56, 58, 60, 62, 65, 68, 70, 72). Follow the Pattern Repeat for the Bottom Section until you have 20 (20, 21, 22, 22, 23, 24, 25, 26) rows in the hood, fasten off.
2 Sleeves
With Silver Heather, ch 25 (27, 29, 33, 35, 37, 39, 43, 45). Follow the Pattern Repeat for the Sleeve until you have 23 (23, 23, 23, 21, 21, 21, 21, 19) rows in the sleeve, making sure to increase as instructed below.
Increase by 4 sts in row3 and by another 4 sts in row5. Then in row7 increase by 2 (2, 2, 2, 4, 4, 4, 4, 4) sts, in row9 increase by 0 (0, 0, 0, 0, 4, 4, 4, 4) sts and in row11 increase by 0 (0, 0, 0, 0, 0, 2, 2, 0) sts.
After you’ve done your increases, your top sleeve stitch count per row is 34 (36, 38, 42, 46, 52, 56, 60, 60). Fasten off.
How Do You Increase In Sleeve Rows?
I’ve explained this in the video as well.
In the increasing rows, place 2 sts in the same st 4 or 2 times anywhere in a given row as specified above. In other words, follow the Sleeve pattern as usual but make sure that somewhere in the row you place 2 hdc-blo in same stitch instead of 1, four or two times as instructed. Zero increase means do not make any changes to the row and follow the pattern as usual.
For example, row3 for size M can look like this: ch 2 (counts as hdc), skip crocheting in same st, 2 hdc-blo in next st, hdc-blo in next st 6 times, 2 hdc-blo in next st, hdc-blo in next st 4 times, 2 hdc-blo in next st, hdc-blo in next st 12 times, 2 hdc-blo in next st, hdc to top of ch-3, t.
I have placed 2 hdc-blo in same stitch 4 times in this row. It doesn’t matter exactly where you do that because your sleeve will grow in width as long as you add extra stitches.
2. Mark Armholes, Mid Neck & Shoulder Seam
Starting from the top, measure & mark with stitch markers 5.6 (5.9; 6.2; 6.8; 7.5;, 8.5; 9.2; 10; 10) inches for the armholes in your back & front rectangles.
Mark with stitch markers the mid neck point on both the back & the hood rectangles by folding them in half and finding the centre.
The video explains it easier! Find & mark with stitch markers the shoulder seam on both back & front rectangles as follows. Place & align the front rectangles on top of the back rectangle. Align the mid neck points of the back & hood rectangles. Fold the hood rectangle inwards so that the left and right sides of the hood align with the front rectangle sides. This is where the hood will sit so you need to mark here & seam what’s left of the shoulders.
3. Seam
Seam the sides, shoulders, sleeves, sleeves into body, hood top & hood into body. I used the mattress stitch.
4. Add Ribbing
Add ribbing to the hoodie bottom, sleeve cuffs and the front including around the hood.
How Many Rows Of Ribbing To Add?
Add 6 rows to the bottom of the hoodie in Burgundy, 6 rows to the sleeve cuffs in Silver Heather & 2 rows for the front including around the hood in Silver Heather in that order. Find the pattern for the ribbing below.
Where Should I Place The Ribbing Stitches?
For the hoodie bottom and the sleeve cuffs, find spaces behind the first row stitches in the base chain. In other words, work into the base chain, but in the opposite direction, which is downwards.
For the hoodie front, crochet into spaces behind the first / last posts of every row. You have two types of rows, the ones that start / end with ch-2 / hdc & the ones that start / end with ch-3 / dc. For the hdc rows, crochet 1 dc into spaces behind first / last posts & for the dc rows, crochet 2 dc into spaces behind first / last posts.
Ribbing Pattern Repeat
Make a slip knot on your hook & insert the hook where you want your ribbing to start. Yarn over & pull through the fabric and the slip knot. You’ve joined new yarn!
Row1 Ch 3 (counts as dc), dc in next space behind a hdc st and in every space behind every hdc st, placing 2 dc behind dc posts, t.
Row2 Ch 2 (counts as st), *FPdc around the next post, BPdc around the next post; rep from *, t.
Row3 Rep row2 by making a FPdc for every FPdc and a BPdc for every BPdc to continue creating the ribbing ridges.
Rep row3 until the required number of rows.
5. Make & Attach 2 Pockets
With Silver Heather, ch 21. Follow the Pattern Repeat for the Bottom Section until you have 11 rows.
Row12 Rep row 2 of Ribbing Pattern Repeat. Fasten off.
I recommend stitching the pockets with Burgundy so you can’t see the stitches on the inside of the hoodie when the lapels open! Position the pockets right above the bottom ribbing and along the front ribbing. You can see these details in the video.
Weave in the ends.
More Ideas
Crochet Remix Cardigan is a waterfall cardigan with a hood by Make & Do Crew. This Casual Crochet Cardigan by Maloo Knits is also a long hooded cardigan with pockets! This Crochet Hooded Fall Cardigan by Crochet With Carrie uses an interesting cross stitch with single crochet and double crochet stitches.
Check out my other crochet cardigan patterns.
Well Done!
I hope you enjoyed this free crochet pattern for my crochet Cross Stitch Hoodie. What type of cardigan should I crochet next? See you in my next pattern!
Happy crocheting!
Justina