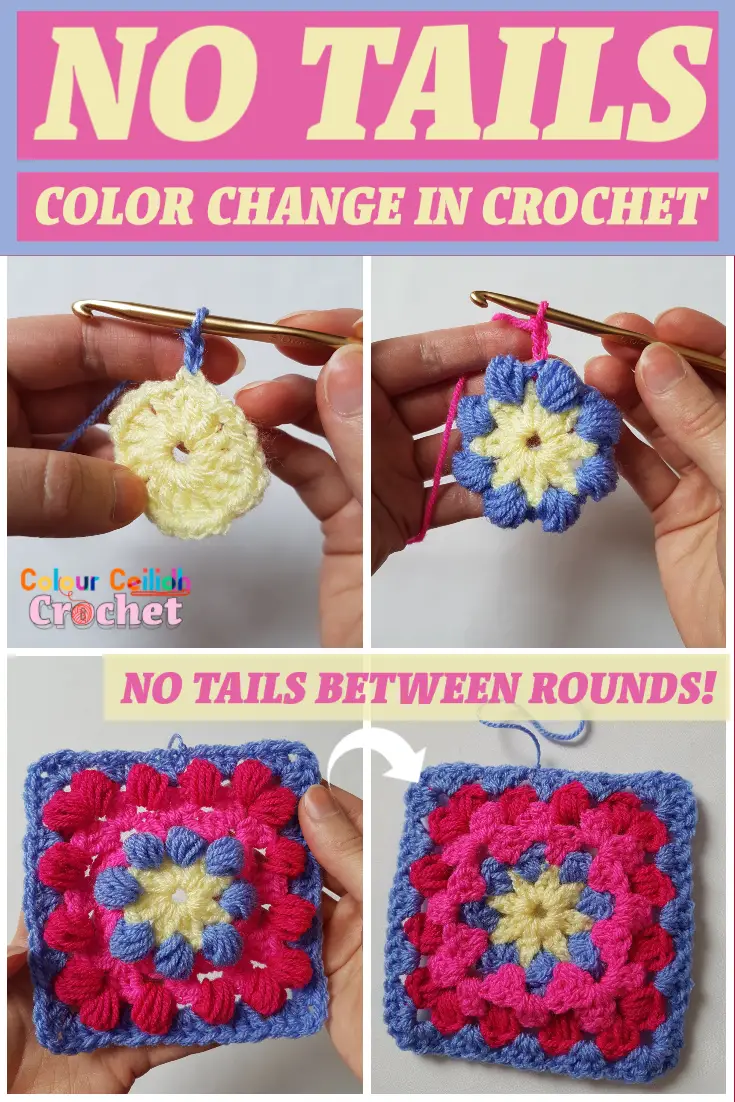
In this No Tails Color Change In Crochet tutorial you will learn exactly how to change color in crochet leaving no yarn tails to weave in at the end between rounds, rows or stripes.
This method dramatically reduces the time you spend weaving in the ends because you’ll only have one end left for every motif or two ends say per stripy blanket.
I love colorwork in crochet, and to be honest I was never one of those people who would change their ways just to avoid switching yarn. But I also love shortcuts and this way to change yarn in crochet is the best of both worlds.
Tutorial PDF
This photo tutorial is also available as a printable PDF in my Etsy shop HERE*.
*a print friendly version for a small fee. Thank you for keeping the website alive!
How To Change Color In Crochet With No Tails
This method uses the magic knot positioned exactly right at the back of the work so that you pull up the new yarn color exactly when you want it, leaving no yarn tails behind.
It’s all about using the magic knot in the right place at the right time. Therefore you might want to practice the magic knot first so you understand this tutorial better. I show you how to make the magic knot and demonstrate this whole method in my video called How To Change Color In Crochet (With No Tails).
Once you are quite familiar with the magic knot, let’s crack on with the tutorial.
PIN it here to refer back to this tutorial later!

First Yarn Tail
1. First I want to quickly show you how I hide the first yarn tail when making a motif. It’s super easy and I do it all the time. I make the yarn tail quite short, I form a ring and I make the first stitch (in this example, a ch 3).
2. I twist the whole length of the yarn tail around and behind the ring, usually twice.
3. I crochet over it as I go (in this example I’m making 8 clusters of 2 dc with ch-1 in between).
Preparing For The Magic Knot
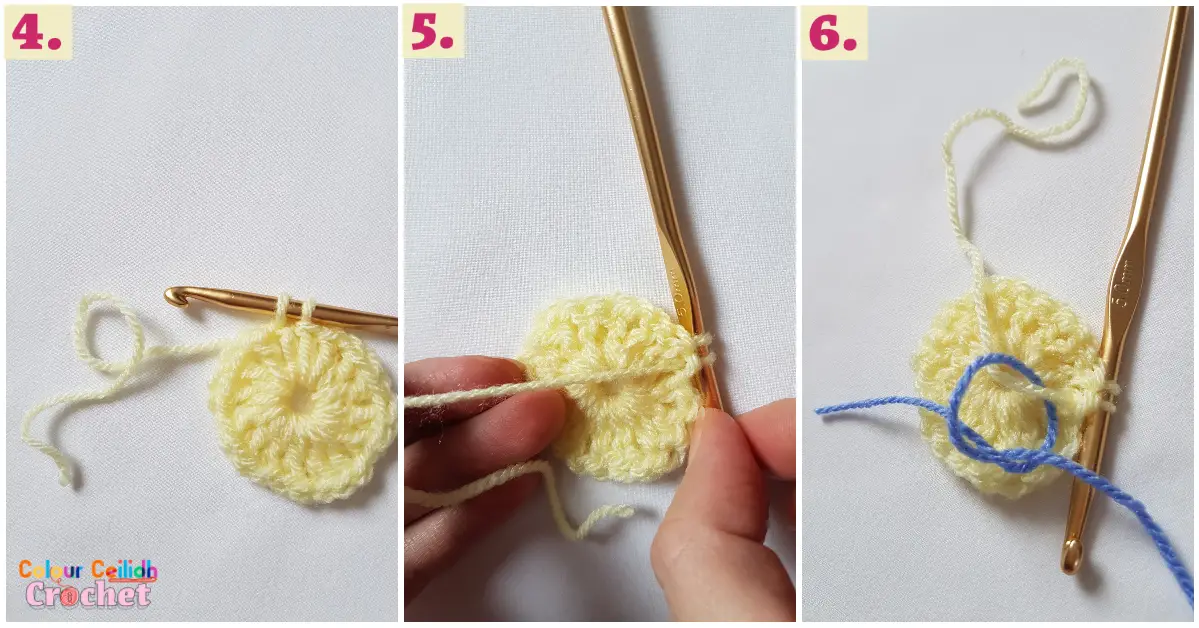
4. When you have last 2 loops left on the hook just before you finish the last stitch (in this case, the single crochet to join the clusters) and just before you close the round or end a row, cut the yarn and turn your work so the reverse side is facing you. If it’s a slip stitch you need to end with, just insert your hook through the work as usual but don’t yarn over and pull through yet. Proceed to the next step.
5. Pull the yarn tight so that there’s only enough yarn to wrap around the hook and the hook is as close to your work as possible.
The Magic Knot
6. Take your new yarn color and make a knot around the old yarn tail. Make it loose at first, then as you tighten it position it as close to where the yarn tail begins as possible. You can slide it with your fingertips while it’s not too tight.
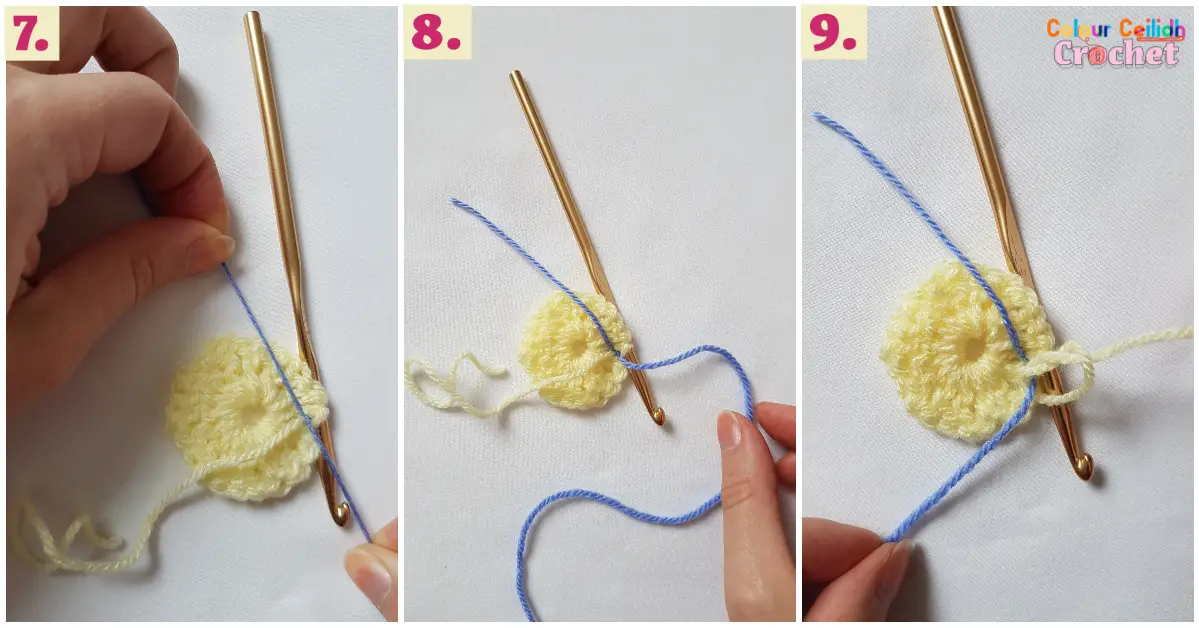
7. Pull tight to secure the knot.
8. Now we’ll make a knot around the long end of the new color (the one I’m holding).
9. Make a loose knot using the old color yarn tail. While pulling tight on the new yarn color, gently pull on the old yarn tail to position the knot right next to the first knot, and tighten it.
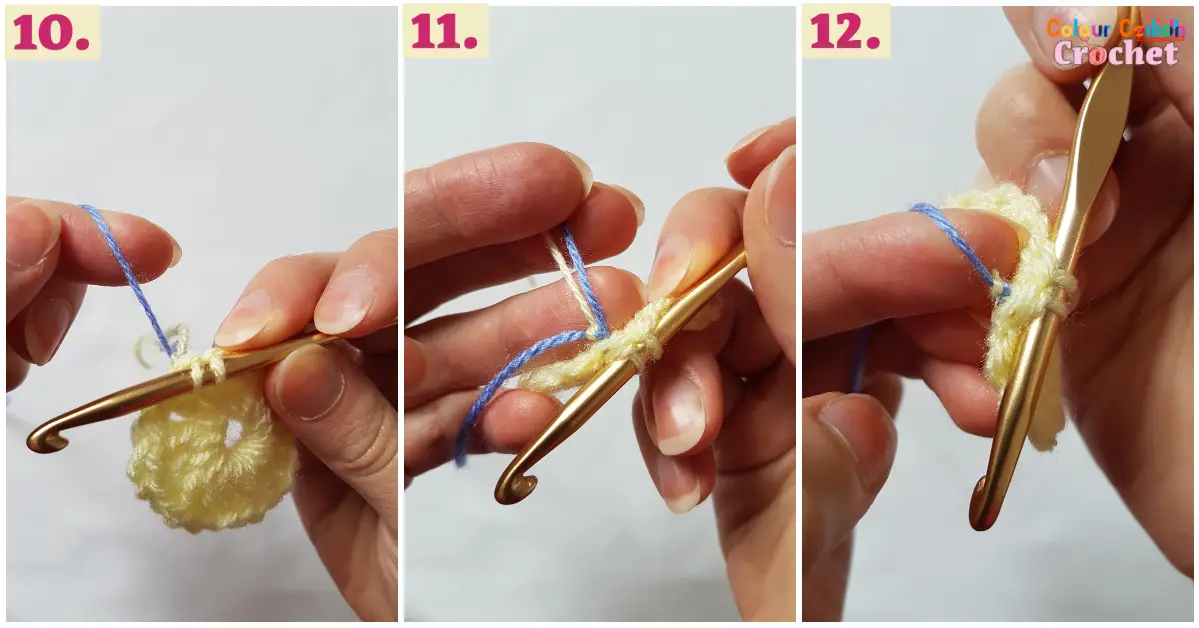
10. Pull the crochet hook and the new yarn in opposite directions to secure the magic knot one last time.
11. Cut the yarn tails very close to the magic knot.
12. You’re ready to yarn over and pull through your new yarn color to complete the round or row.
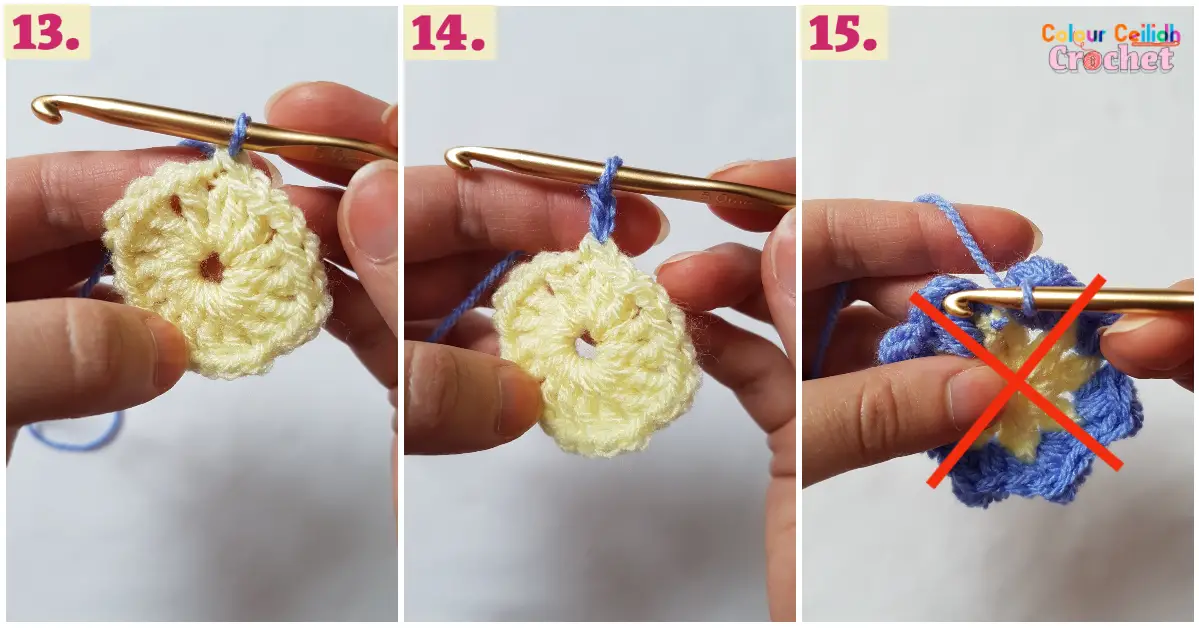
13. Congratulations! You’ve just joined a new yarn color and you left no yarn tails behind! You’re ready to continue as per pattern.
When You Have To Turn Your Work
This part of the tutorial explains how to change color when you’ve been crocheting on the reverse side of your work and now you’re ending your round or row and you need to turn and start a new yarn color for your next round or row.
14. My second round in this example consists of half double crochet and puff stitches, and I need to turn and have the wrong side of my work facing me for this round (because I love working the puff stitch from the wrong side).
15. So I’ve turned, this is the reverse side of my work and I’m about to complete my round with a slip stitch. If I apply the no tails method after I insert the hook through that stitch where the hook is pointing, my magic knot will stick out and will be visible at the front of my work.
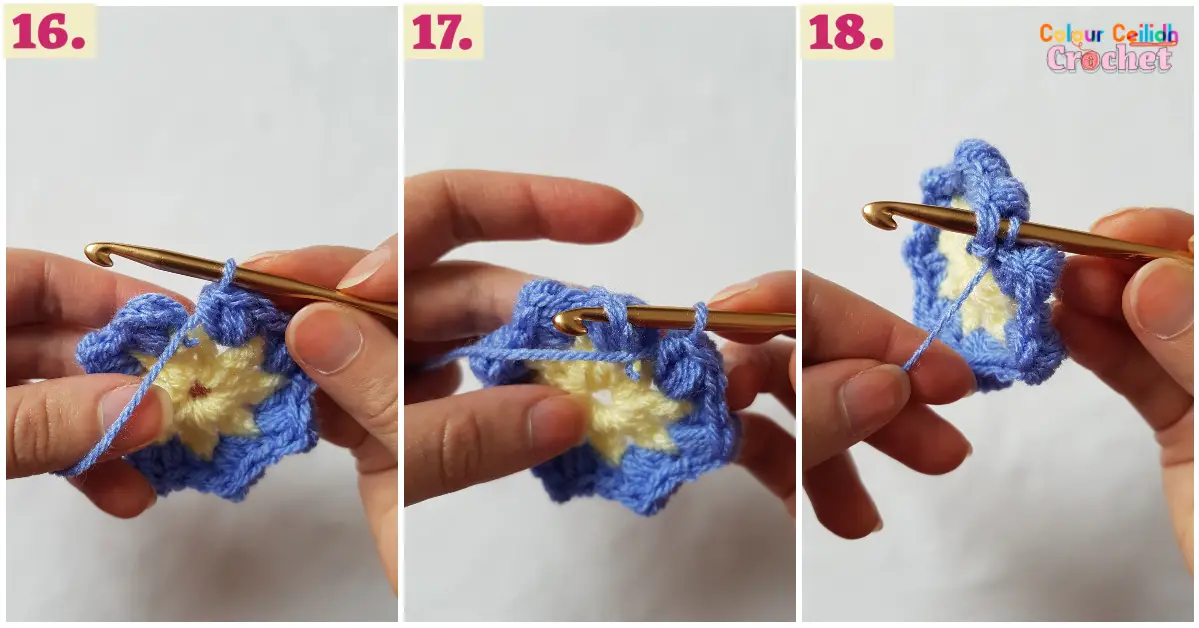
16. Instead let’s bring the yarn toward ourselves because we’re trying to position the magic knot on the reverse side of our work which is facing us.
17. Now insert the hook through the same stitch you normally would to finish the round or the row, but back to front. If you need to end with a single crochet stitch, yarn over and pull through until you have 2 loops on the hook and proceed to the next step. In this example pictured I’m ending with a slip stitch so I’m stopping here as shown.
18. Don’t forget to tighten the yarn just like in step 5, cut the yarn and repeat steps 6 – 11.
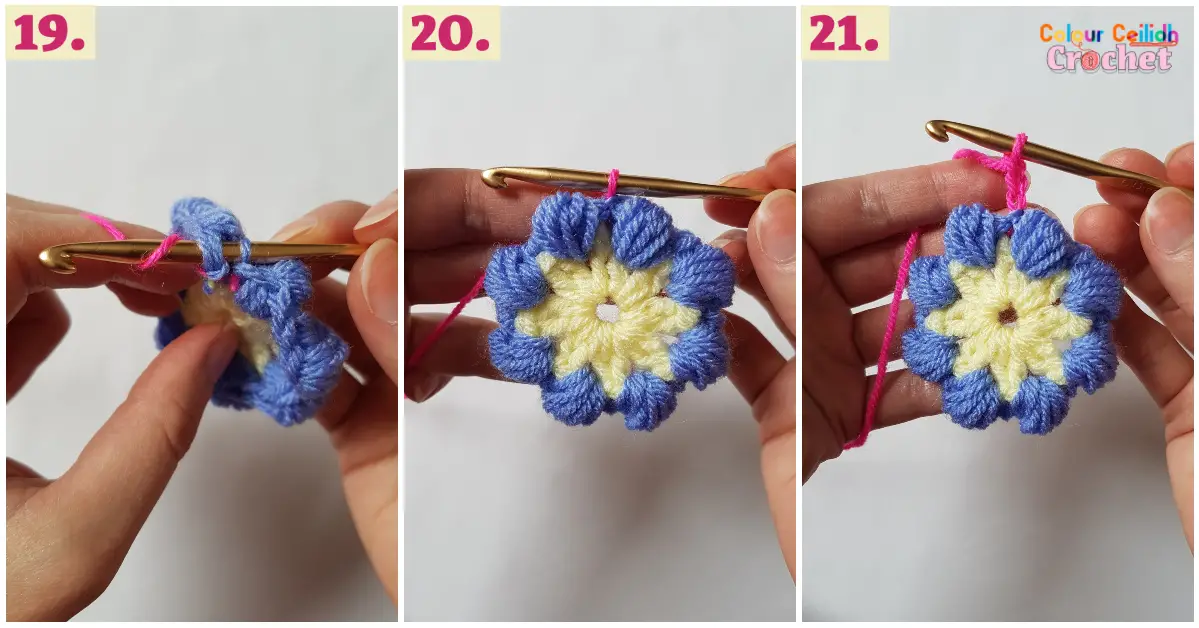
19. Yarn over and pull through to complete your last stitch.
20. Congratulations! You’ve just changed your yarn color from the reverse side of your crochet project with no tails and you’ve positioned the magic knot where noone can see it.
21. Continue as per pattern. Now you should be able to complete your project with no yarn tails between color changes.
Final Result
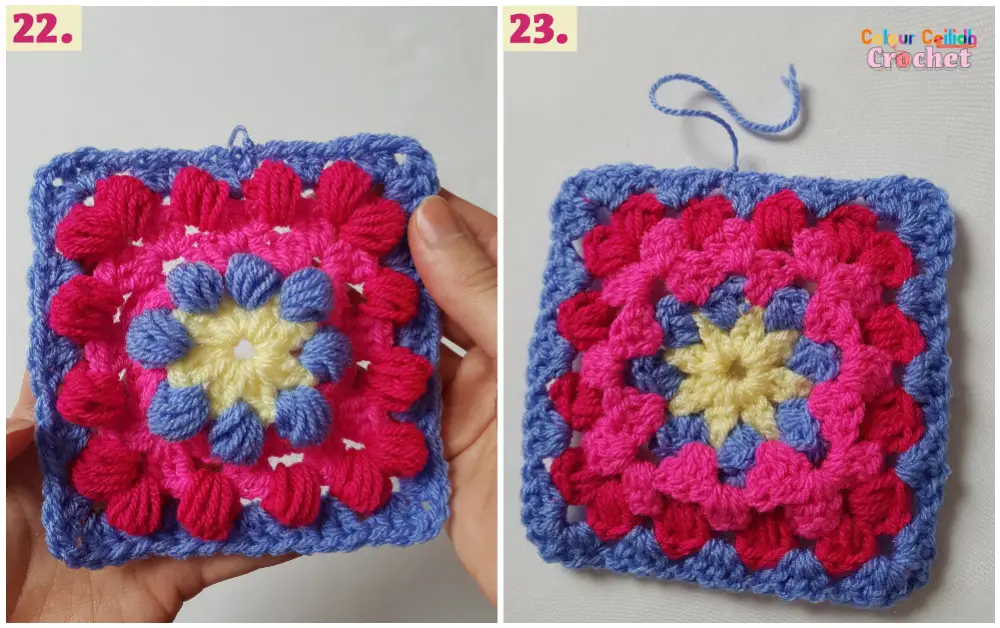
22. This is my beautiful motif called the Fiesta Granny from my Crochet Fiesta Shawl.
23. The just finished granny square, with only one yarn tail per motif like I promised. Without this method for a square like this there would have been 10 yarn tails to weave in at the end. Instead, you only have 1! And on top of that, you can only see one magic knot from the reverse side, and of course, absolutely none from the front.
Well Done!
I really appreciate you visiting here, so a big thank you!
If you enjoyed my No Tails Color Change In Crochet tutorial, please share the link to this post with your friends, subscribe to my email list (the form pops up when you click around or come back again), Pin your favourite image by hovering over it and follow me on Pinterest so you never miss a pin, like my Facebook page and follow me on Instagram to see behind the scenes and for more color in your life.
I’m also on Ravelry and have an Etsy Shop where I sell my dowloadable pattern PDFs so you can crochet with no technology!
Happy Crocheting!
Justina