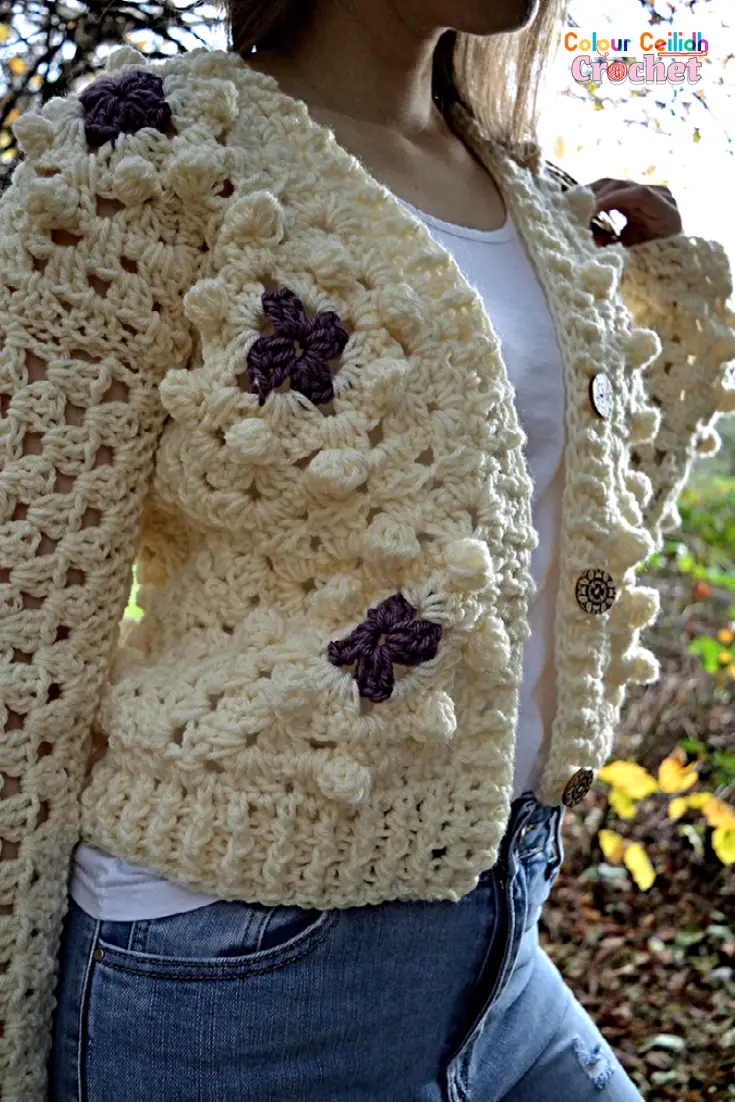
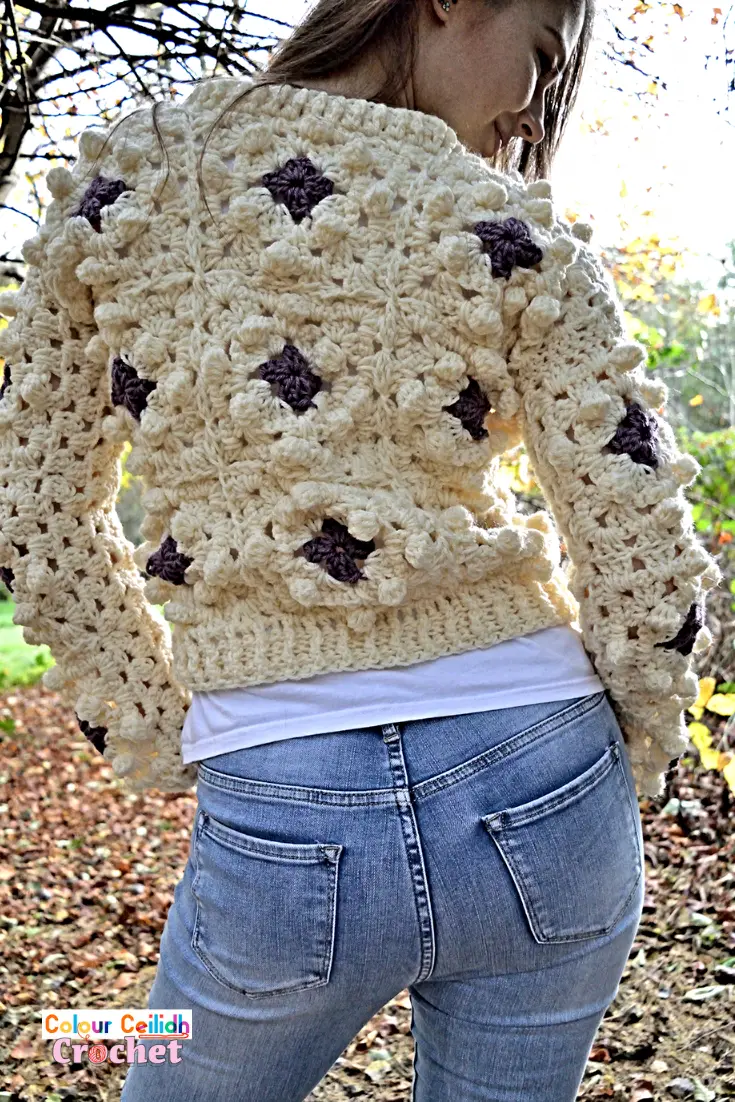
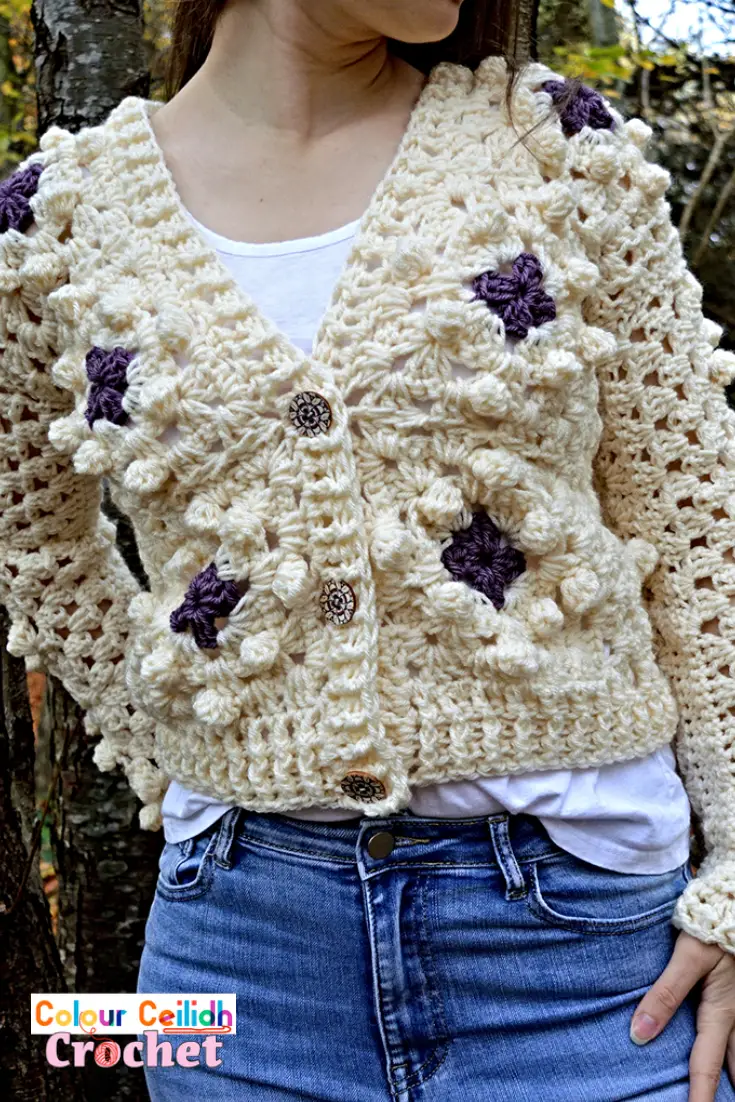
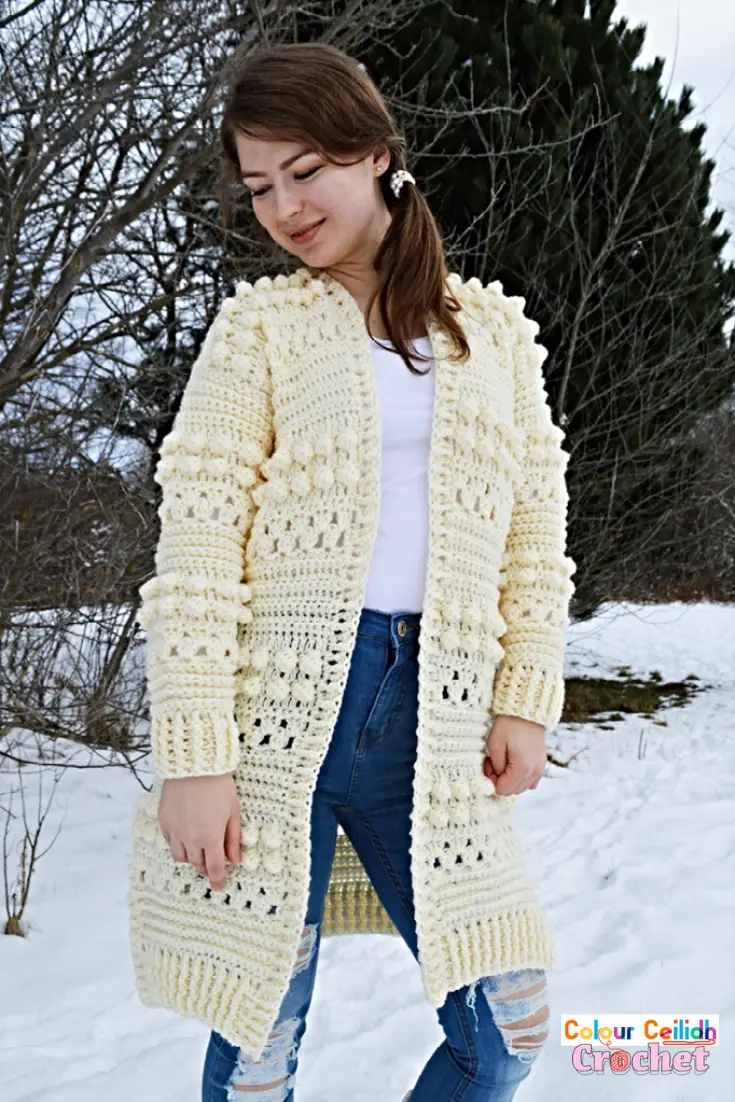
This bobble stitch crochet cardigan Bobble Diamonds is made with bobble stitch granny squares. Featuring a shorter crop length and chunky ribbing, this cardigan brings nostalgia and bobbles of coziness to your wardrobe.

This pattern includes a YouTube video as well.
This post contains affiliate links to products. I may receive a small commission for purchases made through these links.

It All Begins with Yarn…
For this crochet crop cardigan I used a 9 mm hook and Lion Brand Vanna’s Choice in Fisherman and Dusty Purple, which is a worsted weight yarn.
…And Inspiration…
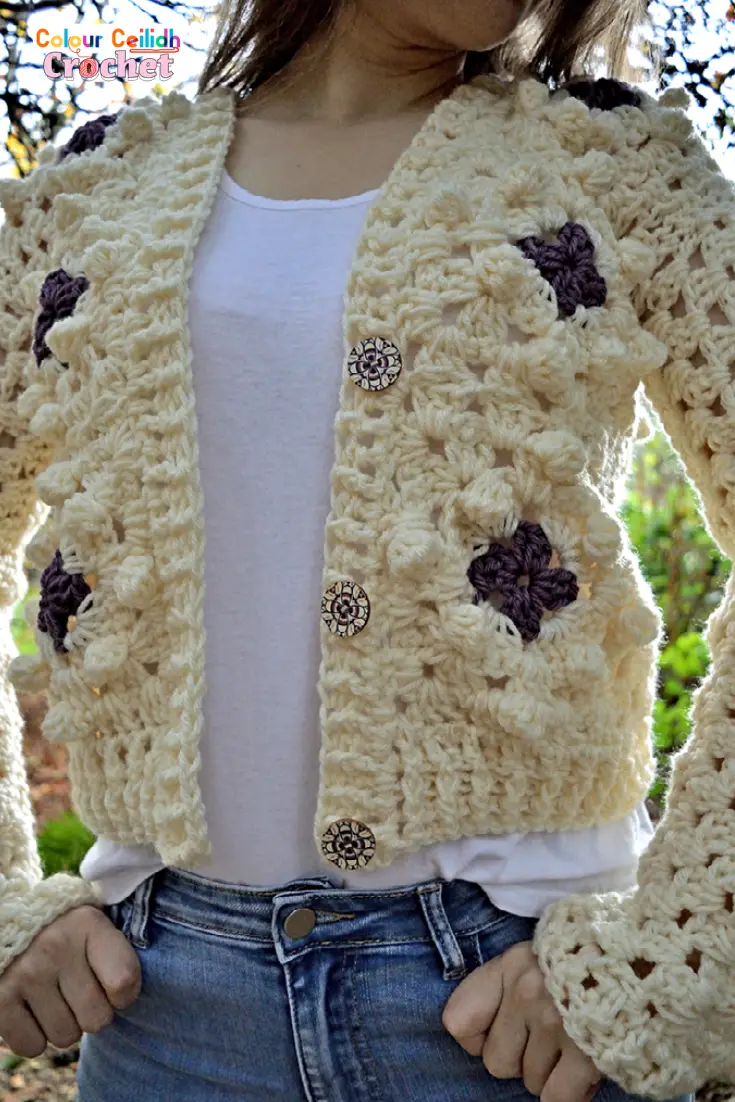
Recently I have seen a few knit versions of bobble diamonds and bobble hearts cardigans online in various colours and styles. My favourite ones were the ones that had embroidered flowers inside the bobble diamonds. That’s where the idea of inserting something soft-coloured inside a diamond came along. And placing a diamond inside a granny square seemed like a natural choice to me.
Customize Your Cardi
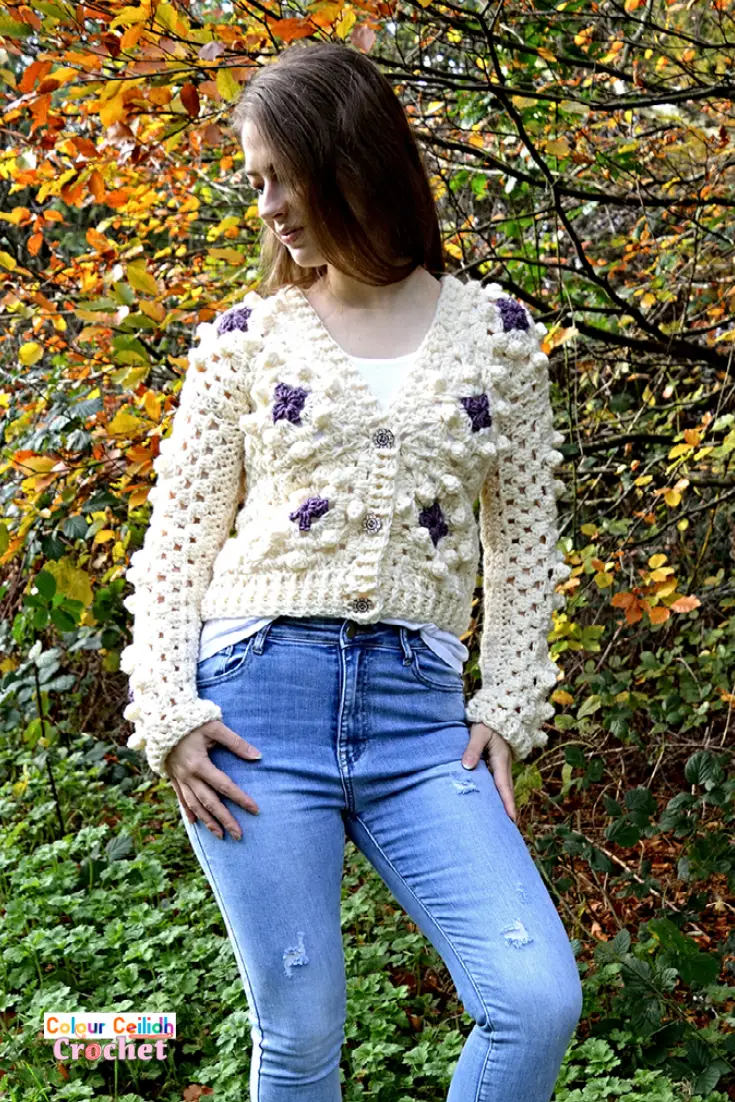
You can easily change the length of your cardigan by adding or removing a row of granny squares. You can also turn your open-front cardigan into a V-neck by adding a few buttons that are about 1″ wide or bigger. Simply sew them on and you’re ready to go as the gaps between your ribbing stitches will serve as ready-made button holes.
Bobble Stitch Crochet Cardigan Bobble Diamonds – Free Pattern
- Love it? PIN it!.
- You can add this pattern to your Ravelry queue here.
- Ready to crochet but don’t want the ads in your way? PRINT it here*.
* a print friendly version for a small fee.
Description
This bobble stitch crochet cardigan Bobble Diamonds is made with bobble stitch granny squares. Featuring a shorter crop length and chunky ribbing, this cardigan brings nostalgia and bobbles of coziness to your wardrobe.
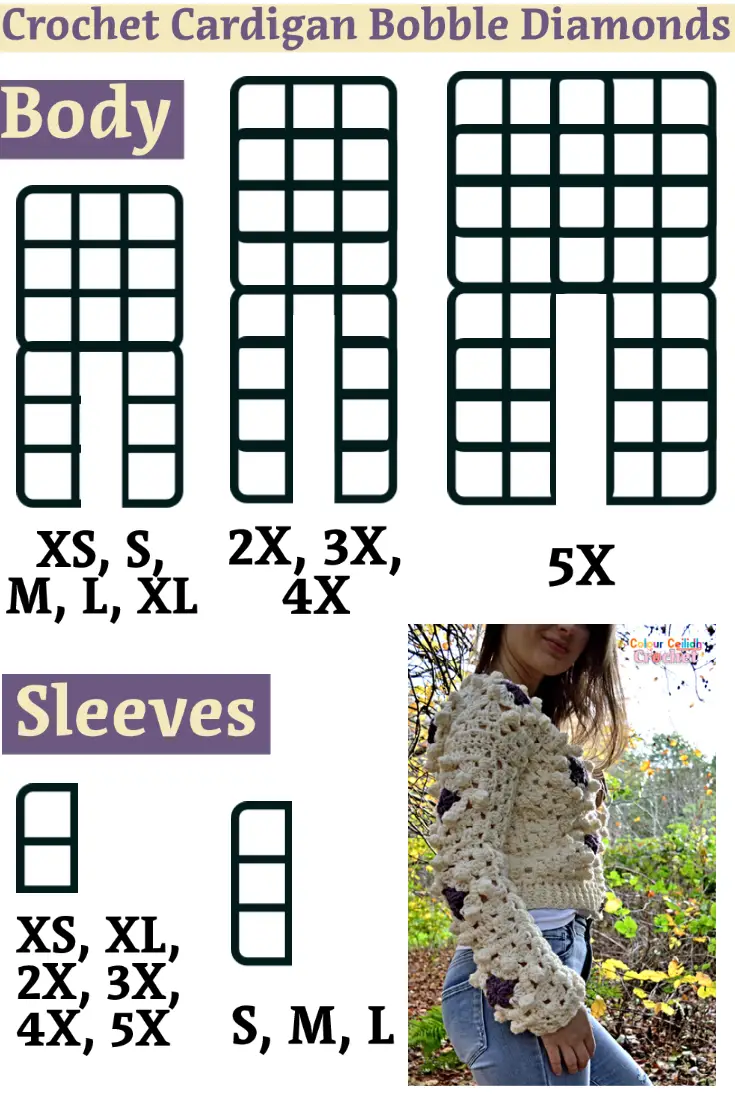
Sizes
This cardigan is available in 9 sizes: XS, S, M, L, XL, 2X, 3X, 4X, 5X.
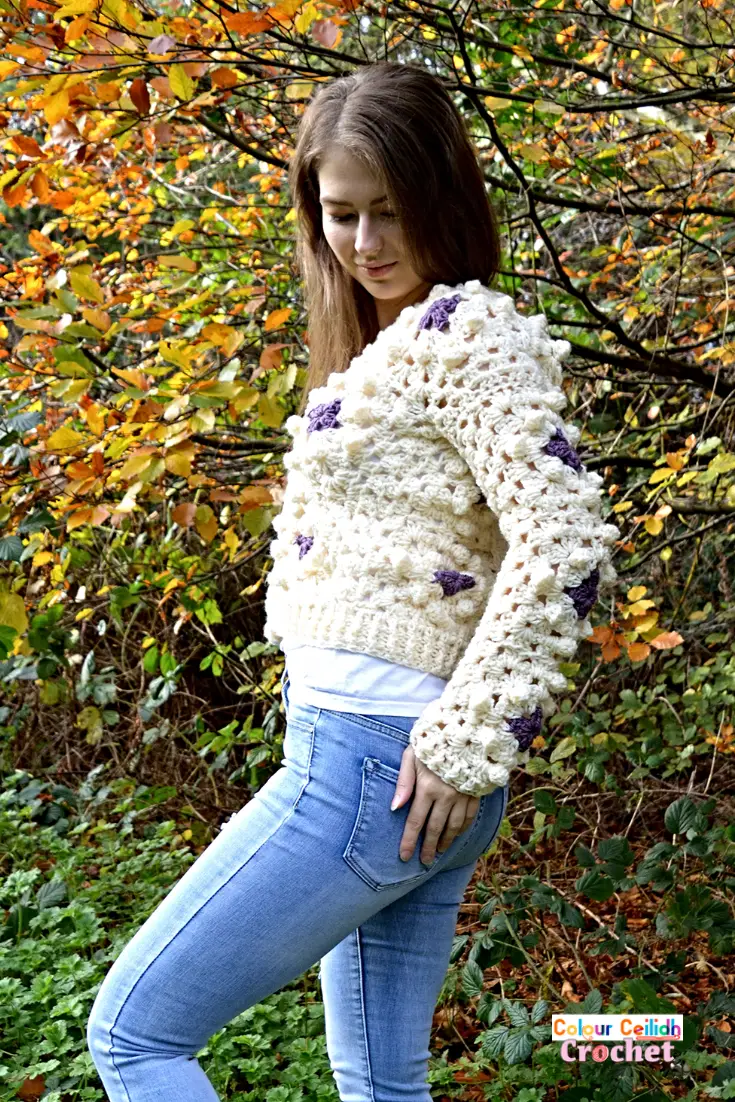
The cardigan is approx 20 (20, 20, 20, 20, 25, 25, 25, 25) inches long (but in reality crochet garments can stretch by an additional 1 – 2″ when worn). Model is 5’7″, wears and is a size M.
You can also add & remove the squares to the length to make it longer or shorter and still be able to follow all the same instructions to make your cardigan.
These sizes are based on the Craft Yarn Council standard body measurements and sizing. But if you would like to double check your size, search for “Craft Yarn Council woman size charts”.
Care Instructions
The Lion Brand Vanna’s Choice yarn is a 100% acrylic. It’s machine washable at 30 C / 86 F.
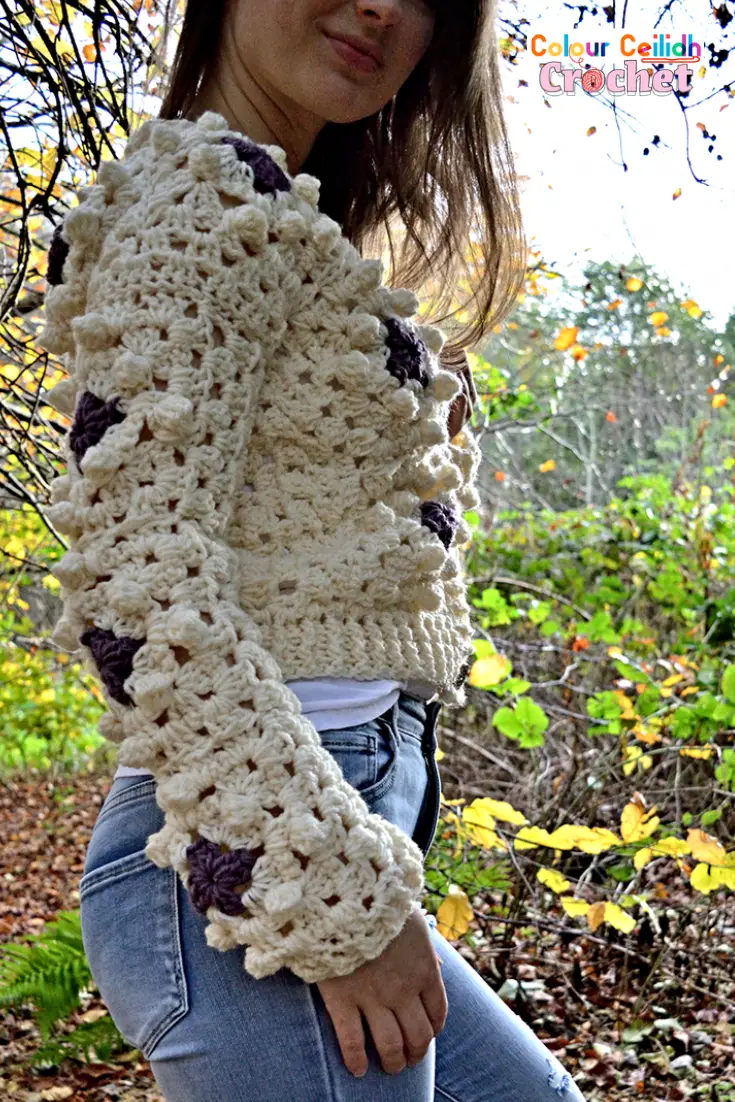
About The Sleeves
This bobble diamond granny square is of such length that your sleeve will either be slightly too long when the sleeve is 3 squares length (sizes S, M, L) or slightly too short when the sleeve is 2 squares length (sizes XS, XL, 2X, 3X, 4X, 5X). However you can easily compensate by adding a longer cuff of ribbing (4 rows for 2-square length sleeves and 2 rows for 3-square length sleeves).
If you make the sleeve ribbing last, you will have an idea of whether extra rows of ribbing will be enough to elongate your sleeve by looking at how long the ribbing at the bottom of the cardigan is or whether you would like to add some granny rows prior to adding the cuffs. This way, your sleeve will be of perfect length that is just right for you. (4 rows of ribbing is approx 2″ long and the fabric from the shoulders usually stretches down by an additional 1 – 2″.)
Alternatively
Alternatively, if you’re a size XS, XL, 2X, 3X, 4X or 5X and you think you’d rather slightly longer sleeves than slightly shorter, make your 3-square “columns” with a smaller hook that’s still comfortable to use for you with this yarn (for example, a 6 mm). And then in step 5, row 3 instead of crocheting sc in every st for the next 2 granny clusters, do it for 7 (just like sizes S, M & L that have 3-square length sleeves). This way your sleeve will be on the longer side, extending down past the wrist like in the photos. Lastly, only add 2 rows of ribbing to such a sleeve, because it’s already long.
By the way, I did my best trying to match how many squares length your sleeve should be! (Hence the switch of the hook size if you want to add an extra square to the length, because otherwise it would be way too long.) I picked the number that most closely matches the length that you’re supposed to have for your size.
Pattern Notes
- Project Level: Easy
- Read this if you want to learn how I change color without tails. To minimise weaving in the ends and because I love working with color so much I developed a method of how to change color in crochet without tails.
Bobble Stitch Crochet Cardigan Bobble Diamonds – Video Tutorial
Here’s a link to the Bobble Stitch Crochet Cardigan | Bobble Diamonds video on YouTube.
Materials
- Lion Brand Vanna’s Choice (4 / Medium / Aran weight, 100 g / 3.5 oz, 156 m / 170 yd, 100% acrylic) 6 (7, 7, 8, 8, 10, 10, 10, 11) skeins in Fisherman, 1 skein in Dusty Purple.
- 9 mm crochet hook.
- Optional: three ~1″ wide buttons. I got them from a local Etsy seller.
Gauge
Following the pattern below, one granny square is approx 6″ long.
Abbreviations (US Terms)
- BPdc: back post double crochet
- ch: chain
- dc: double crochet
- dc5tog: double crochet five together, or the bobble stitch. Work 5 partial double crochet stitches into the same stitch leaving the last loop of each on the hook. So yarn over, insert hook in the indicated stitch, yarn over and pull through, yarn over and pull through 2 loops and stop there. Repeat 4 more times. Yarn over and draw through all loops on hook
- FPdc: front post double crochet
- hdc: half double crochet
- rep: repeat
- sc: single crochet
- sl: slip
- st: stitch
- t: turn
Bobble Stitch Crochet Cardigan Bobble Diamonds Pattern:
Pattern Overview – 8 Easy Steps
- Make your first granny square.
- Join granny squares to form the main body and two “columns” for the sleeves as shown in the diagram below.
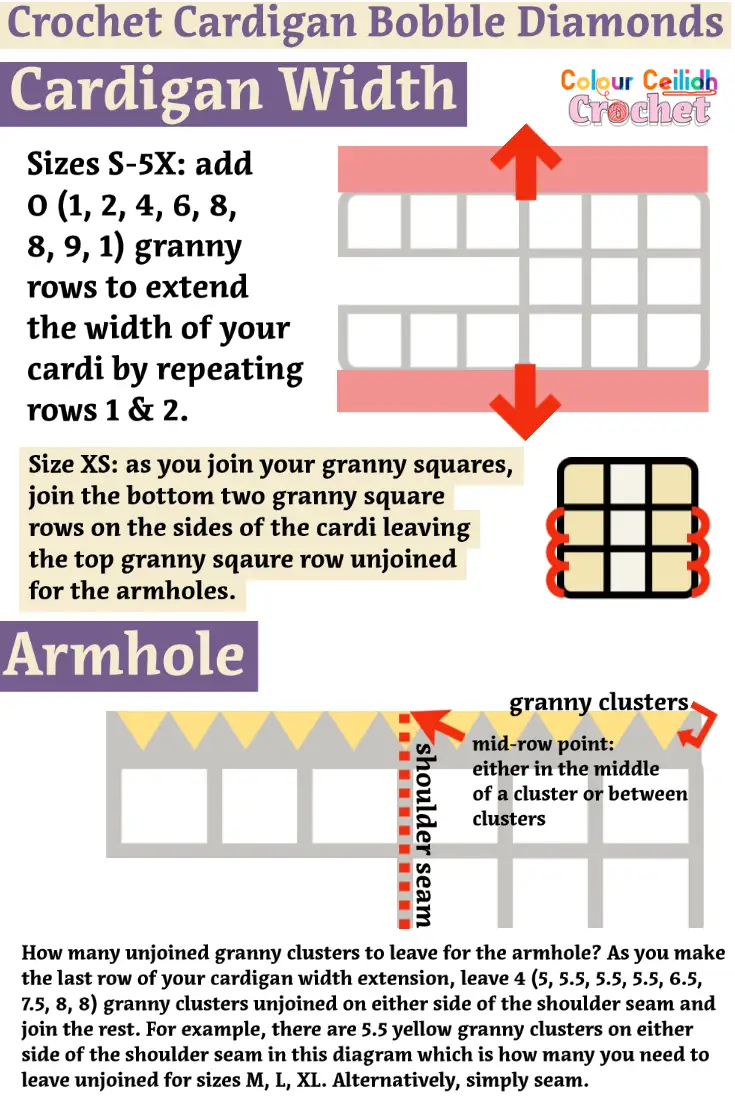
- Add granny rows to the width of the cardigan on the sides of the body if you need to.
- Join the side seams as-you-go or simply seam, leaving the armholes.
- Make the sleeves.
- Seam the sleeves and sleeves into body.
- Add ribbing.
- Optional: add some buttons!
1. Make Your First Granny Square.
To make the first granny square follow the instructions below.
Crochet Bobble Diamond Granny Square
With Purple, ch 4. Sl st to first ch to form a ring.
Rnd1 (Purple). Ch 3 (counts as dc), 2 dc in ring, (ch 1, 3 dc in ring) three times, join with sc to top of ch-3. (16)
Rnd2 (Fisherman). Ch 3 (counts as dc), (2 dc, ch 1, 3 dc) in same space, (3 dc, ch 1, 3 dc) in next space 3 times, join with a sl st to top of ch-3, t. (28)
Rnd3 (Fisherman). Ch 1, sc in same st, sc in next st and every st, placing dc5tog in ch-1 corner sts, join with sl st in first sc, t. (28)
Rnd4 (Fisherman). Ch 3 (counts as dc), 2 dc in same space, make 3 dc in each space, placing (3 dc, ch 1, 3 dc) in corner sts, join with sl st to top of ch-3, t. (40)
Rnd5 (Fisherman). Ch 1, sc in same st, make sc in every st, placing 3 sc in corner ch-1 sts and dc5tog in mid-row sts, join with sl st to first sc, t. (48)
Rnd6 (Fisherman). Ch 3 (counts as dc), 2 dc in same space, make 3 dc in each space, placing (3 dc, ch 1, 3 dc) in corner spaces, join with sl st to top of ch-3, fasten off. (52)
2. Join Granny Squares Together.
As you make your second and subsequent granny squares, join them together to form the main body of the cardigan and two “columns” for the sleeves as shown in the diagram below (size XS: check the next diagram before completing this step). My preferred method of joining granny squares is joining as-you-go in the last round.
If you want to achieve a different cardigan length, this is where you decide how many squares length you would like. Just join a few & try them on for length. The sleeves and all the following instructions remain the same otherwise.
Joining Granny Squares As-You-Go in the Last Round.
To join granny squares: as you’re making the last round of your granny, leave one full side undone to be joined with the other square. We’ll start joining in the corner.
Start making the corner but stop after the first 3 dc. Remove your hook from the loop, insert the hook front to back through the corner space of the other square you’re joining with, pick up the loose loop, pull it up and ch 1, 3 dc in the same corner space to complete the corner. *Remove the hook from the loop, insert the hook front to back through the next space along of the other granny, pick up the loose loop, pull it up and ch 1, and make 3 dc in the next space again. Rep from * until you joined the second corner with a ch 1.
For more details, see the video tutorial.
3. Add Granny Rows to the Width of the Cardigan Body.
Add granny rows to the width of the cardigan on both sides of the body if you need to as shown below.
Turn your cardigan body layout sideways and face the front. Join Fisherman in the top right corner (I used the slip stitch method: make a slip knot on your hook, insert hook in the space indicated, yarn over and pull through the fabric & the slip knot).
Rep rows 1 & 2 below until you have added 0 (1, 2, 4, 6, 8, 8, 9, 1) granny rows but only make the last row just over half-way through before proceeding to step 4.
Rows 1 & 2
Row1. Ch 3 (counts as dc), dc in same space, 3 dc in next space and every space, placing 2 dc in last space, t.
Row2. Ch 3 (counts as dc), 3 dc in next space and every space, placing dc to top of ch-3, t.
4. Join The Side Seams As-You-Go Or Simply seam, Leaving The Armholes.
As you make the last row of your cardigan width extension, note where the mid-row point or shoulder seam is in that row, as shown in the diagram above.
Counting from the middle row point, make sure you have 4 (5, 5.5, 5.5, 5.5, 6.5, 7.5, 8, 8) granny clusters made to the left of it, then stop and remove the hook from the loop.
Now you’re ready join the rest of the row as-you-go. Find the space right after the 4 (5, 5.5, 5.5, 5.5, 6.5, 7.5, 8, 8) -th granny cluster to the right of the mid-row point, and fold your body piece along the shoulder seam to align this space with the loop where you removed your hook.
Insert the hook back to front through that space, pick up the loose loop and ch 1. Proceed with making the next granny cluster in the next space and removing the hook to join with the next space along till the end of the row. For more details, see the video tutorial.
5. Make The Sleeves.
Take your “column” of 2 (3, 3, 3, 2, 2, 2, 2, 2) granny squares joined together. Facing the right side, align it horizontally in front of you. Next join Fisherman in the top right corner and rep rows 1 & 2 until you have 3 (3, 3, 3, 3, 3, 5, 5, 5) rows.
Then make the following rows and follow instructions for your size (everybody makes row 3).
Rows 3 – 7
Row3. Ch 1, sc in same st. For the next 2 (7, 7, 7, 2, 2, 2, 2, 2) granny clusters including 2 dc below, sc in every st. Then make 3 hdc in space below and next space, 3 dc in next space and every space, ending with dc to top of ch-3. Sizes XS, S, M: fasten off. Everyone else: t.
Row4. Ch 3 (counts as dc), dc in same space, 3 dc in next space and every space until you have 5 granny clusters including 2 dc at the beginning, 3 hdc in next space twice, sc in next space. Size L: fasten off. Everyone else: t.
Row5. Ch 1, skip same st and next st, sc in next st, 3 hdc in same space below and next space, 3 dc in next space and every space, dc to top of ch-3. Size XL: fasten off. Everyone else: t.
Row6. Ch 3 (counts as dc), dc in same space, 3 dc in next space twice, 3 hdc in next space twice, sc in next space. Sizes 2X, 3X: fasten off. Everyone else: t.
Row7. Ch 1, skip same st and next st, sc in next st, 3 hdc in same space below and next space, 3 dc in next space twice, dc to top of ch-3, fasten off.
Turn your sleeve around and align it horizontally. Facing the wrong side this time, join new yarn in the top right corner again and rep the same rows for your size.
Rep to make the second sleeve.
6. Seam The Sleeves & Sleeves Into Body.
I used the mattress stitch.
7. Add Ribbing.
Join new yarn and add ribbing to the bottom of the cardigan first (4 rows), then the front around the neck (2 rows) and then the sleeve cuffs (2 rows for 3-square length sleeves and 4 rows for 2-square length sleeves).
Row1. First row of ribbing is a row of dc. Chain 3 and make:
- Dc for every dc in the granny cluster, corner space, sc row and seam (in the sleeve).
- Extra dc at the beginning and end of ribbing row 1.
- 2 dc for every granny row and ribbing row.
- Twice as many dc sts as above for the neck area to compensate for stretching (in the back granny).
Turn.
Row2. Ch 2. Skip the first post below. *FPdc around the next post, BPdc around the next post. Rep from *, t.
Row3. Ch2, skip the first post below. Make FPdc for every front ridge and BPdc for every back ridge, t.
Rep row 3 as needed to achieve the desired length of ribbing. Fasten off.
Weave in the ends.
8. Add Some Buttons If You Like!
I used three approx 1″ wide wooden patterned buttons that matched my yarn colours. Have a look at your front ribbing gaps between stitches and decide what size buttons you need that would fit snugly through the holes.
More Ideas
This flower cardigan by Leonela Cevallos is very cute and sweet! I also like her granny square cardigan too. And Carrie M Chambers has a free Diamond Bobble Sweater pattern.
If you fancy something longer, try my crochet cardigan Bobbles of Snow:
Well Done!
I hope you enjoyed this free crochet pattern for my bobble stitch crochet cardigan Bobble Diamonds. What should I crochet next? See you in my next pattern!
Happy crocheting!
Justina