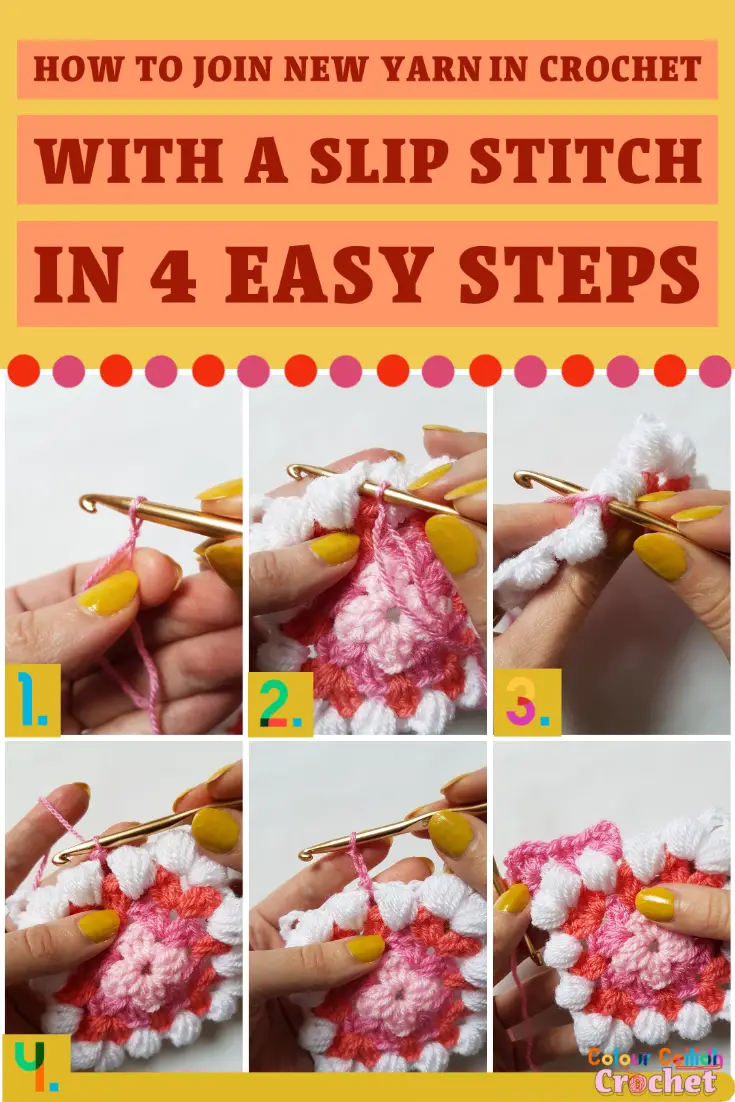
This tutorial shows you how to join new yarn in crochet with a slip knot and a slip stitch for your crochet blankets, granny squares and other crochet projects, in 4 easy steps.
I find the slip stitch join to be quick and easy, and it’s my favourite method to use for granny stitch projects, where it’s nice to set your mind on autopilot and not have to search your memory for any specific methods. I think you kind of learn it once, and never forget, and it looks pretty too!
It’s been especially useful for creating neat and even edges in my colorful ripple stitch blankets for spring and the festive season, my cheerful granny squares where I had to join new color after fastening off in the previous round (pictured below), and my striped afghan made out of 12 stripy granny squares, to name a few.
I first learned of this method from Attic24 in this blog post, and later I found this blog post by Oombawka Design Crochet, although she does it slightly differently, and then I found this blog post by Look At What I Made, which was quite informative.
This slip stitch method being fast, together with crocheting over the ends as I go so that I spend less than a minute weaving in the ends for a large blanket with color changes after every stripe makes work light!
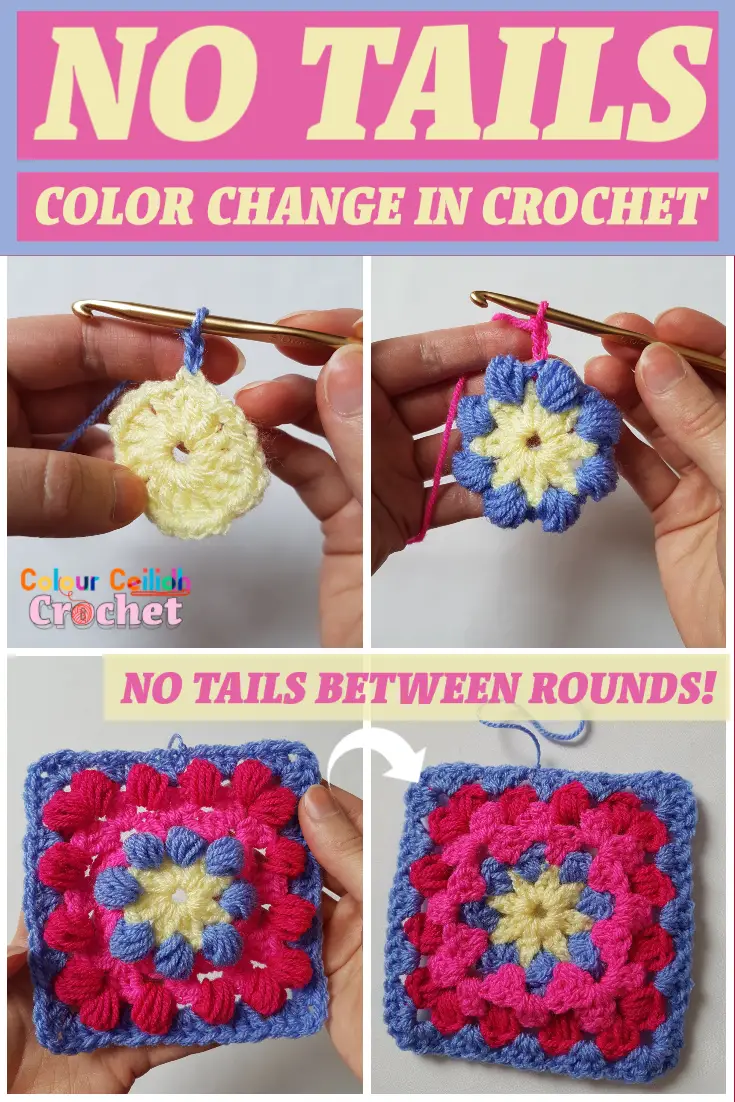
UPDATE: Here’s how I change yarn color now, so that there are no tails to weave in between rounds, stripes or rows. If you use this method, you might not need to use the slip stitch join to join new color. Check out my tutorial How To Change Yarn Color In Crochet With No Tails!
So here it is, the tutorial for joining yarn with a slip knot and a slip stitch.
How To Join Yarn With A Slip Stitch
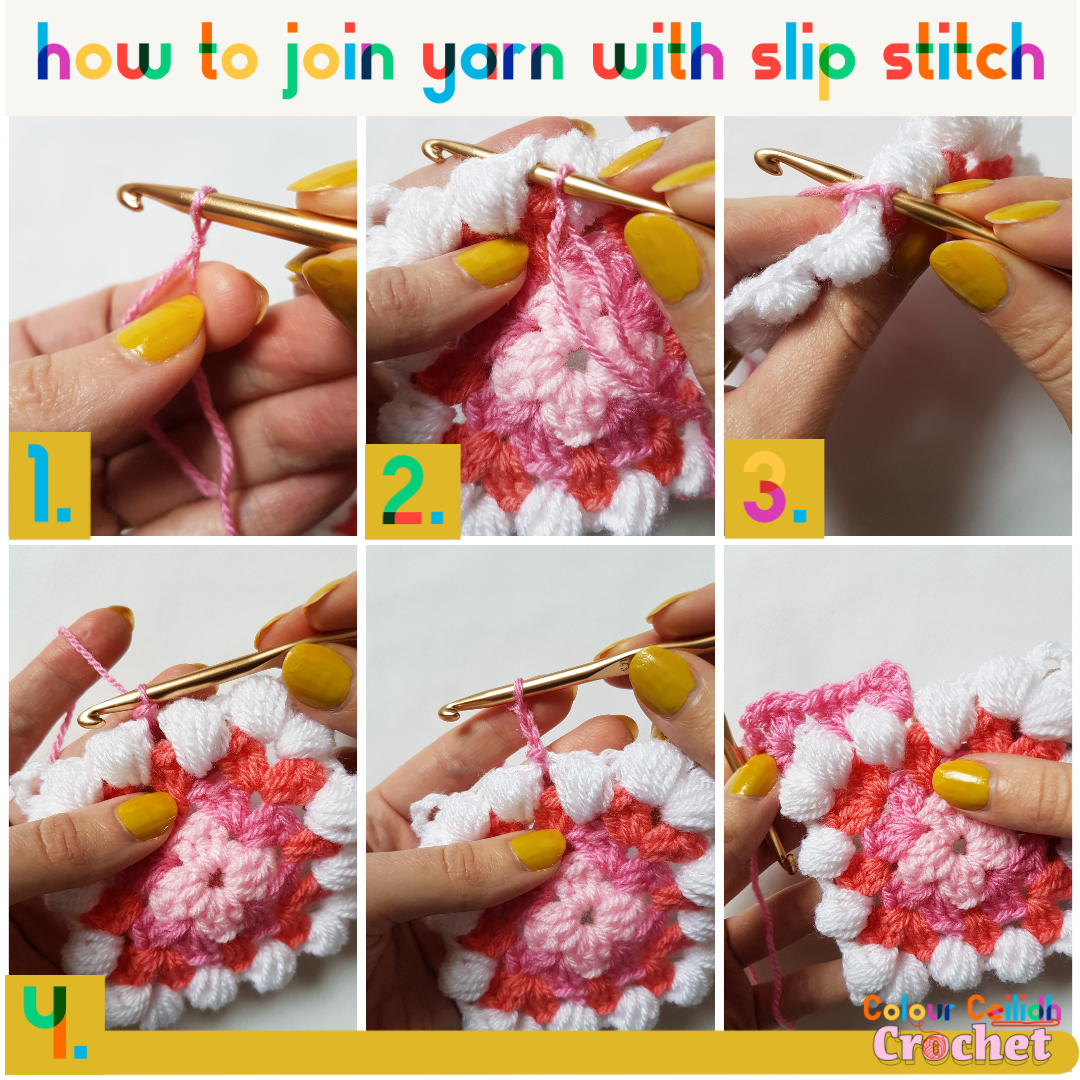
The pattern and colors for this granny square used in this tutorial can be found here in my Easter Granny Squares post.
If you found this useful you might want to check out my bow tie pasta join and how to join granny squares as you go.
Well Done!
I really appreciate you visiting here, so a big thank you!
If you enjoyed this tutorial of how to join new yarn in crochet with a slip stitch in 4 easy steps, please share the link to this post with your friends, subscribe to my email list (the form pops up when you click around or come back again), Pin your favourite image by hovering over it and follow me on Pinterest so you never miss a pin, like my Facebook page and follow me on Instagram to see behind the scenes and for more color in your life.
Happy Crocheting!
Justina