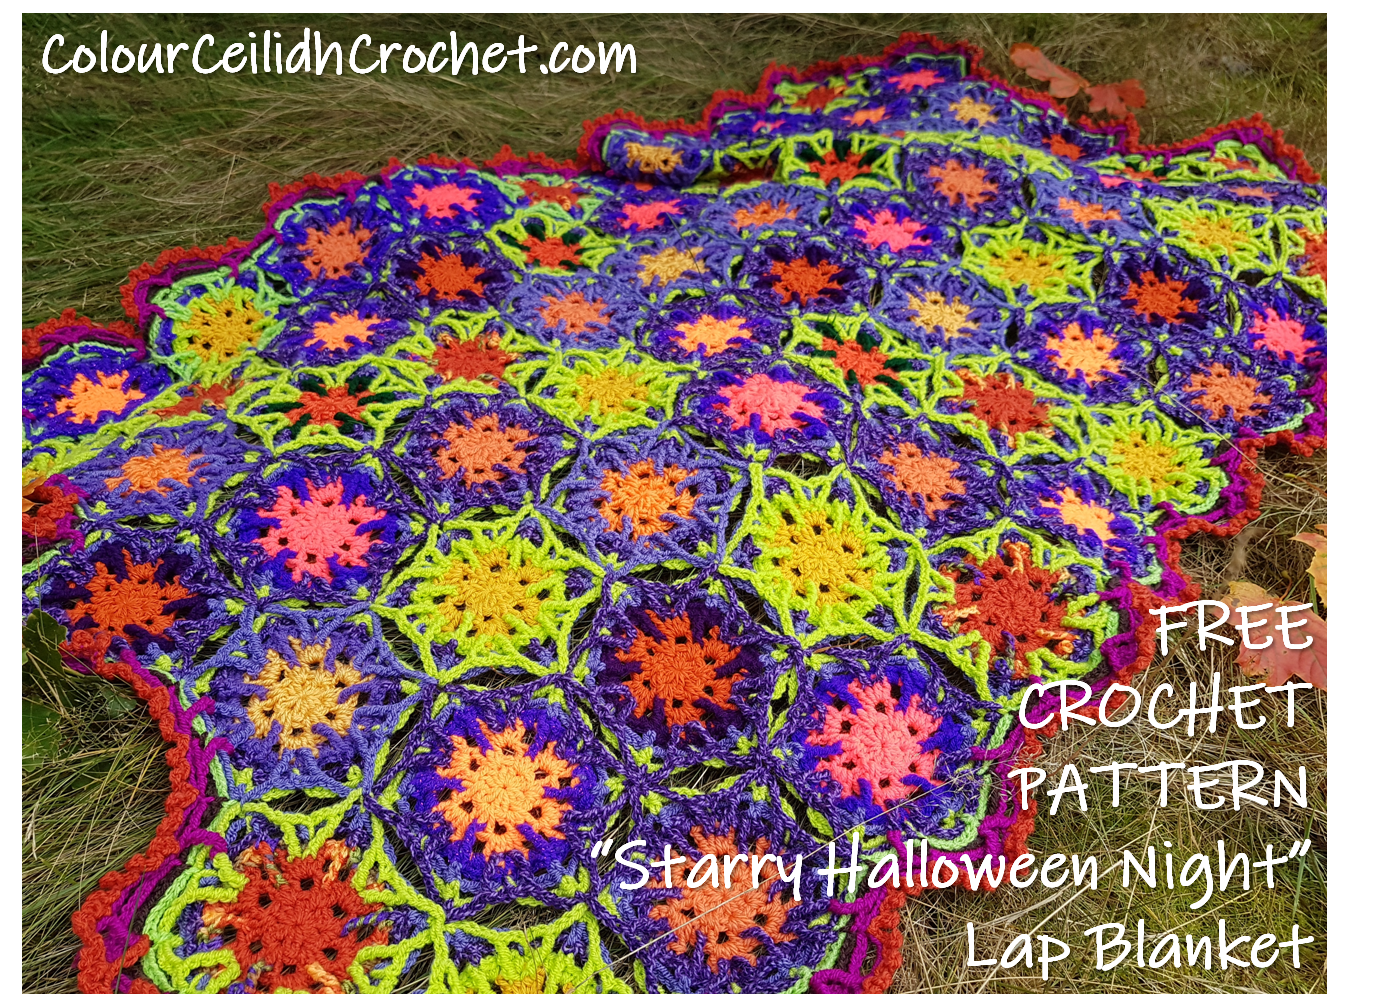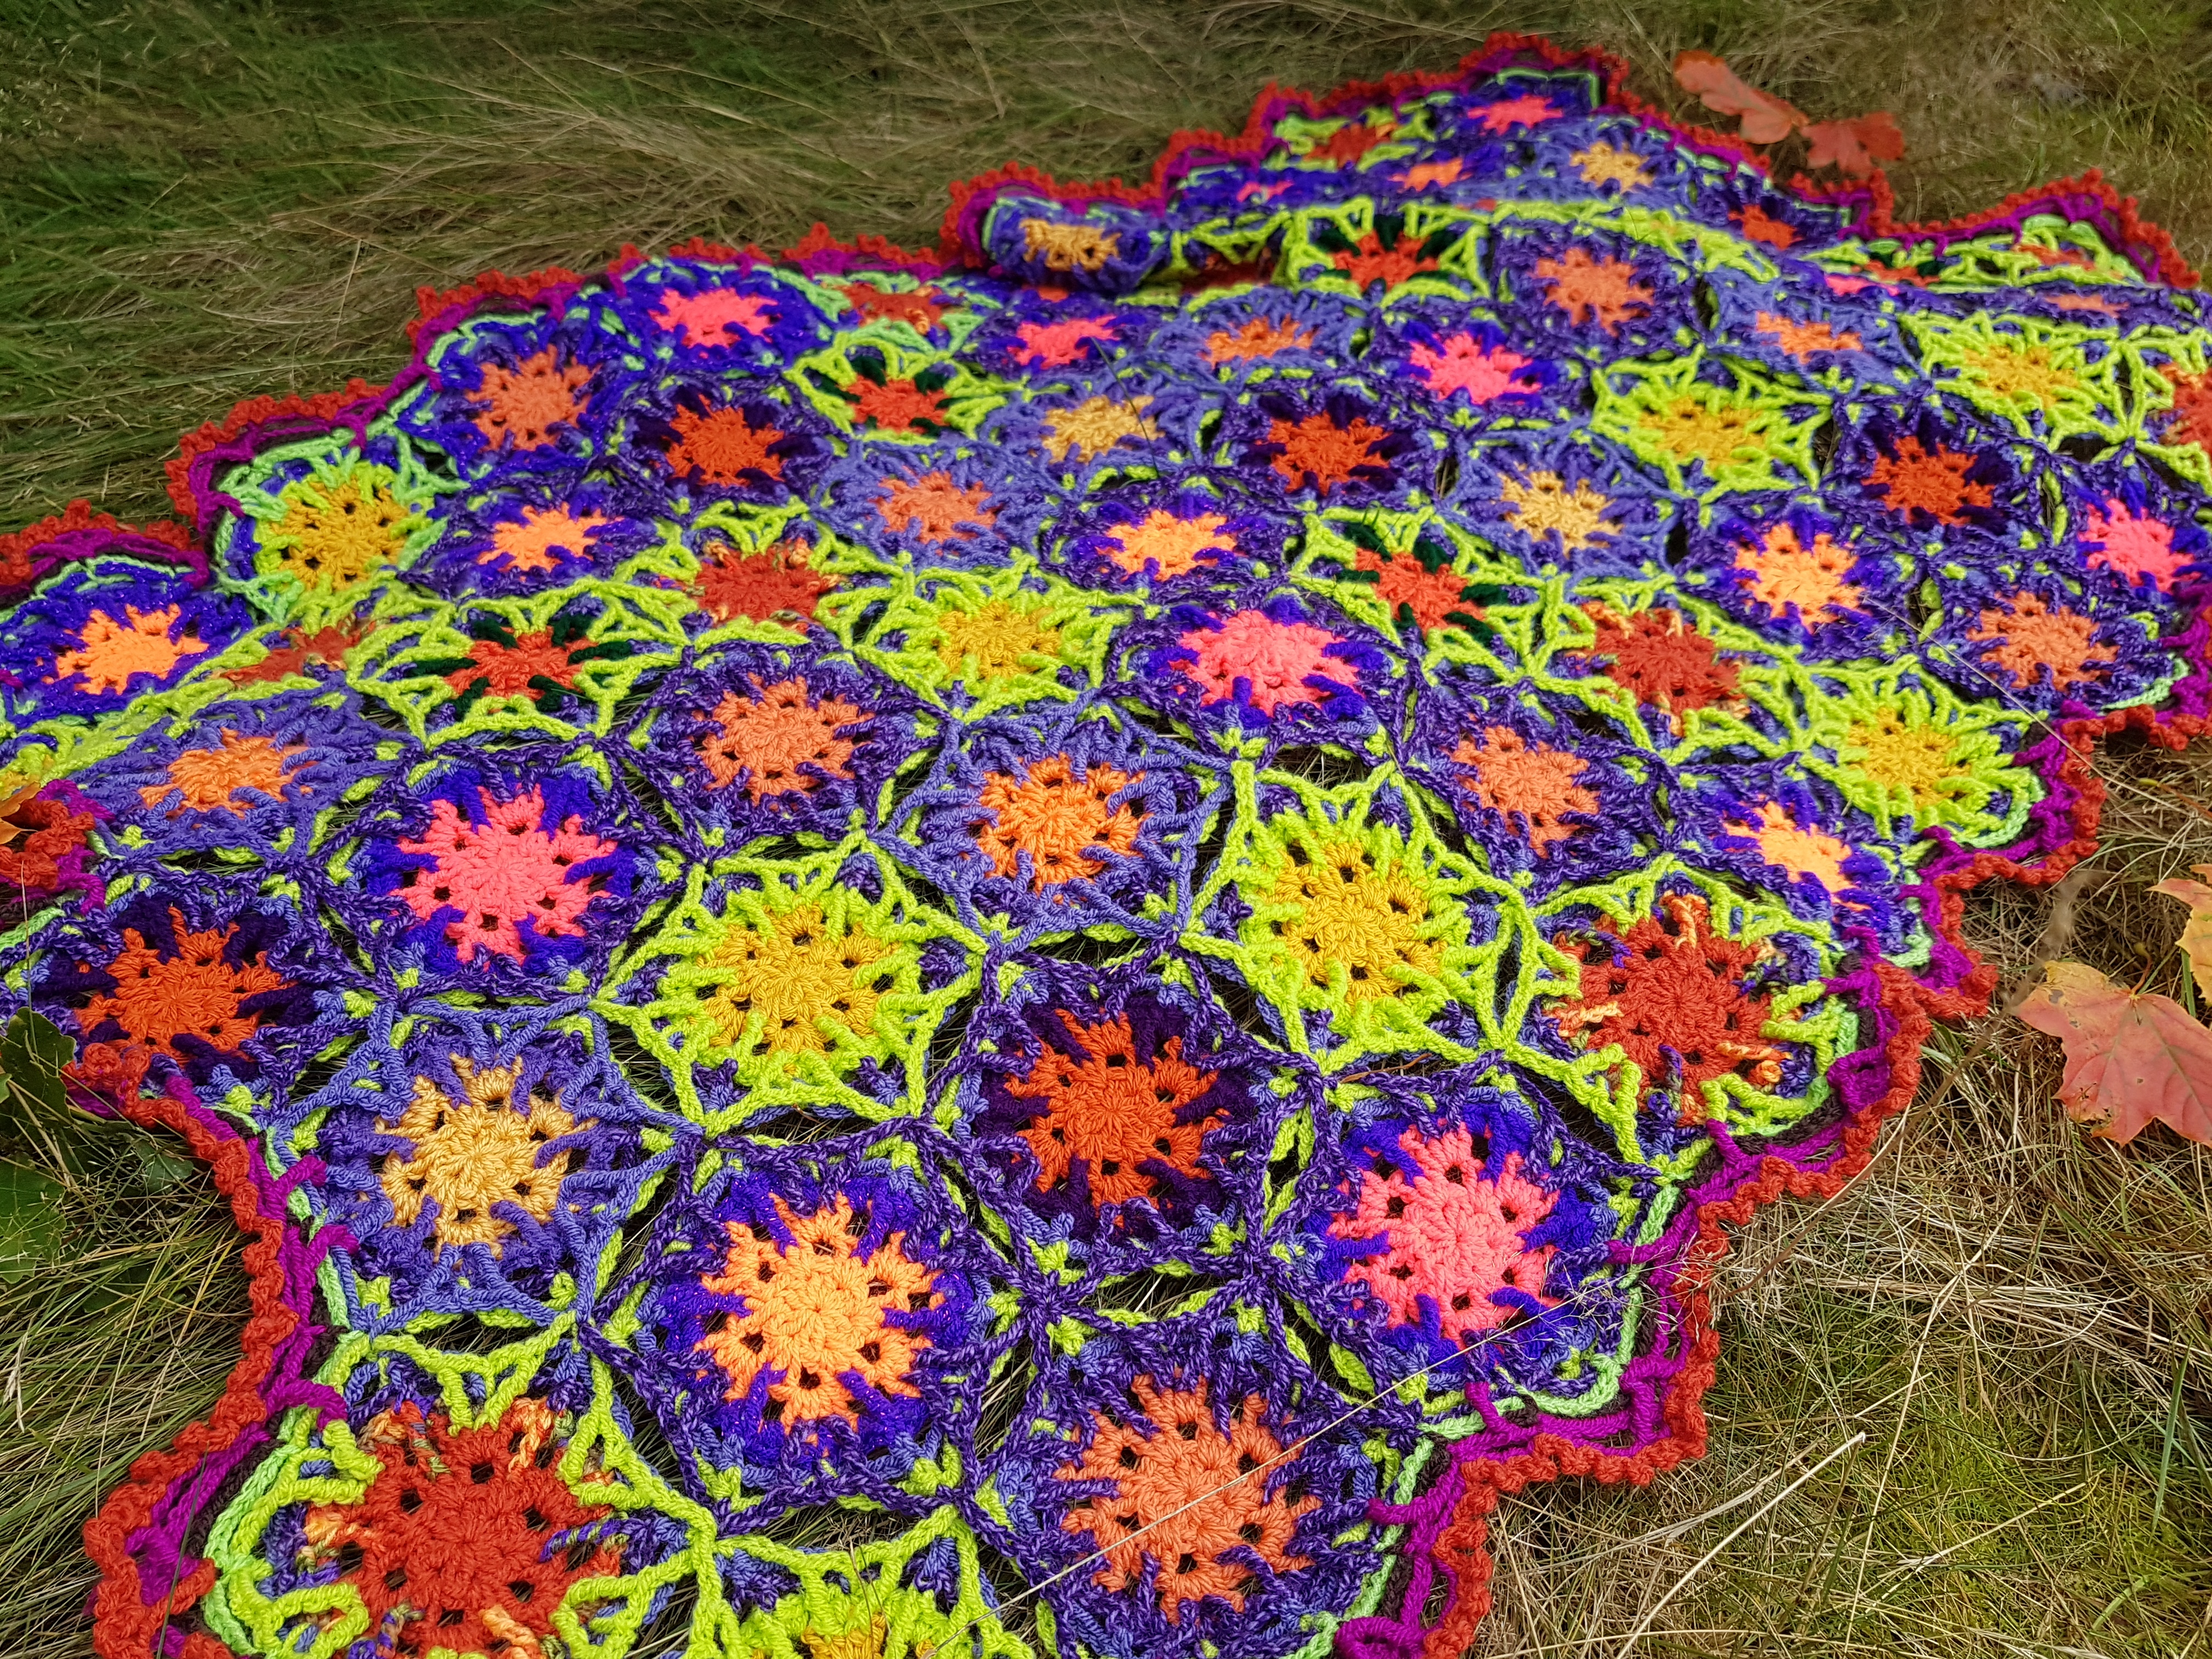
If you are looking for a stash buster crochet blanket pattern that can also be a fun Halloween crochet project then this Crochet Blanket “Starry Halloween Night” is for you!
- Crochet Blanket “Starry Halloween Night”: In The Beginning There Was A Magic Loop
- Crochet Blanket “Starry Halloween Night”: The Hexagon Motif Pattern & Joining As You Go
- Crochet Blanket “Starry Halloween Night”: The Border Pattern
Materials
- Old unwanted yarn from your stash. My finished blanket weighs 700g and the majority of my yarn was light worsted/ DK weight
- 4.5 mm crochet hook
- Large eye tapestry needle
Gauge
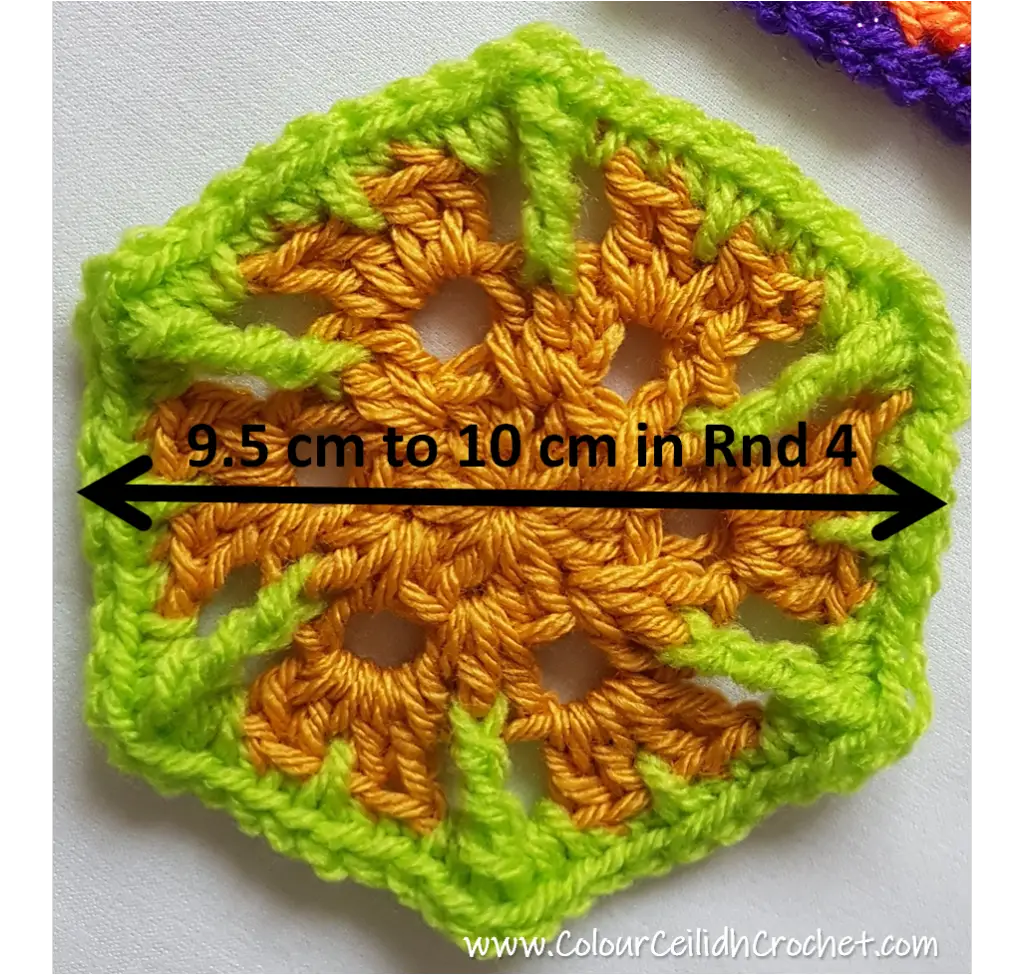
4 Rounds of the hexagon pattern = 9.5- 10 cm/ 3.7 – 3.9 in.
My finished blanket roughly measures 150 x 90 cm/ 59 x 35 in after having been used a little (mainly photoshoots and adoration LOL).
Abbreviations
ch: chain
dc: double crochet
FPdtr: front post double treble crochet stitch. Yarn over three times, insert hook from front to back to front around post of stitch indicated and pull up a loop, [yarn over and pull through 2 loops on hook] four times
hdc: half double crochet
rep: repeat
rnd: round
sc: single crochet
sc-blo: single crochet, back loop only
sliding loop: magic loop, magic circle, adjustable loop, magic ring, adjustable ring, drawstring ring
st: stitch
“Starry Halloween Night” Hexagon Motif
Begin with sliding loop.
Rnd 1 Ch 3 (counts as dc), 11 dc in ring, join with slip st to top of ch-3 – 12 dc.
Rnd 2 Ch 3 (counts as dc), 2 dc in space below between dc in Rnd 1, *ch 2, skip 1 space, 3 dc in next space; rep from * around, join with hdc to top of ch-3.
Rnd 3 Ch 3 (counts as dc), 3 dc in same space, *ch 3, 4 dc in next space; rep from * around, join with hdc (counts as ch-3) to top of ch-3.
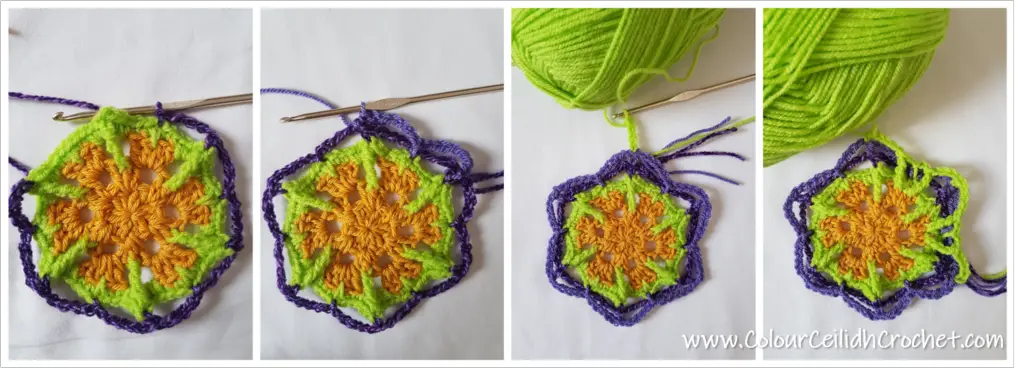
Change yarn colour: you have one loop on the hook. Drop the old colour yarn, pull up a loop with the new colour yarn and tug on the old colour yarn tail until the old colour yarn loop has disappeared.
Weaving In The Ends
Don’t crochet too tight in this following round as this is where you will be weaving in your ends from all those colour changes that are coming up in Rounds 5, 6 & 7. I had 7 ends to tuck in (one from current round, two from each of next three rounds), and the rest I had been crocheting over as I went along where possible.
![]()
Rnd 4 Ch 1, *(2 sc, ch 1, FPdtr around middle dc in 3-dc cluster in Rnd 2, ch 1, 2 sc) in ch-3 space, sc-blo in next 2 dc, sc in space between 2nd and 3rd dc in Rnd 3, sc-blo in next 2 dc; rep from * around, join with slip st to first sc.
To bring the yarn up to the hexagon corner in preparation of the next round: slip st in sc, slip st in ch-1 space, slip st in FPdtr.
Change yarn colour: simply pull up a new colour loop yarn and tug on the old colour yarn tail until the old colour yarn loop has disappeared.
Gently tug on every hexagon corner to help the stitches align. This is not necessary, but I just naturally do it anyway.
![]()
Star Of The Show
Don’t worry if your hexagon looks a little wavy or can’t hold its shape very well at this point, it depends on how stiff or soft your yarn is, and the next few rounds are designed to pull the hexagon in all the right places. Also when you start joining them later on, they fully open up in all their glory and literally become little stars of the show :D.
![]()
Once you’ve made a few (or a lot of) hexagons and decided on your colour combinations, I recommend deciding on the final blanket layout between now and before the last round, as the last round is also the joining round.
Will You Have A Border?
I have written a border pattern for the following hexagon layout, pictured below. If you decide on a different layout, you can still use my pattern to adapt it to your own blanket edges, but there will be no pattern to follow.
![]()
In the following round when it comes to hexagon corner stitches, just pick the one you like most and you think will work best for you, the FPdtr or the ch-1 next to it, and you can vary your choices between different hexagons as you please, because we’re only working with gathered chains.
And don’t worry if you miscount the chains, I think this pattern is very forgiving!
Rnd 5 Ch 1 (counts as hdc), *ch 5, slip st in the middle-point sc between hexagon corners, ch 5, hdc in corner st; rep from * around, omitting last hdc, change colour as you join with slip st in ch-1.
Change yarn colour: insert hook in ch-1 and pull up a different colour yarn.
It’s beginning to look a lot like Halloween don’t you think? Can you see the spider web shape emerging yet?
![]()
Layering Slip Stitches
In the next two rounds we’re going to be layering slip stitches (I tried to Google it, but I couldn’t find such a term, yet this is what I’m doing in this pattern!).
It basically means that we’re going to be placing our slip stitch in the same single crochet stitch as the last slip stitch from the last round, and positioning it to the right. And in Round 7 there’s going to be yet another slip stitch joining these two.
![]()
You don’t have to keep positioning your new slip stitches to the right of old ones, it’s just simply what I try to do to tidy up the look, but sometimes there isn’t space or the stitches just want to sit differently, and so I let them as it still looks colourful and pretty.
![]()
Oh and be generous when you are pulling up the yarn through the single crochet stitch, we want your subsequent slip stitches to sit above and be taller than the old ones and level up with the current round so that the tension is not too tight and your motif doesn’t curl up.
![]()
Rnd 6 Ch 1 (counts as hdc), *ch 6, slip st in the same middle sc as in Rnd 5, ch 6, hdc in corner st; rep from * around, omitting last hdc, change colour as you join with slip st in ch-1.
Remember to arrange your hexagons and decide where each of them goes if you haven’t already done so as this final round is the joining round.
Joining Round
Rnd 7 Ch 1 (counts as hdc), *ch 4, FPdtr around 2nd dc in 4-dc cluster in Rnd 3, ch 2, slip st in the same middle sc as in Rnd 5, ch 2, FPdtr around 3rd dc in 4-dc cluster in Rnd 3, ch 4, hdc in corner st; rep from * around, omitting last hdc, join with slip st in ch-1.
![]()
Joining As You Go
Simply remove your hook every time you make the corner half double crochet stitch if you’re ready to join there, insert the hook through the corner stitch of the hexagon you want to join with, front to back, pick up the free loop, pull through and continue as normal.
![]()
When you’re joining your hexagon to the point where two hexagons are already joined, just pick either one of their corner stitches to insert your hook through. I tried both ways and personally haven’t noticed any difference in the final look.
![]()
In case you were wondering, it took me about 9 hours of weaving in ALL the ends of my 73 hexagons! What can I say! It’s hard work, can put creative people off, can make you want to postpone finishing off your project, but I’m glad I did it all in one day!
![]()
Don’t forget to PIN this as well as follow me on Pinterest, Facebook and Instagram to RECEIVE behind the scenes news, and SUBSCRIBE to my email list for more exciting posts and—
Happy Crocheting!
Justina