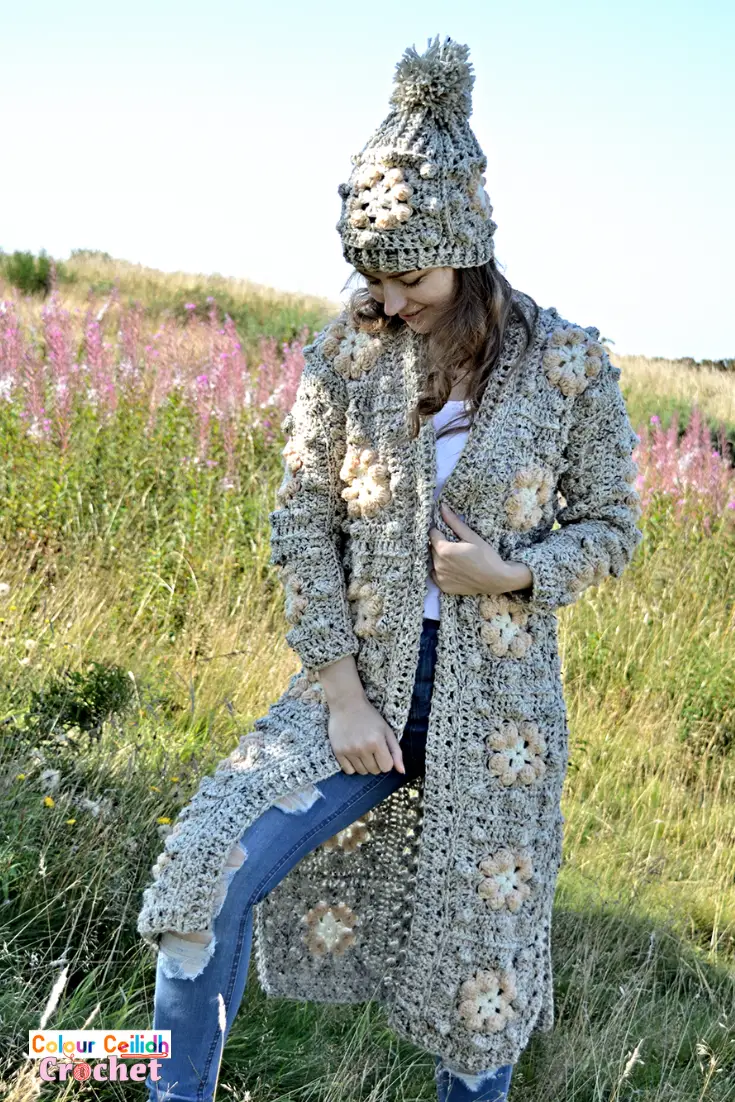
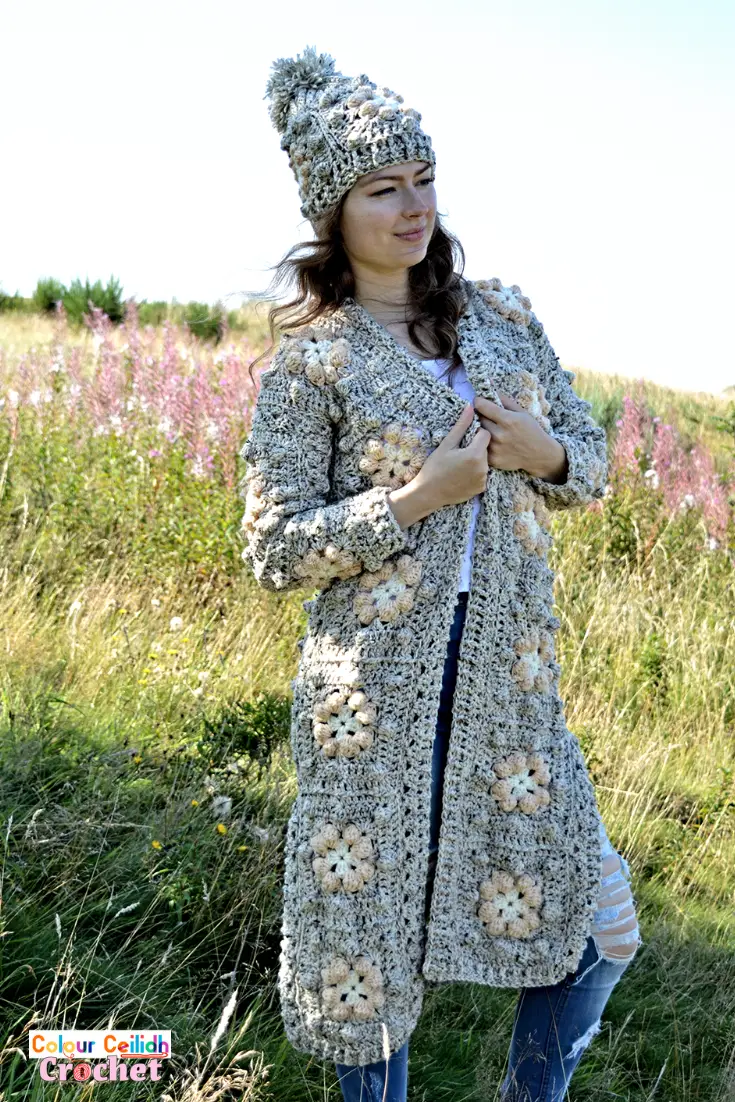
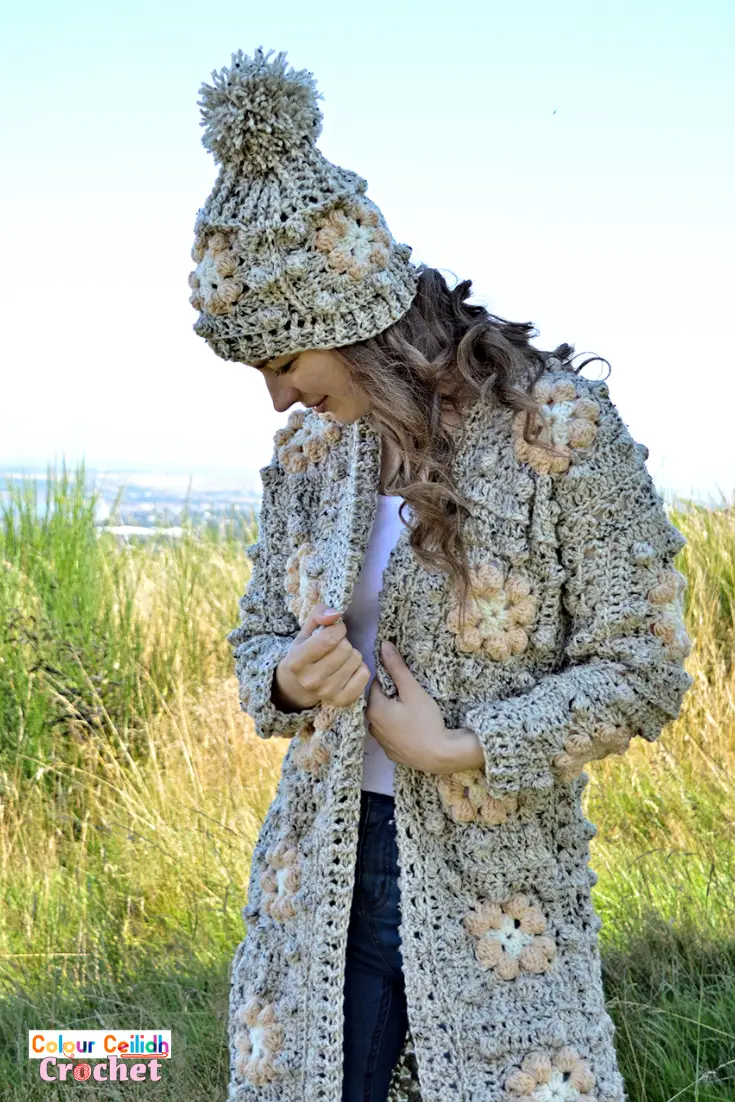
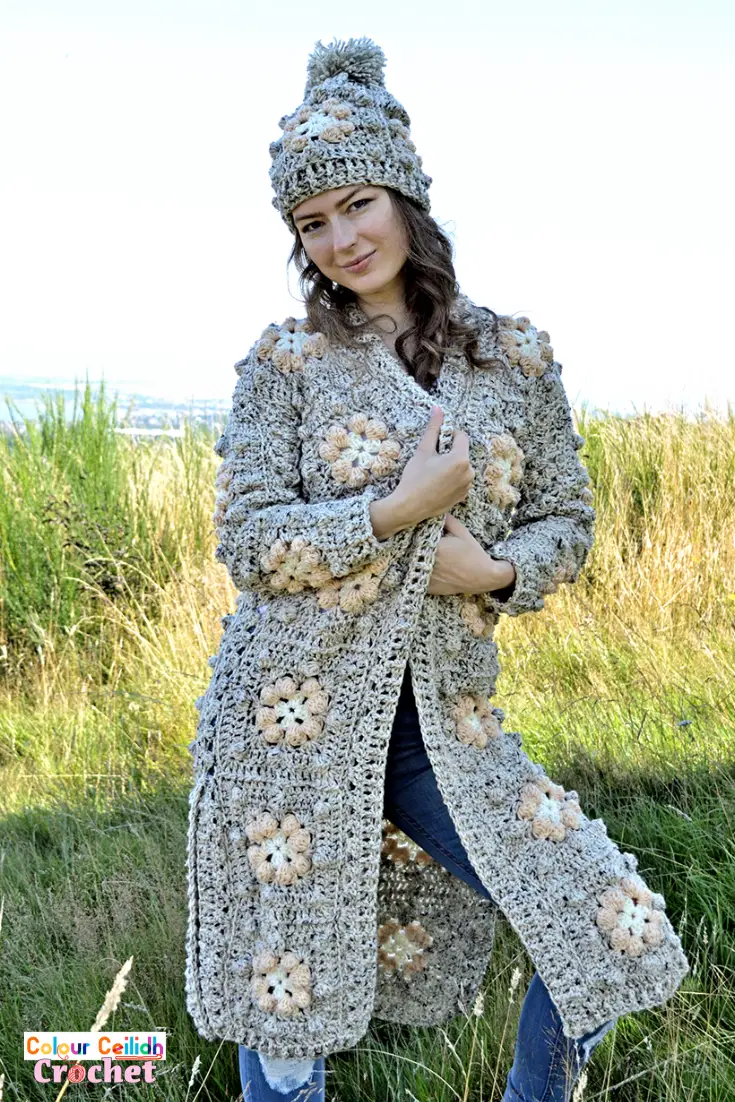
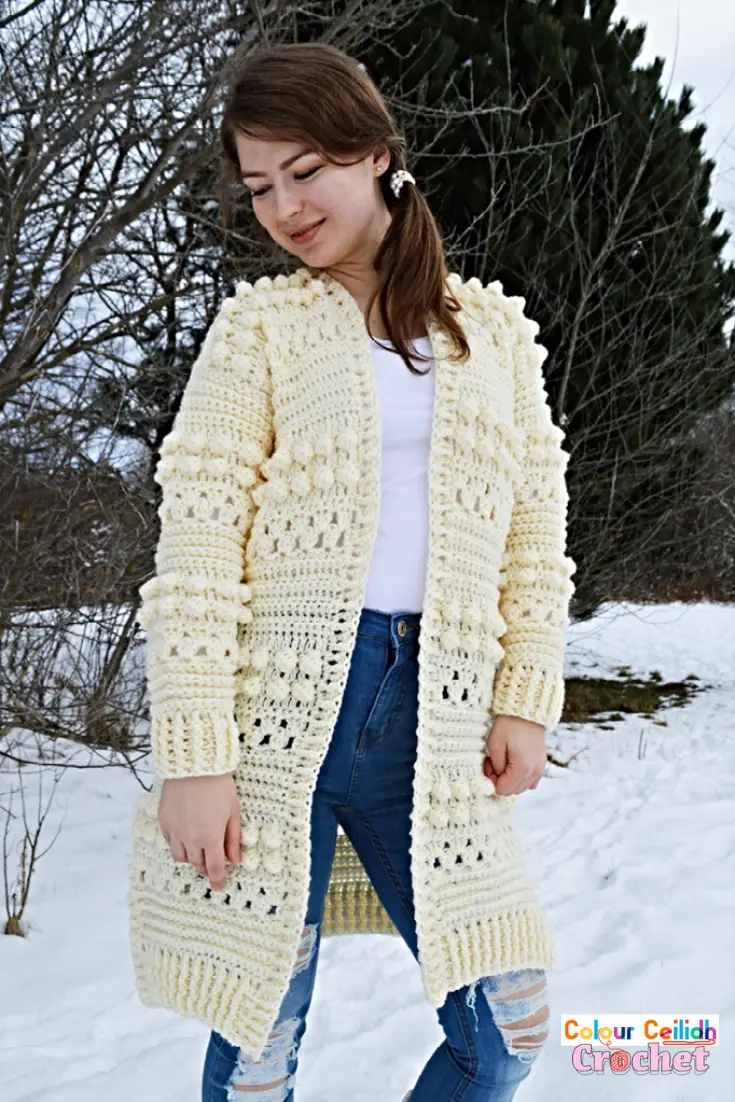
This crochet Bobble Flower granny square cardigan is a long sweater coat made with a matching ribbed bobble hat. This pattern has bobbles of comfort, squishiness and you just want to live in it and wrap yourself in it!
This pattern includes a YouTube video as well.
This post contains affiliate links to products. I may receive a small commission for purchases made through these links.
It All Begins with Yarn…
For this crochet granny square cardigan I’m using Lion Brand Vanna’s Choice in Oatmeal, Beige & Fisherman. I like to use a 9 mm hook with this medium weight yarn.
…And Inspiration…
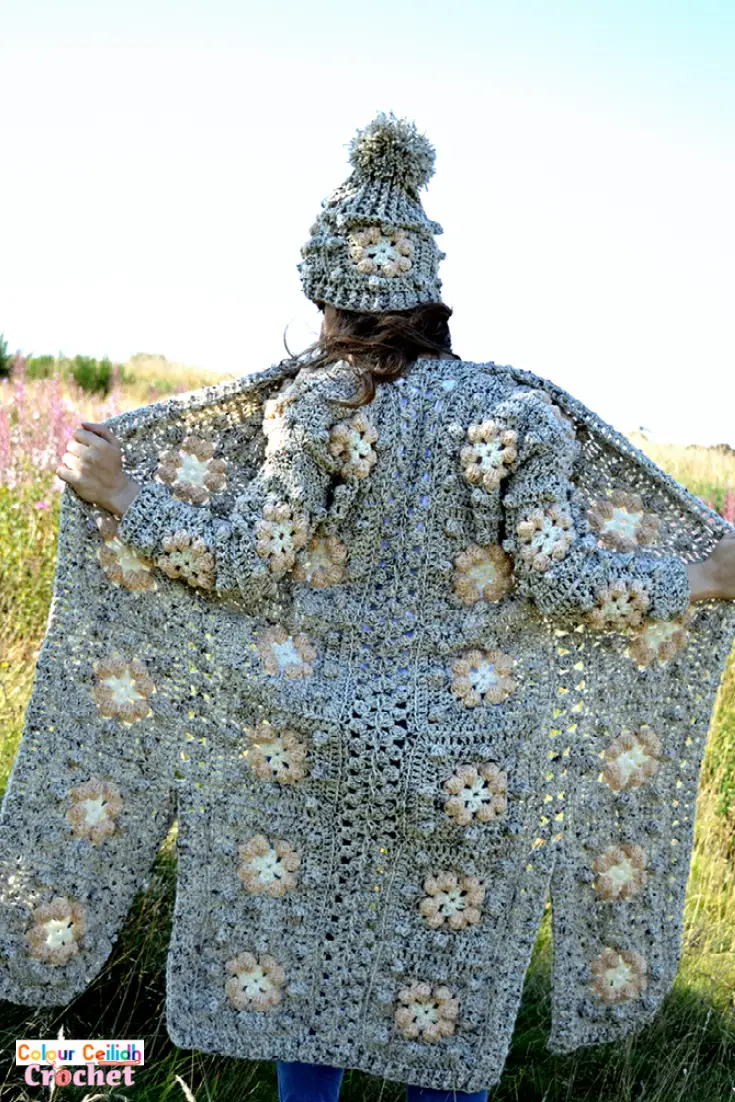
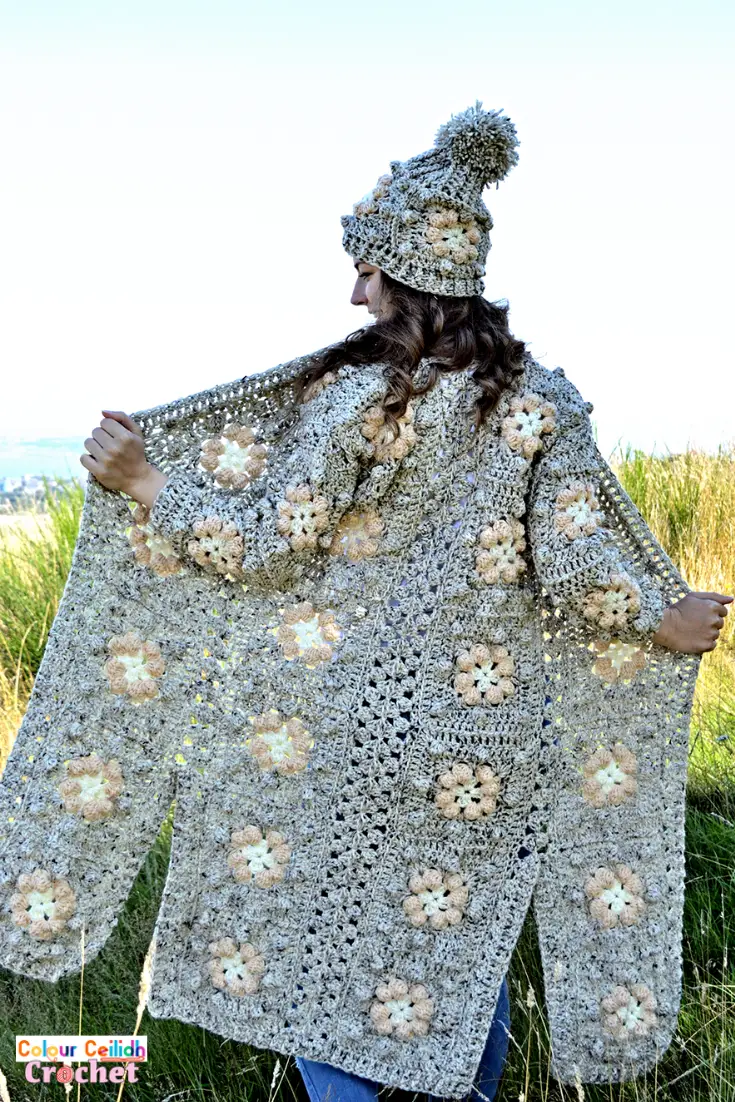
After I made the granny square cardigan all in one color I really wanted to see one made in monochromatic color scheme such as this one as I love soft calm colors just as much as I love bright ones! And I wanted less of a contrast like you usually see in the more traditional granny squares. Also my last cardigan was short, so I was excited to make a long crochet coat again.
Let’s Talk Stitches!..
This cardigan is made of my beloved bobble stitch, the granny stitch and of course the granny squares. In fact, here comes the good news! Since the bobble stitch is made of partial double crochet stitches, when you make this cardigan most of the time you will be using the double crochet stitch! Which is probably the fastest crochet stitch.
Crochet Bobble Flower Granny Square Cardigan – Free Pattern
- Love it? PIN it!.
- You can add this pattern to your Ravelry queue here.
- Ready to crochet but don’t want the ads in your way? PRINT it here*.
* a print friendly version for a small fee.
Description
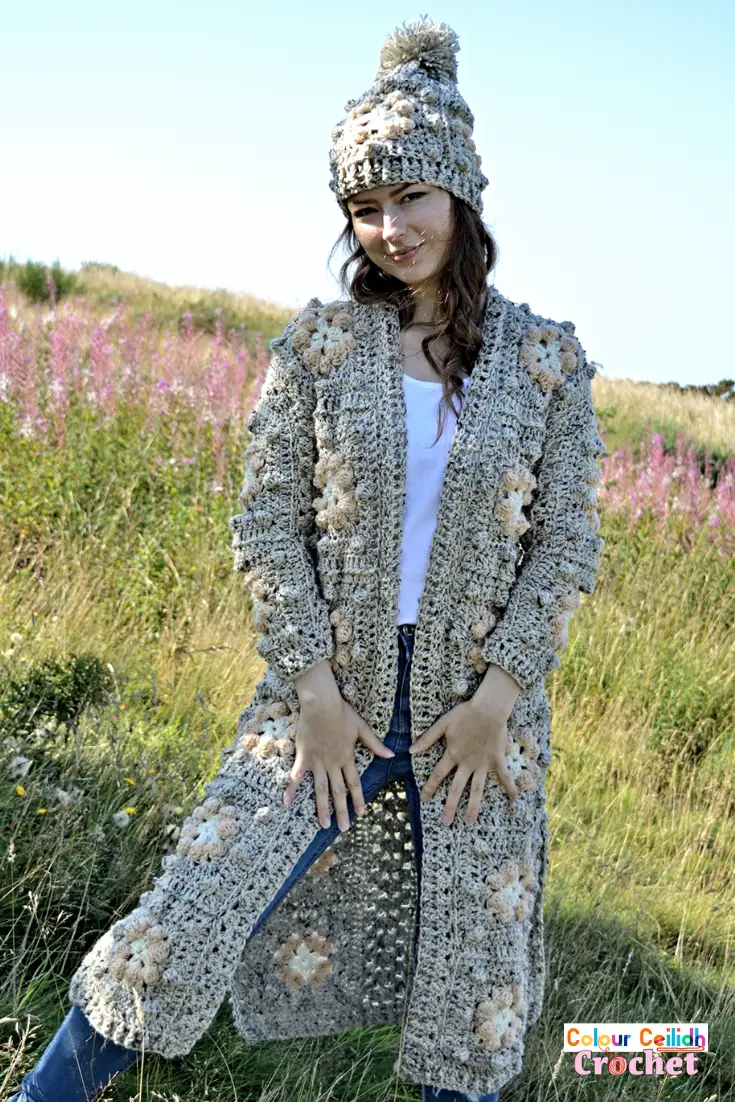
This crochet Bobble Flower granny square cardigan is a long sweater coat made with a matching ribbed bobble hat. This pattern provides bobbles of comfort, squishiness and you just want to live in it and wrap yourself in it! Made in monochromatic color scheme, this easy granny square cardigan comes in 9 sizes, includes a layout diagram and a YouTube tutorial as well.
Sizes
This cardigan is available in 9 sizes: XS, S, M, L, XL, 2X, 3X, 4X, 5X.
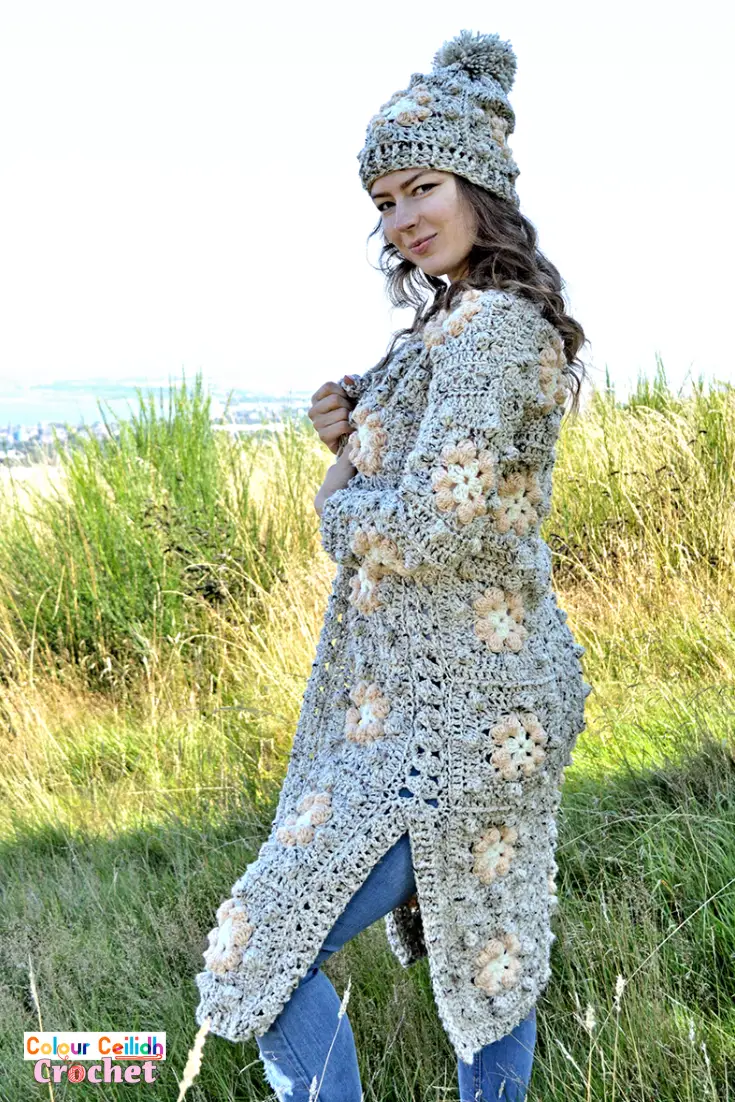
The cardigan is approx 42 inches long (but in reality crochet garments can stretch by an additional 1 – 2″ when worn). Model is 5’7″, wears and is a size M.
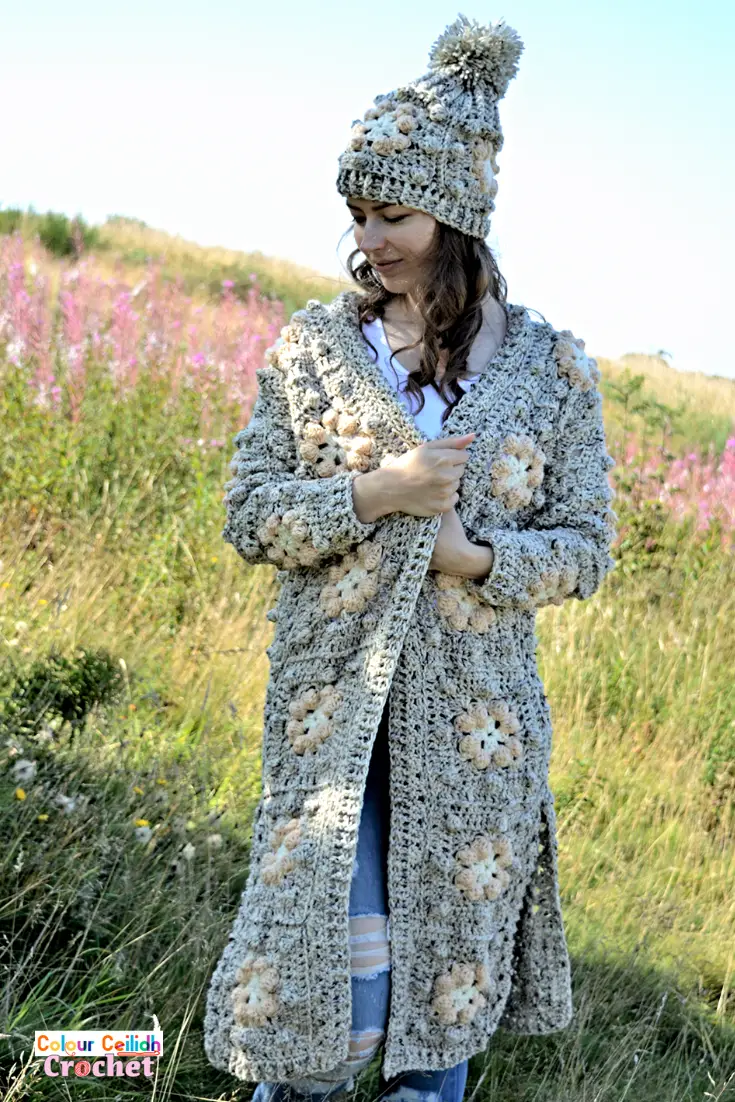
You can also add & remove the squares to the length to make it longer or shorter and still be able to follow all the same instructions to make your cardigan.
These sizes are based on the Craft Yarn Council standard body measurements and sizing. But if you would like to double check your size, search for “Craft Yarn Council woman size charts”.
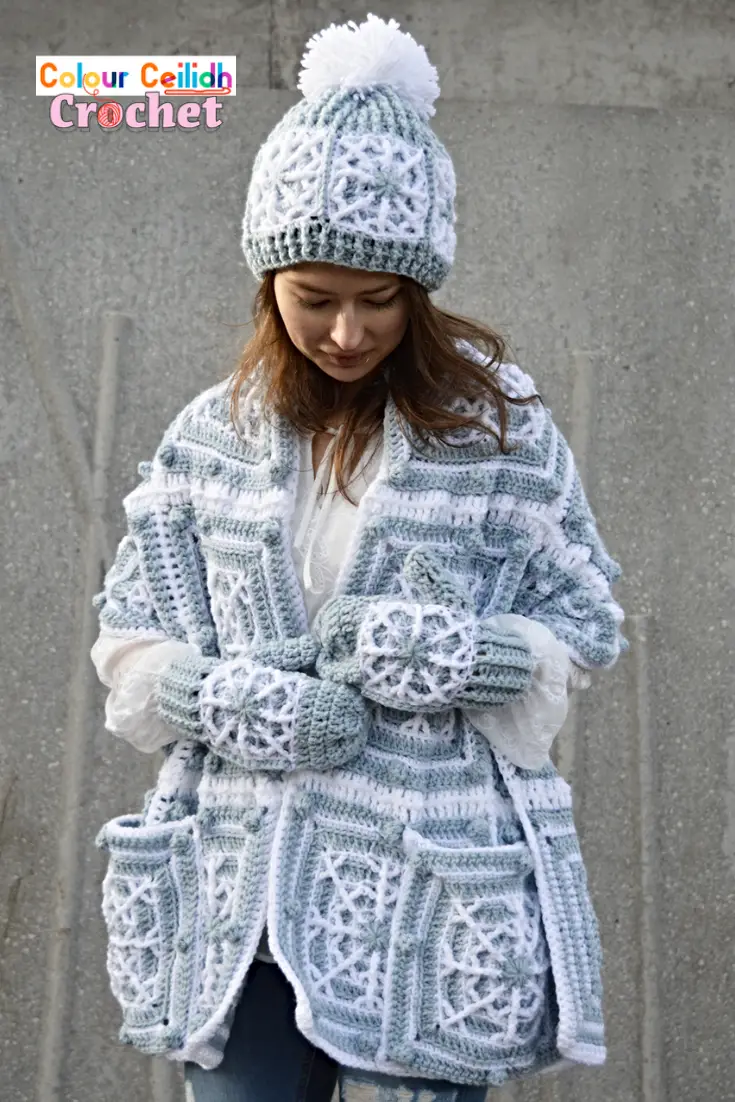
Crochet Bobble Beanie
This bobble flower hat comes in adult small size. Which means it fits approx head circumference of 21 -23″. Model’s head circumference is 22″.
Care Instructions
The Lion Brand Vanna’s Choice yarn is a 100% acrylic (Oatmeal is 92% acrylic and 8% rayon). It’s machine washable at 30 C / 86 F.
Pattern Notes
- Project Level: Easy
- Read this if you want to learn how I change color without tails. To minimise weaving in the ends and because I love working with color so much I developed a method of how to change color in crochet without tails.
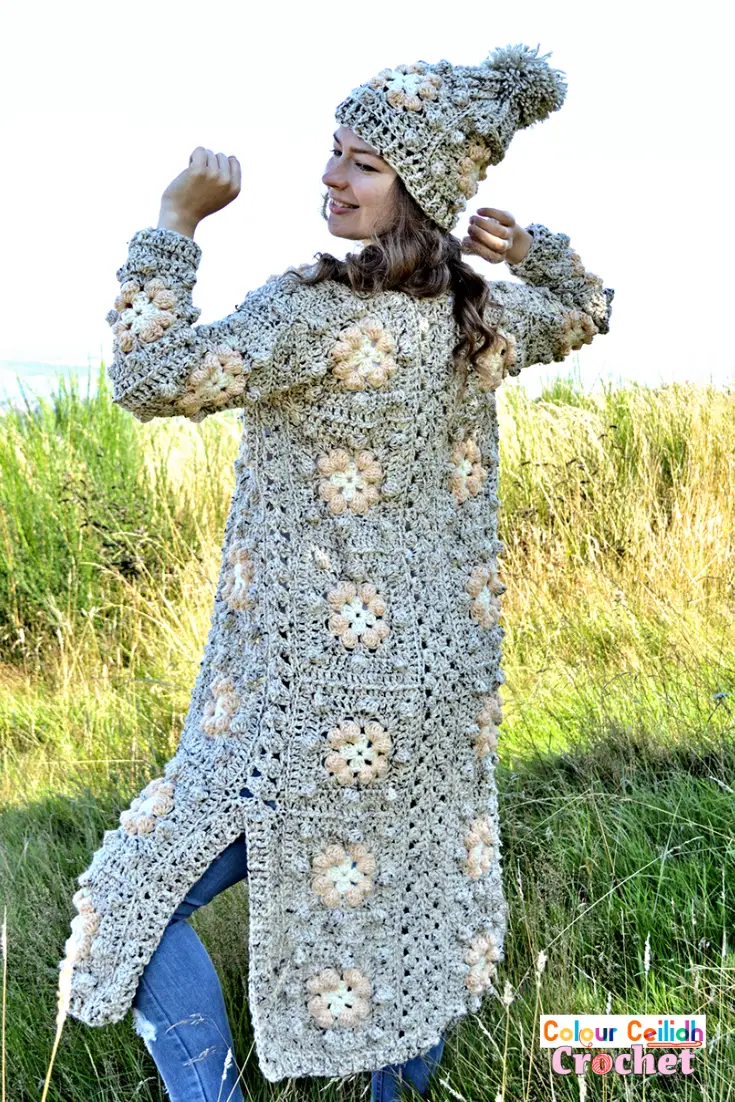
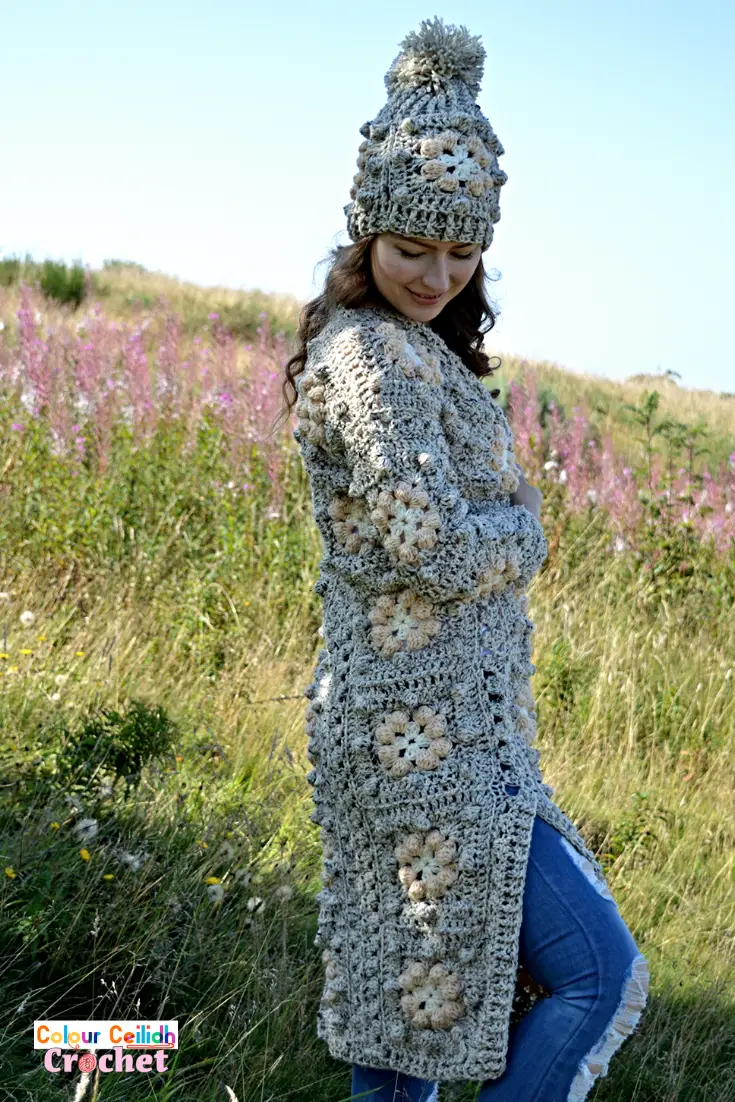
- TIP 1: I think that your side slits will look best when they sit just below the widest part of your hips. So in step 4 e check that you’re happy where your side slit is sitting.
- TIP 2: In step 4, mark the top of your cardigan with say a safety pin so you know which side is where the armholes will be and which side is where the side slits will be. This is to help you seam the shoulders on the correct side later.
- TIP 3: You can make the sleeves longer by adding more ribbing rows.
- If you have any questions & for more details check the video tutorial (link below), also leave me a comment below or on my YouTube channel.
- The long sequence of numbers in the pattern corresponds to the 9 sizes starting from XS and ending with 5X, with XS being placed first and then others arranged in ascending order in brackets and separated by commas.
Crochet Bobble Flower Granny Square Cardigan Pattern – Video Tutorial
Here’s a link to the Granny Square Cardigan Bobble Flower video on YouTube.
Materials
- Lion Brand Vanna’s Choice (Oatmeal: 4 / Medium / Aran weight, 85 g / 3 oz, 133 m / 145 yd, 92% acrylic, 8% rayon; Beige & Fisherman: 4 / Medium / Aran weight, 100 g / 3.5 oz, 156 m / 170 yd, 100% acrylic). For the coat you will need: 9 (9, 10, 11, 12, 12, 13, 14, 15) skeins in Oatmeal, 2 skeins in Beige & 1 skein in Fisherman. The bobble hat uses approx 162 g of Oatmeal, 16 g of Beige & 4 g of Fisherman, that’s including the large pom pom. So all together for the coat + bobble hat you will need: 11 (11, 12, 13, 14, 14, 15, 15, 16) skeins in Oatmeal, 2 skeins in Beige & 1 skein in Fisherman. Buy more Oatmeal if you want to add extra rows of ribbing.
- 9 mm crochet hook
- Measuring tape
Gauge
Following the pattern below, one granny square (5 rounds) measures about 6.8“.
Abbreviations (US Terms)
- blo: back loop only
- BPdc: back post double crochet
- ch: chain
- dc: double crochet
- dc5tog: double crochet five together, or the bobble stitch. Work 5 partial double crochet stitches into the same stitch leaving the last loop of each on the hook. So yarn over, insert hook in the indicated stitch, yarn over and pull through, yarn over and pull through 2 loops and stop there. Repeat 4 more times. Yarn over and draw through all loops on hook
- flo: front loop only
- FPdc: front post double crochet
- hdc: half double crochet
- rep: repeat
- sc: single crochet
- sl: slip
- st: stitch
- t: turn
Crochet Bobble Flower Granny Square Cardigan Pattern:
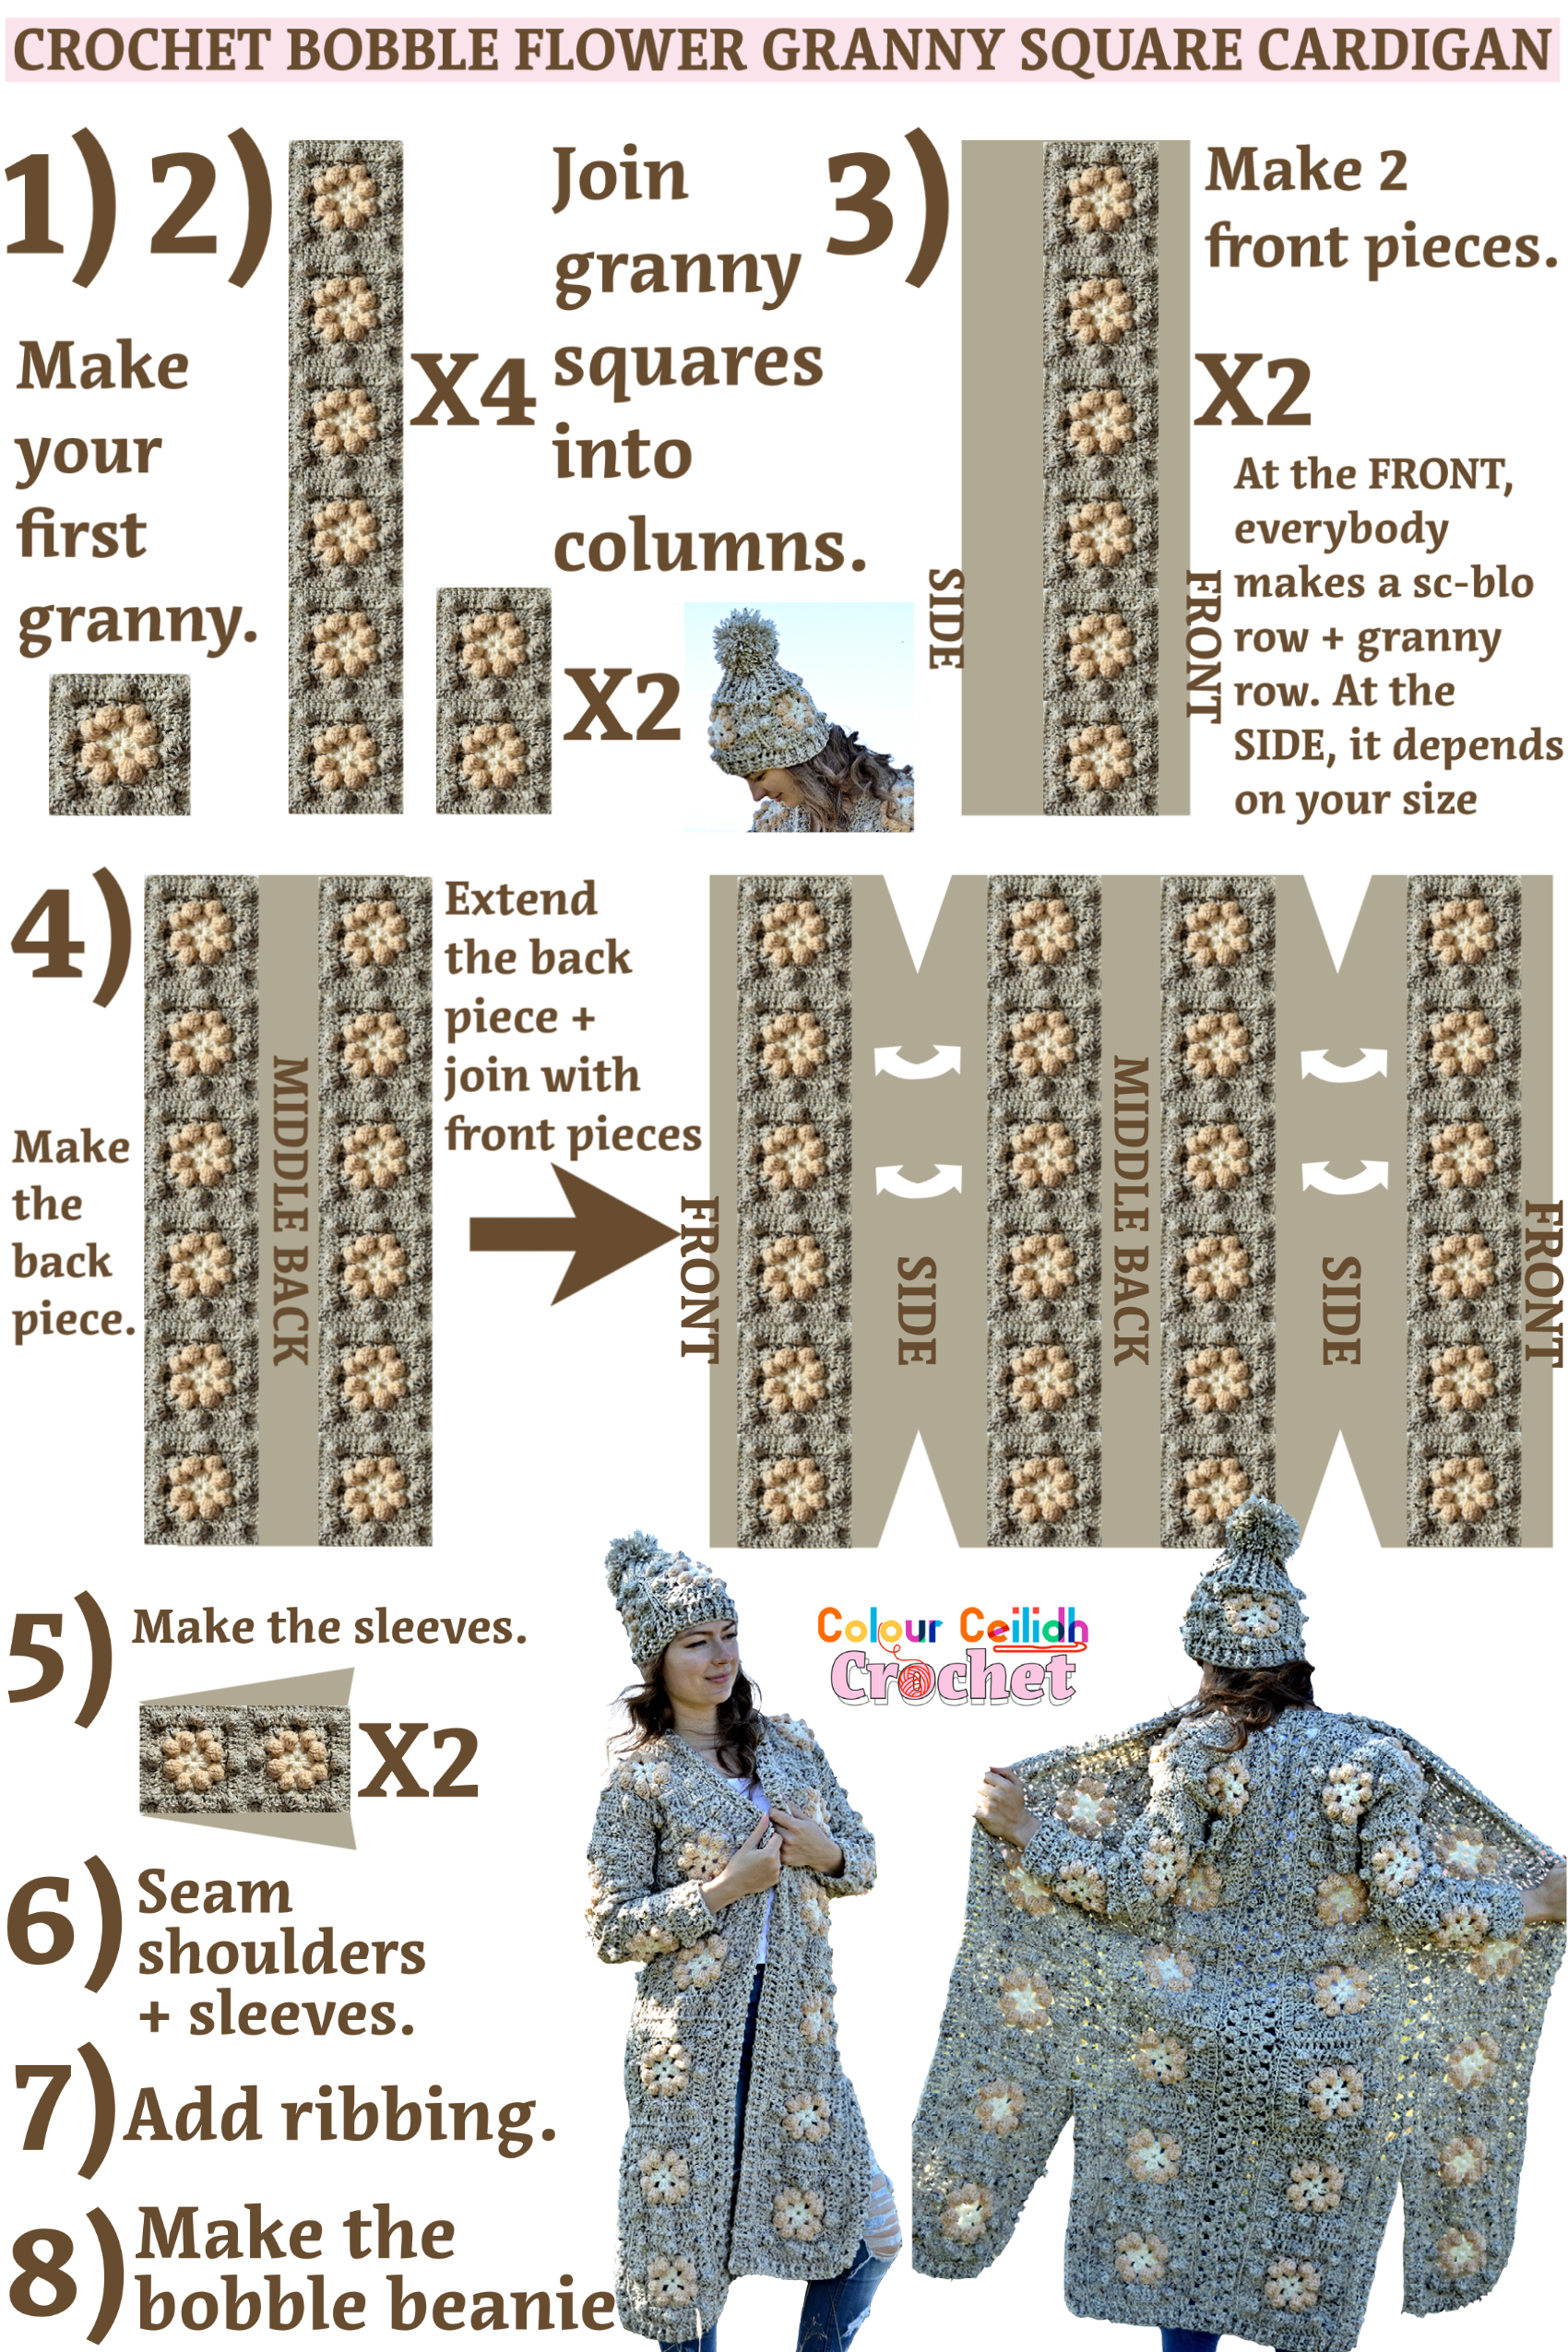
Pattern Overview – 8 Easy Steps
- Make your first granny.
- Join granny squares into columns (see diagram & instructions below).
- Make two front pieces.
- Begin the back piece and join with the front pieces.
- Make the sleeves.
- Seam.
- Add ribbing.
- Make the matching bobble hat!
1. Make Your First Granny
Make the first granny square as follows.
Crochet Bobble Flower Granny Square
Ch 4, sl st to first ch to form a ring.
Rnd1 (Fisherman) Ch 3 (counts as dc), 2 dc in ring, *ch 1 (corner space made), 3 dc in ring; rep from * two times, ch 1, join with sl st to top of ch-3, t (16 sts).
Rnd2 (Beige) (Ch 3 (counts as dc), dc5tog, dc, ch 1, dc, dc5tog, dc) in same space, (dc, dc5tog, dc, ch 1, dc, dc5tog, dc) in each space around, join with sl st to top of ch-3, t (28 sts).
Rnd3 (Oatmeal) Ch 3 (counts as dc), 2 dc in same space, make 3 dc in each space placing (3dc, ch 1, 3 dc) in corner spaces, join with sl st to top of ch-3, t (40 sts).
Rnd4 (Oatmeal) Ch 3 (counts as dc), make dc in each dc placing (dc, dc5tog, dc) in mid-row sts and ch-1 sts, join with sl st to top of ch-3, t (56 sts).
Rnd5 (Oatmeal) Ch 3 (counts as dc), make dc in every st placing (2 dc, ch 1, 2 dc) in corner sts, join with sl st to top of ch-3, fasten off (72 sts).
2. Join Granny Squares Into Columns (See Diagram)
Join the second and subsequent granny squares together on one side into “lines” or “columns” as follows. Make 4 columns of 6 granny squares joined together and 2 columns of 2 granny squares joined together as shown in the diagram below. The taller columns will be used to make the front and back pieces and the shorter columns will be used to make the sleeves.
If you want to achieve a different cardigan length, this is where you decide how many squares length you would like. Just join a few & try them on for length. The sleeves and all the following instructions remain the same otherwise.
Join The Granny Squares
To join granny squares: as you’re making the last round of your granny, leave one full side undone to be joined with the other square. We’ll start joining in the corner.
Start making the corner but stop after the first 2 dc. Remove your hook from the loop, insert the hook front to back through the corner space of the other square you’re joining with, pick up the loose loop, pull it up and ch 1, dc in the same corner space. *Remove the hook from the loop, insert the hook front to back through the next space along of the other granny, pick up the loose loop, pull it up and ch 1, and make a dc again (be sure to complete the corner before moving on). Rep from * until you joined the second corner with a ch 1.
For more details, see the video tutorial.
3. Make 2 Front Cardigan Pieces
a. Take your column of 6 granny squares joined together. Face the front and turn the granny squares so they’re aligned horizontally in front of you.
Join new yarn (I used the slip stitch method: make a slip knot on your hook, insert hook in the space indicated, yarn over and pull through the fabric & the slip knot) in the top right corner of a granny square & add 2 rows as follows (this will be the front of your cardigan where later you will add front ribbing):
Rows 1 to 4:
Row#1 Ch 1, sc in same space, sc-blo in first dc and every dc, sc-blo in last ch-1, t.
Row#2 Ch 3 (counts as dc), dc in same st, *skip 2 sts, 3 dc in next st; rep from *, skip 3 sts, 2 dc in last st, t. (Sometimes the last st is a ch-1 space & you only need to skip 2 sts. Sleeves: you should have 13 clusters in row#2 but it doesn’t matter how many clusters you have in the body pieces)
Fasten off.
Size XS: proceed to c.
b. Turn your piece around / upside down. Facing the front, join new yarn again in the top right corner of a granny square and rep row#1.
Size S: proceed to c.
Now rep row#2.
Size M: proceed to c (you guys have a symmetrical front piece where both sides look the same – one granny row on either side).
Then rep rows 3 & 4 below (this will be the side of your cardigan to be joined with the back piece later) until you have – (-, -, 3, 5, 6, 7, 8, 10) granny rows in total on this side (it’s easier to count just granny rows, so this number represents just granny rows):
Row#3 Ch 3 (counts as dc), 3 dc in next space and every space, dc to top of ch-3, t.
Row#4 Ch 3 (counts as dc), dc in same space, 3 dc in next space and every space, 2 dc in last space, t.
Fasten off. One front piece complete.
c. Repeat the same steps for your size to make the second piece.
4. Begin Back Piece & Join With Front Pieces
a. Take your column of 6 granny squares joined together. Face the front and turn the granny squares so they’re aligned horizontally in front of you.
Join new yarn in the top right corner of a granny square. Rep rows 1, 2 & 3 and fasten off.
b. Take another column of 6 & rep a but as you make your last row, join as you go with the last row from the first piece you just made (see the video) & fasten off. You just joined the middle back. Now you have two granny square columns joined together with 6 rows in between (or 4 granny rows).
Size XS: proceed to 5.
c. Face the front and turn your piece so the granny squares and your rows are aligned horizontally in front of you. Join new yarn in the top right corner of a granny square & rep row#1.
Size S: proceed to f.
Now rep row#2 (size M: this is your last row – proceed to e.).
d. Then rep rows 3 & 4 until you have – (-, -, 3, 5, 6, 7, 8, 10) granny rows (it’s easier to count just granny rows, so this number represents just granny rows).
e. As you make the last row, join with the last row of the front piece (as shown in the diagram above), leaving – (-, 6, 6, 7, 8, 8, 9, 9) granny clusters unjoined on one side for the armhole and approx 12 granny clusters unjoined on the other side for the side slits (ch 3 / dc and 2 dc / ch 3 + dc all count as your first cluster).
f. Turn your piece around / upside down and rep from c onwards again.
5. Make The Sleeves
a. Take your column of 2 granny squares joined together. Face the front and turn the granny squares so they’re aligned horizontally in front of you.
b. Join new yarn in the top right corner of a granny square. Rep rows 1, 2 & 3 as needed so you have 1 (1, 1, 3, 3, 3, 3, 3, 3) granny rows made (it’s easier to count just granny rows, so this number represents just granny rows).
Then make the following rows and follow instructions for your size (everybody makes row#5).
Rows 5 to 9:
Row#5 Ch 1, sc in same st. For the next 6 granny clusters including 2 dc below, sc in every st. Then make 3 hdc in space below and next space, 3 dc in next space and every space, ending with dc to top of ch-3, t.
Row#6 Ch 3 (counts as dc), dc in same space, 3 dc in next space and every space until you have 4 granny clusters including 2 dc at the beginning, 3 hdc in next space twice, sc in next space. Sizes XS, S, L, XL: fasten off. Everyone else: t.
Row#7 Ch 1, skip same st and next st, sc in next st, 3 hdc in same space below and next space, 3 dc in next space and every space, dc to top of ch-3. Size M: fasten off. Everyone else: t.
Row#8 Ch 3 (counts as dc), dc in same space, 3 dc in next space, 3 hdc in next space twice, sc in next space. Sizes 2X, 3X: fasten off. Everyone else: t.
Row#9 Ch 1, skip same st and next st, sc in next st, 3 hdc in same space below and next space, 3 dc in next space, dc to top of ch-3, fasten off.
Turn your piece around / upside down. Face the wrong side this time and turn the granny squares so they’re aligned horizontally in front of you. Rep b but in row#1 make sc-flo instead of -blo, so it looks the same from the front. One sleeve complete.
c. Rep a & b to make the second sleeve.
6. Seam
Sizes XS/ S: seam the sides leaving 5.6″/ 5.9″ unseamed for the armholes on one side and approx 13″ unseamed for the side slits on the other side.
Everyone: seam the shoulders, the sleeves and the sleeves into body. I used the mattress stitch.
7. Add Ribbing
Add ribbing to the bottom of the cardigan first, then the slits, the front & the sleeve cuffs. I added just 2 rows of ribbing everywhere (except for the hat) but you can adjust it to suit your taste.
First row: join new yarn in the corner & chain 3. Make 2 more (dc) posts in the corner space.
These are the guidelines I used to make my first row:
- 3 posts for every corner space
- 2 posts for every granny row and ribbing row
- 1 post for every dc post in the granny squares and the granny clusters
- twice as many posts than above in the neck area because it stretches a lot
Second row: ch 2, skip first post, *FPdc around next post, BPdc around next post; rep from *, t.
Third row: rep row2, making sure to match FPdc with FPdc and BPdc with BPdc to continue creating the ribbing ridges.
Rep row3 (where needed) to the desired length of ribbing.
Sew the tops of the side slits together (use the yarn tails) by overlapping the front slit ribbing with the back slit ribbing (see the video).
Weave in the ends.
8. Make the Matching Crochet Bobble Hat!
Make this bobble flower hat in 4 easy steps:
- Crochet 3 granny squares omitting the last round.
- Join the granny squares together through the back loops with sc into a circle / tube shape.
- Add 3 rows of ribbing (first row is dc-blo) on one side & 8 rows on the other.
- Gather the top & add a large 4.8″ pom pom.
To make the pom pom I used instructions provided by Pattern Paradise. I wrapped the yarn around a 4.8 ” / 12 cm wide piece of cardboard around 150 times.
For more information, see the video tutorial.
More Ideas
This nice little granny square cardigan by Originally Lovely is also monochrome crochet!
Another long booble stitch cardigan with side slits that I made is my bobbles of snow cardi. The ribbing is done very similarly in this pattern as in the bobble flower cardi.
Also this crochet snowflake granny square hat is what I modelled to make my bobble stitch hat.
Well Done!
I hope you enjoyed this free crochet pattern for my Crochet Bobble Flower Granny Square Cardigan. What should I crochet next? See you in my next pattern!
Happy crocheting!
Justina