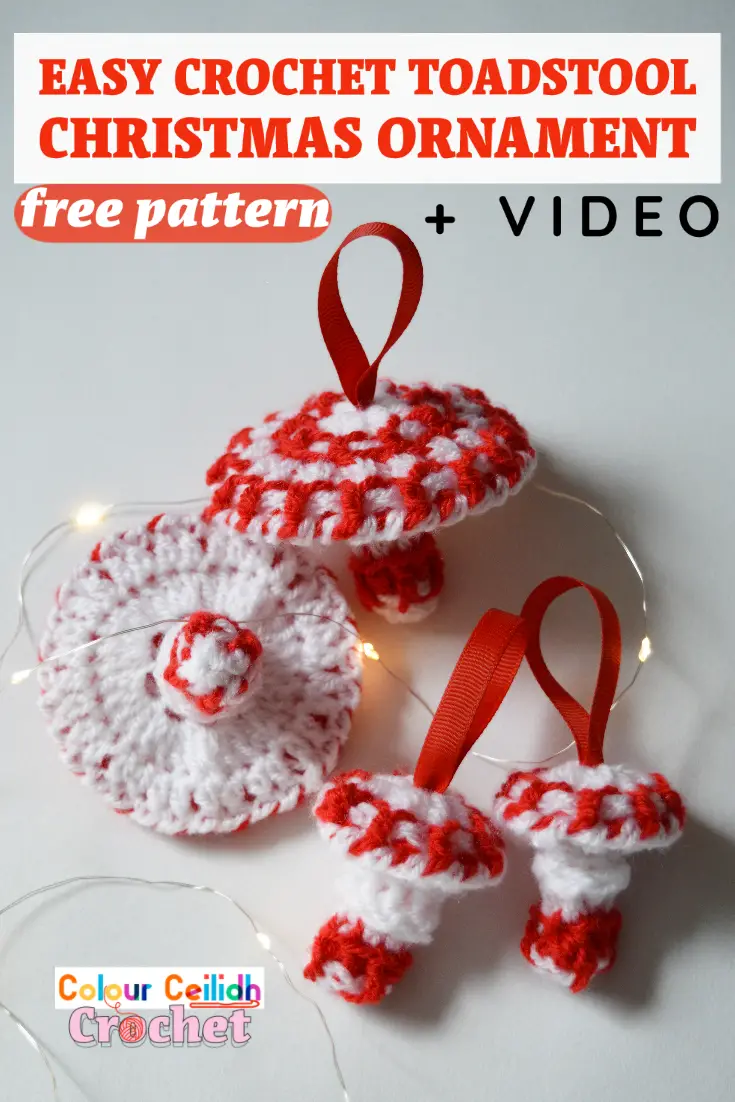
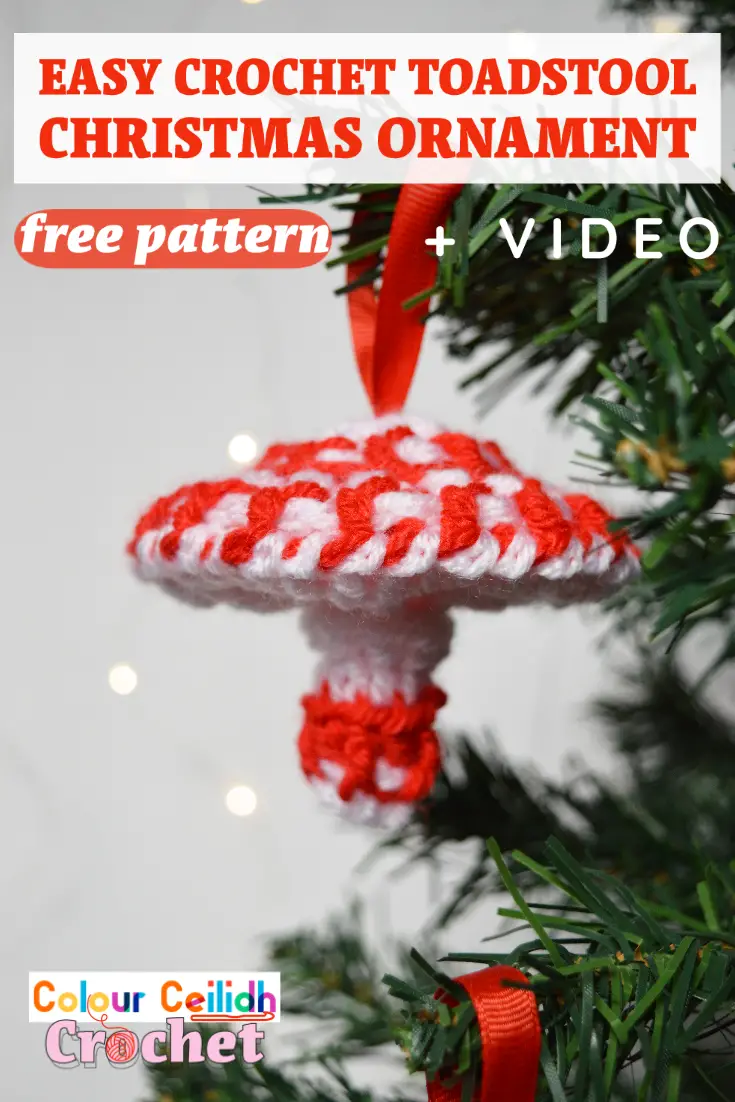
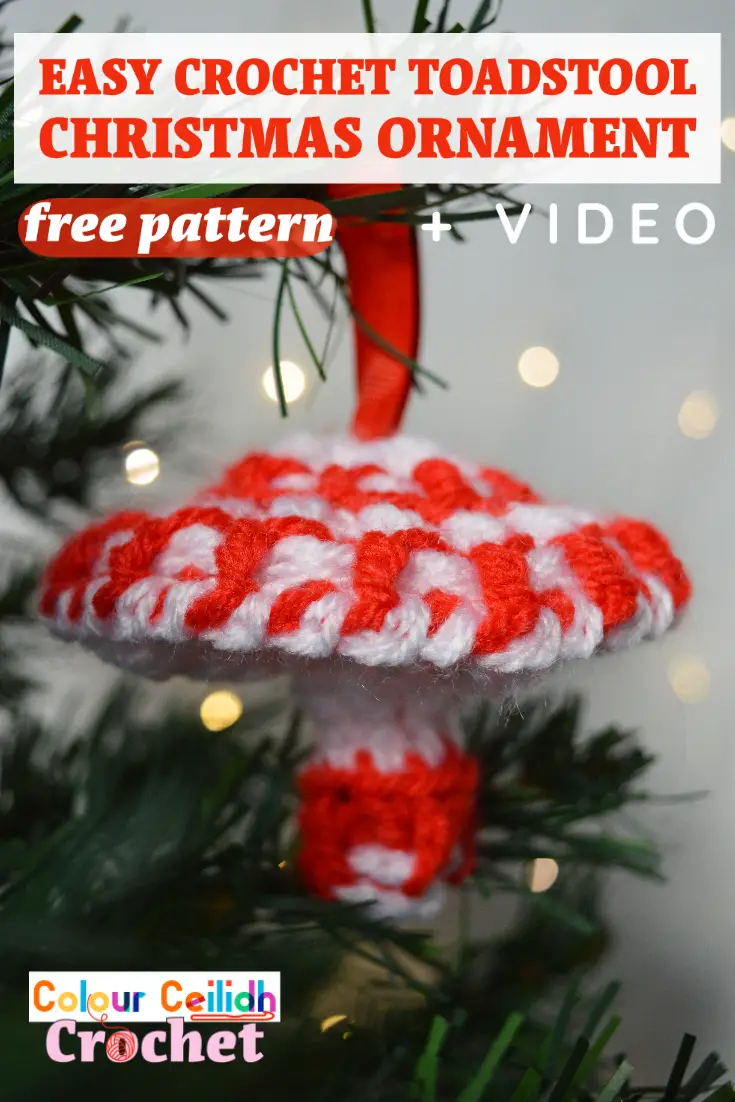
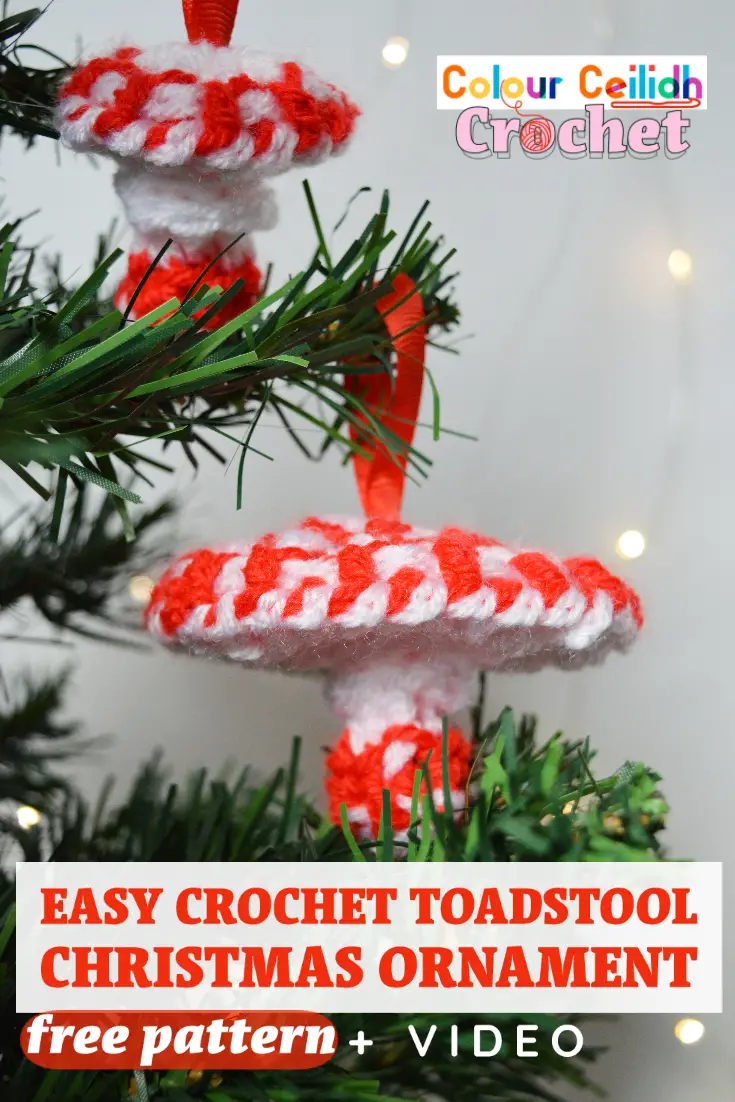
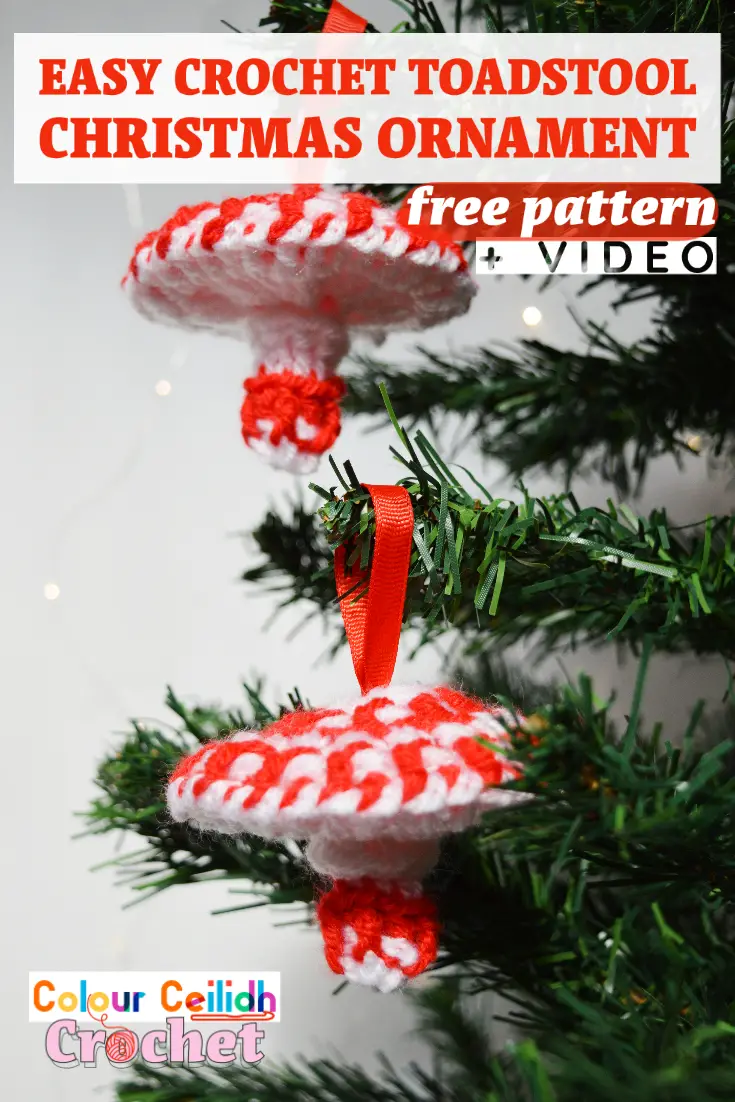
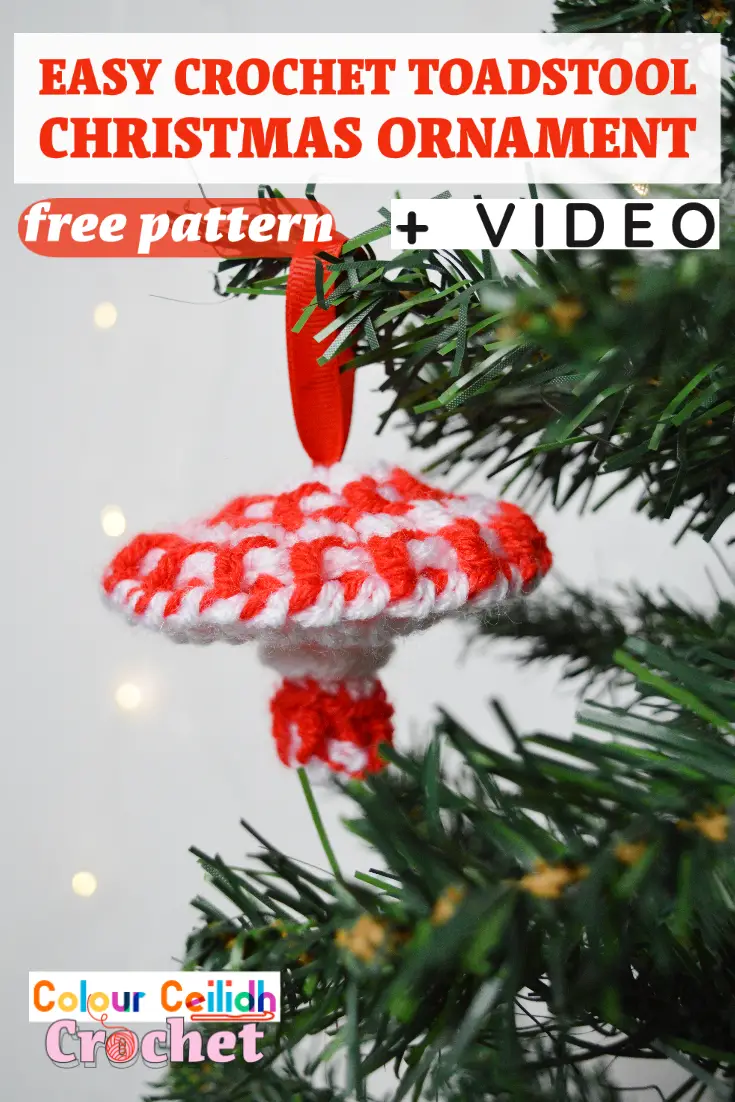
This easy crochet toadstool Christmas ornament will be a cute addition to your handmade Christmas decorations. Featuring easy basic crochet stitches and a video tutorial, in just a few rounds this pattern creates a magical crochet fairytale scene on your tree.

This post contains affiliate links to products. I may receive a small commission for purchases made through these links.
This red crochet toadstool might well have just stepped out of a crochet fairytale and is the perfect balance between how easy it is to make, how organic it looks, and how crochet it looks.
I mean, we are all massive crochet fans here and this little baby displays all the beautiful classic crochet stiches.
And of course, it’s super fun to make, to decorate your Christmas tree with, and to admire it once you’re done!

The Yarn
I’m using small amounts of red and white King Cole Pricewise DK. I like how fluffy, matt and sturdy it is, and I love that shade of red for this project.
The Design
The inspiration for this lil’ fairy toadstool came when I was making my Nordic crochet bauble and the small version of it, the mini crochet Nordic bauble. It’s in the bauble halves, they just look like mushroom caps. Specifically, the fairytale toadstool Amanita muscaria or the fly agaric mushroom. I just had to make it!
This red fairy toadstool has the cap, the gills, the little skirt, the stem and the volva. It looks as though it has a red cap with white dots except that we won’t need to make any separate dots to sew on. I love shortcuts that give you the same result 🙂
The Stitches
The stitches are: single crochet, double crochet, double crochet back loop only, front post double crochet and back post double crochet.
Are you familiar with those stitches? If so, with a little help from my video, you can follow this beginner friendly pattern with ease.

I think the beauty of this project definitely lies in the stitches. And the bold red and white color combination just shows them off perfectly. Such a cute, clean and simple design created by these classic crochet stitches is what makes this pattern so easy, effective and impressive.
The Video
This video tutorial is designed to accompany the written pattern found on this page below. It walks you through each round and each stage of making the ornament so you can make it alongside me and it helps you with stitch counting.
VIDEO: Crochet Christmas Decorations: Toadstool
Easy Crochet Toadstool Christmas Ornament: Free Pattern
Description
This easy crochet toadstool Christmas ornament is a cute addition to your handmade Christmas decorations. Featuring easy basic crochet stitches and a video tutorial, in just a few rounds this pattern creates a magical crochet fairytale scene on your tree. This is an easy and free beginner friendly crochet pattern. For more crochet Christmas gift ideas, come browse my blog.
Finished Measurements
The toadstool is approx 2.3″ tall, the cap is about 3.5″ in diameter and the hanging loop is about 2″.
Pattern Notes
- Project difficulty: Easy
- Beginner friendly, because this pattern uses basic crochet stitches
- No sewing, no stuffing needed, don’t need to make separate white dots to sew on the mushroom cap. You can still add stuffing if you like
- You need small amounts of yarn, which is great for using up leftovers
- The numbers at the end of the rounds are stitch counts.
- To change color between rounds the easiest way, do not break yarn but simply pull up the new color with the last time you yarn over and pull through in your last stitch (see video if you’re unsure).
- The idea for joining the halves this way came from my favorite granny square joining method. For more details see my photo tutorial for how to join granny squares as you go.
Materials
- King Cole Pricewise DK (3 / light, 320 yards / 290 m, 3.5 oz / 100 g), less than 5 g of each color per mushroom in Red and White
- Size H / 5 mm crochet hook
- Ribbon, approx 8″ per toadstool
- Scissors
Abbreviations (US Terms)
- blo: back loop only
- BPdc: back post double crochet
- ch: chain
- dc: double crochet
- FPdc: front post double crochet
- rep: repeat
- sl: slip
- sliding loop: magic loop, magic circle, adjustable loop, magic ring, adjustable ring, drawstring ring
- st: stitch
Pattern Overview
- Make the cap and attach the ribbon loop before you close the magic ring.
- Make the stem and seamlessly join as you go with the cap in the last round.
Pattern
The pattern is broken into the Cap and the Stem.
Cap
First let’s make a hanging loop by folding the ribbon into half and tieing it on one end.
Grab your White and alternate the color in each round with Red.
Begin with sliding loop.
Before closing the sliding loop when you finish Rnd1, pull your ribbon loop through so that the knot is on the inside of the cap and tighten the magic ring to secure the ribbon loop into place.
Rnd1 (White) Ch 3 (counts as dc), 15 dc in ring, sl st to top of ch-3. (16 dc)
Rnd2 (Red) Ch 2 (doesn’t count as st), *FPdc around post directly below, BPdc around next post; rep from * around, join with sl st to first FPdc. (16 = 8 FPdc + 8 BPdc)
Rnd3 (White) Ch 3 (counts as dc-blo), dc-blo in same st, *2 dc-blo in next st; rep from * around, join with sl st to top of ch-3. (32 dc-blo)
Rnd4 (Red) Rep Rnd2, fasten off. (32 = 16 FPdc + 16 BPdc)
Stem
Begin with sliding loop.
Rnd1 (White) Ch 2 (counts as sc), 7 sc in ring, sl st to top of ch-2. (8 sc)
Rnd2 (Red) Rep Rnd2 from Cap. (8 = 4 FPdc + 4 BPdc)
Rnd3 (White) Ch 3 (counts as dc-blo), *dc-blo in next st; rep from * around, join with sl st to top of ch-3. (8 dc-blo)
Rnd4 (White) Ch 2 (doesn’t count as st), BPdc around post directly below, *BPdc around next post; rep from * around, join with sl st to first BPdc. (8 BPdc)
Rnd5 (White) Ch 3 (counts as dc-blo), 3 dc-blo in same st, *4 dc-blo in next st; rep from * around, join with sl st to top of ch-3. (32 dc-blo)
For the next round the ch-2 we made in the last round of the Cap doesn’t count as a post.
Rnd6 (White) Ch 3 (counts as dc), remove hook from loop, insert hook front to back through any gap between 2 posts in the last round of the Cap, *pull up the loose loop and ch 1, dc in next st, remove hook and insert it front to back through the next gap; rep from * around, ending your last rep with ch 1, join with sl st to top of ch-3, fasten off. (32 dc)
Hide the yarn tail inside the toadstool. And you’re done!
More Ideas
If you’re looking for more cute Christmas crochet gift ideas like this one, why not try this Mario mushroom by Sharon at Ami Amour who even cleverly suggests using them as party favors. Or this Toadstool tin caddy by Matt at the Boy and Bunting. And this Puffball Gnome Ornament by With Alex Official Blog.
You might want to try these other easy crochet patterns designed by me. Like these matching crochet Christmas baubles Scandinavian style and this mini Nordic bauble.
Well Done!
I hope you enjoyed this free pattern for my easy crochet toadstool Christmas ornament.
If you did, please share the link to this post with your friends, subscribe to my email list (the form pops up when you click around or come back again), Pin your favourite image by hovering over it and follow me on Pinterest so you never miss a pin, like my Facebook page and follow me on Instagram to see behind the scenes and for more color in your life.
Happy crocheting!
Justina