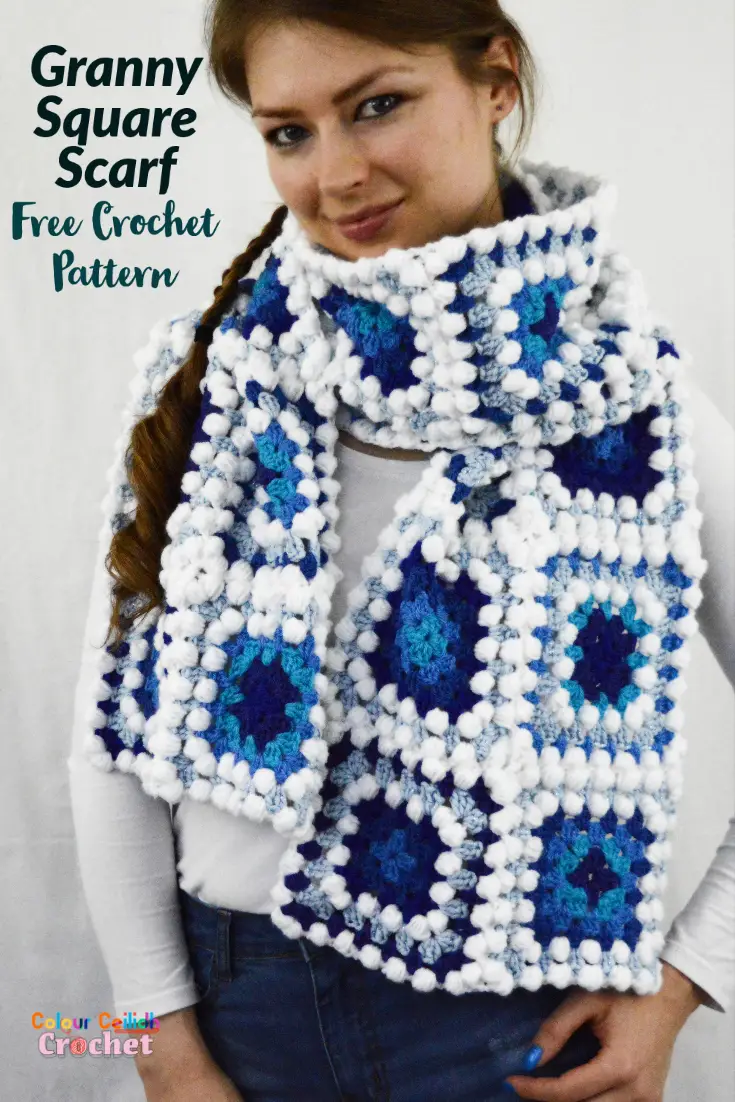
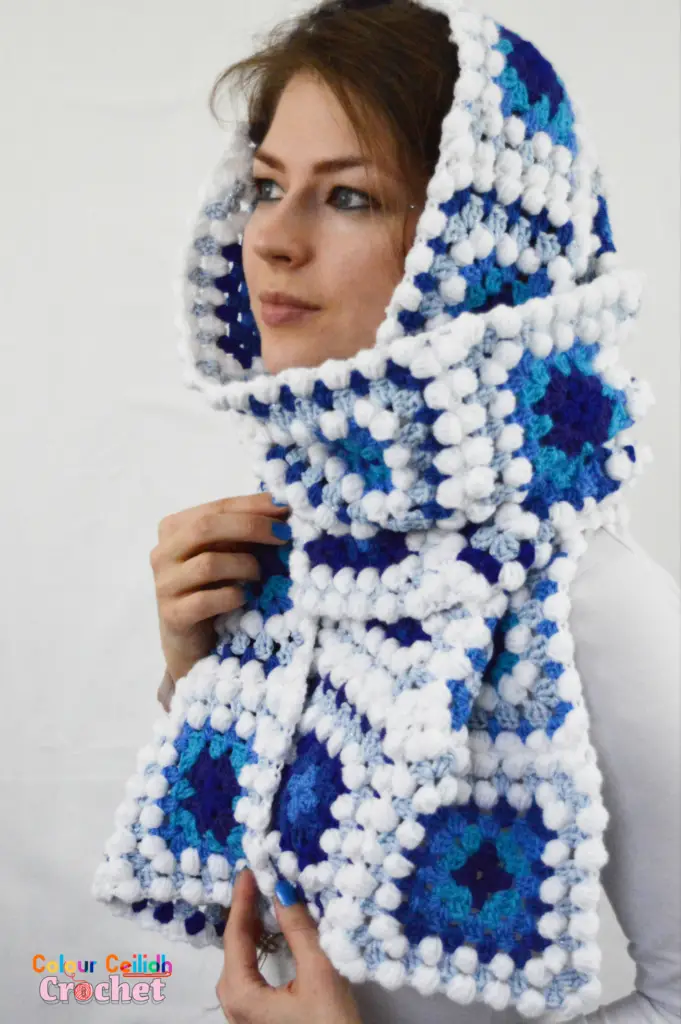
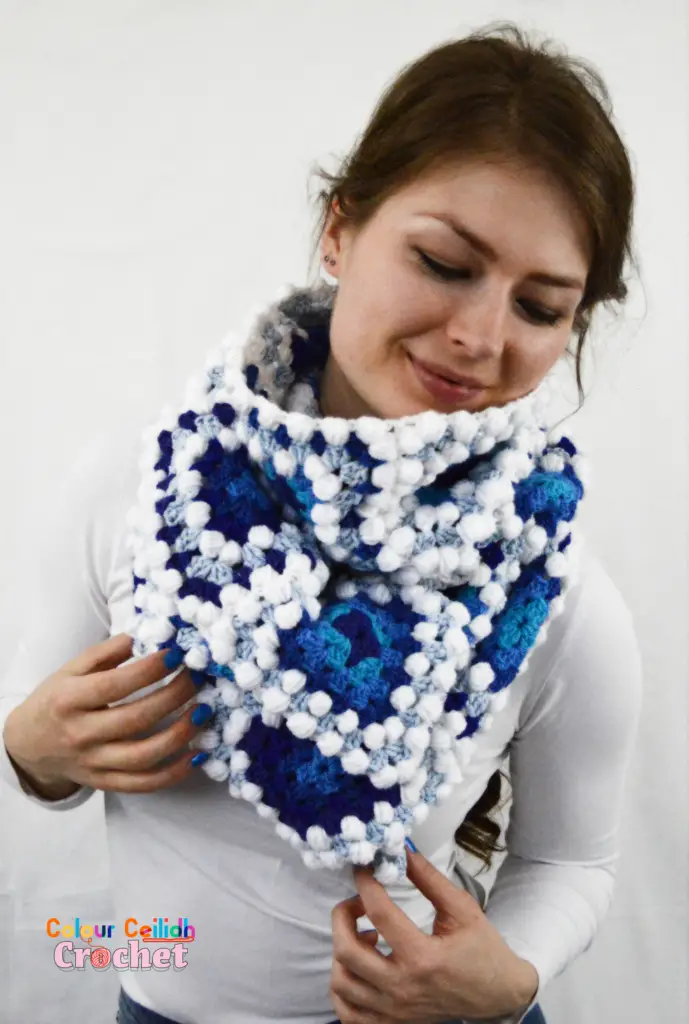
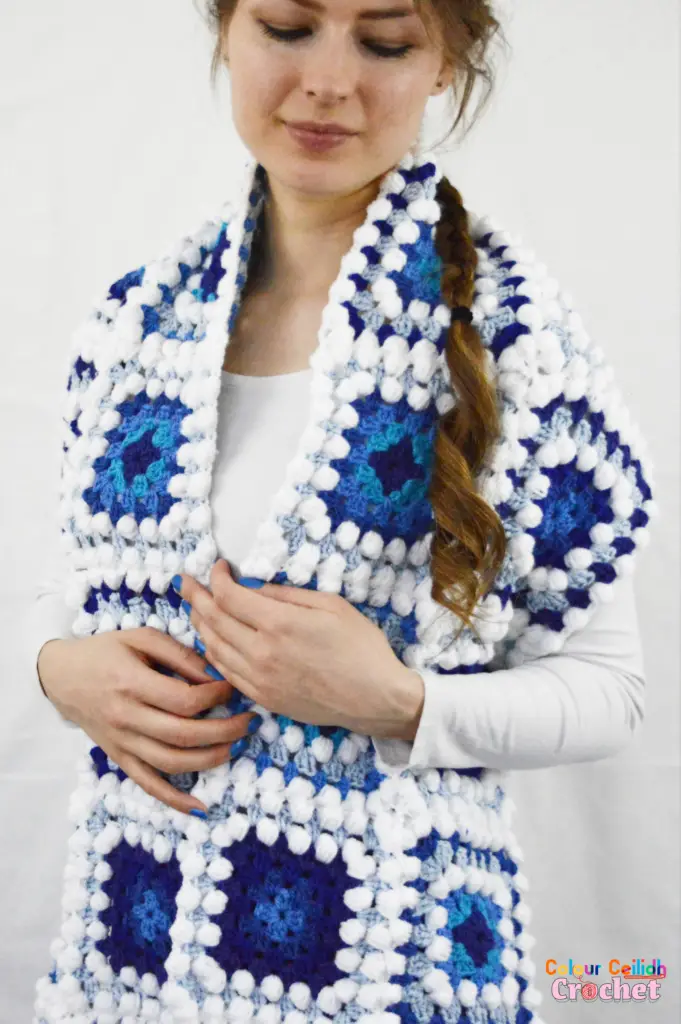
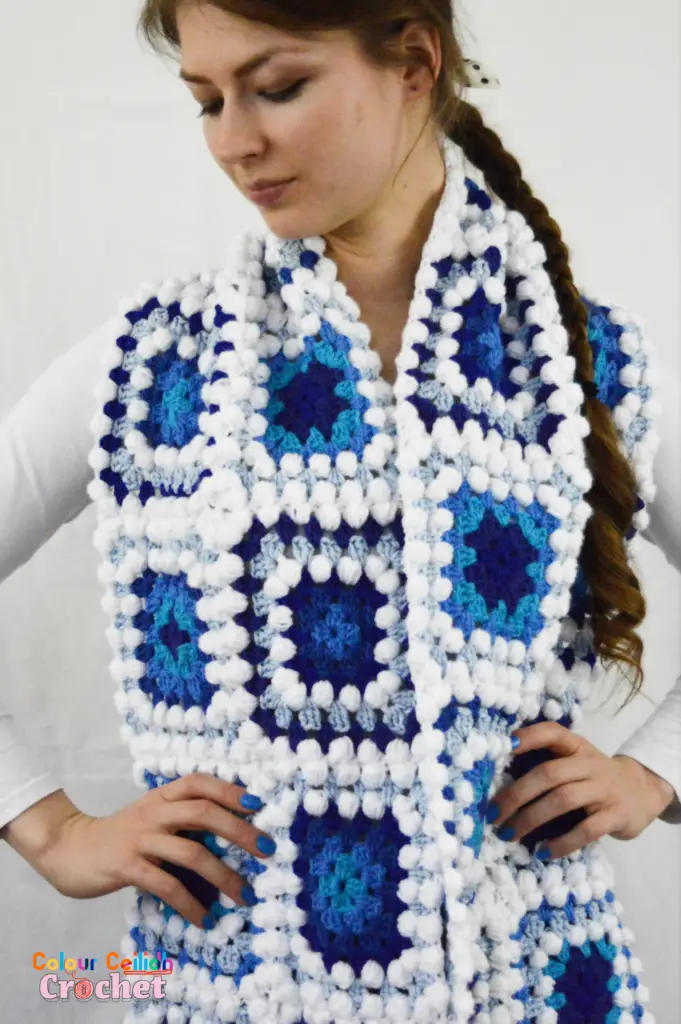
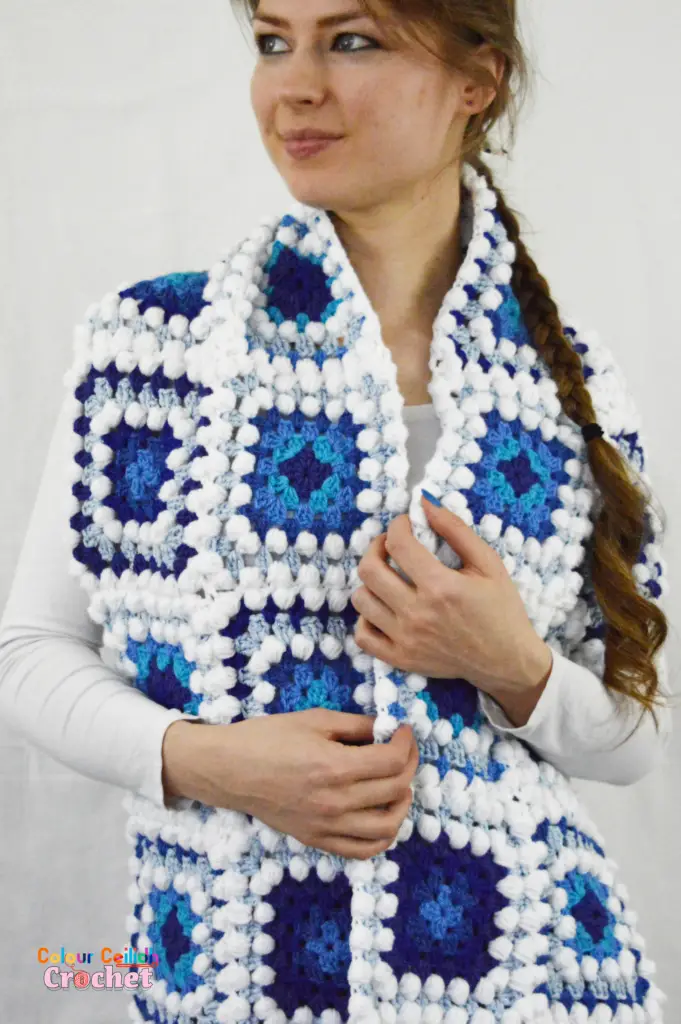
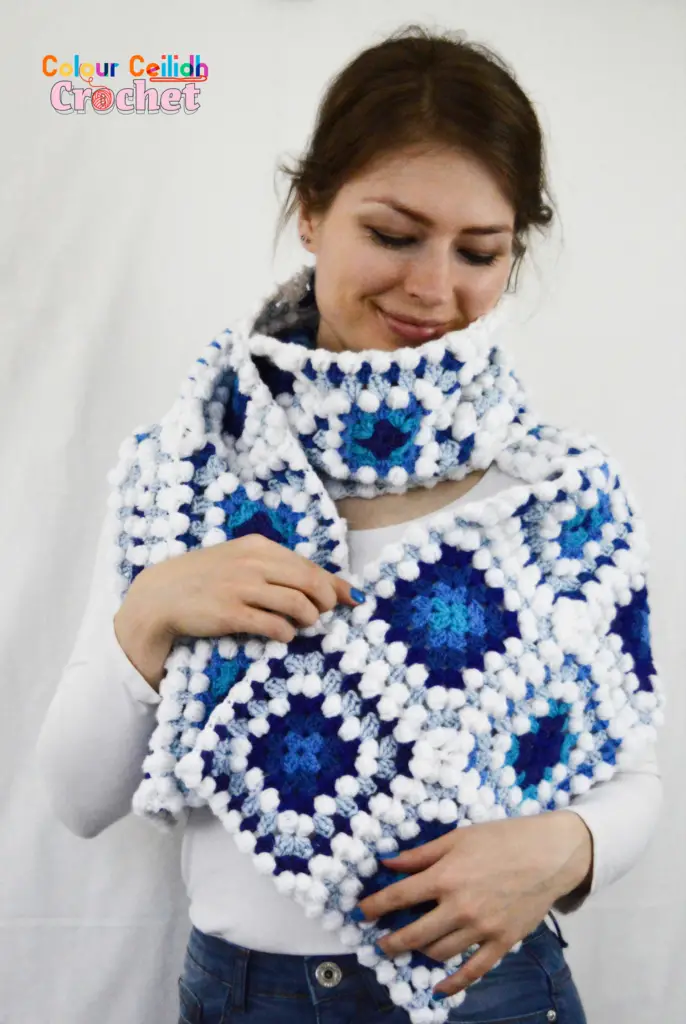
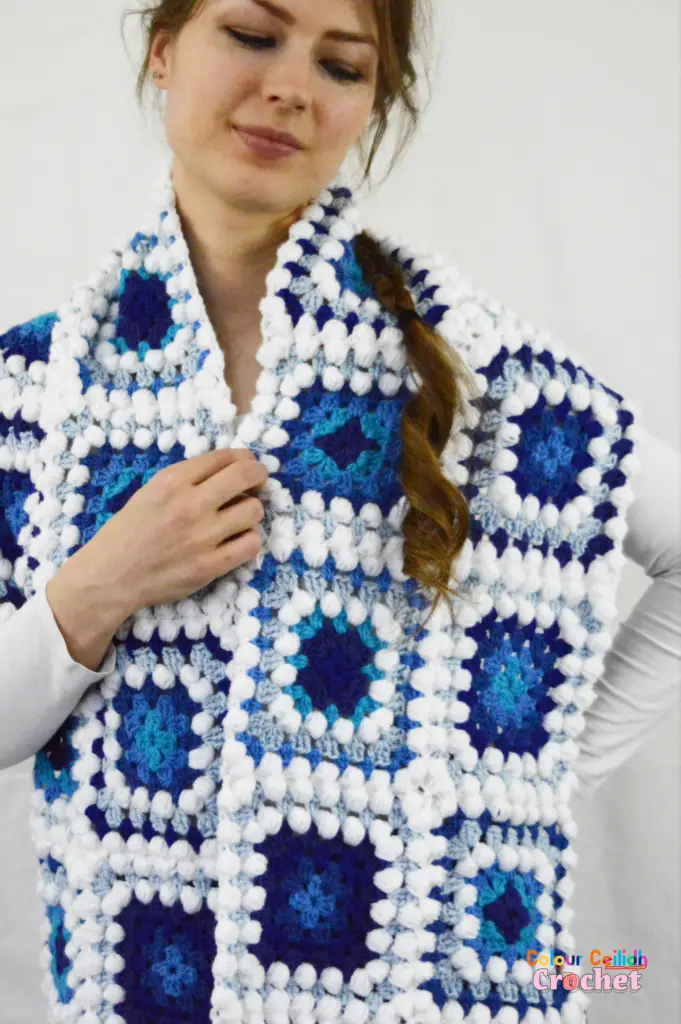
This Granny Square Scarf Icy Blues is a totally free crochet pattern for you to enjoy here on my blog & it only takes 24 granny squares of your time. The inspiration for this scarf came from my LAST PROJECT where I incorporated the puff stitch into my granny squares. And of course this yarn I am using is pretty inspiring too – I love a bit of sparkle!
This post contains affiliate links to products. I may receive a commission for purchases made through these links.
Get your instant, printable & ad-free pattern pdf on Etsy HERE.
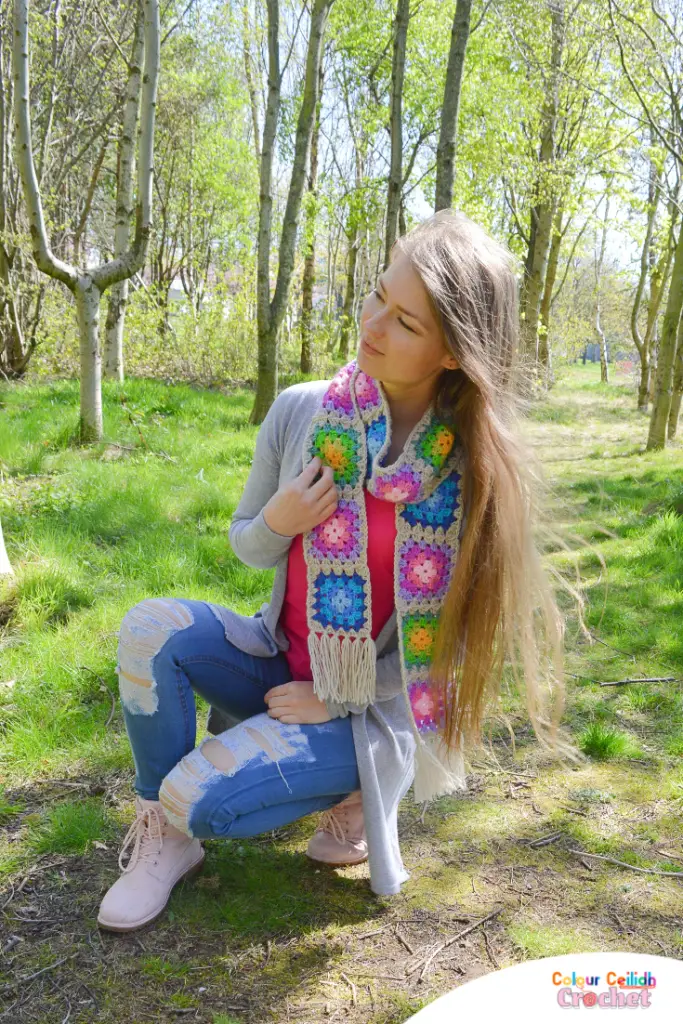
For a spring color theme, take a look at my crocus flower inspired granny square scarf below.
Blue Granny Squares
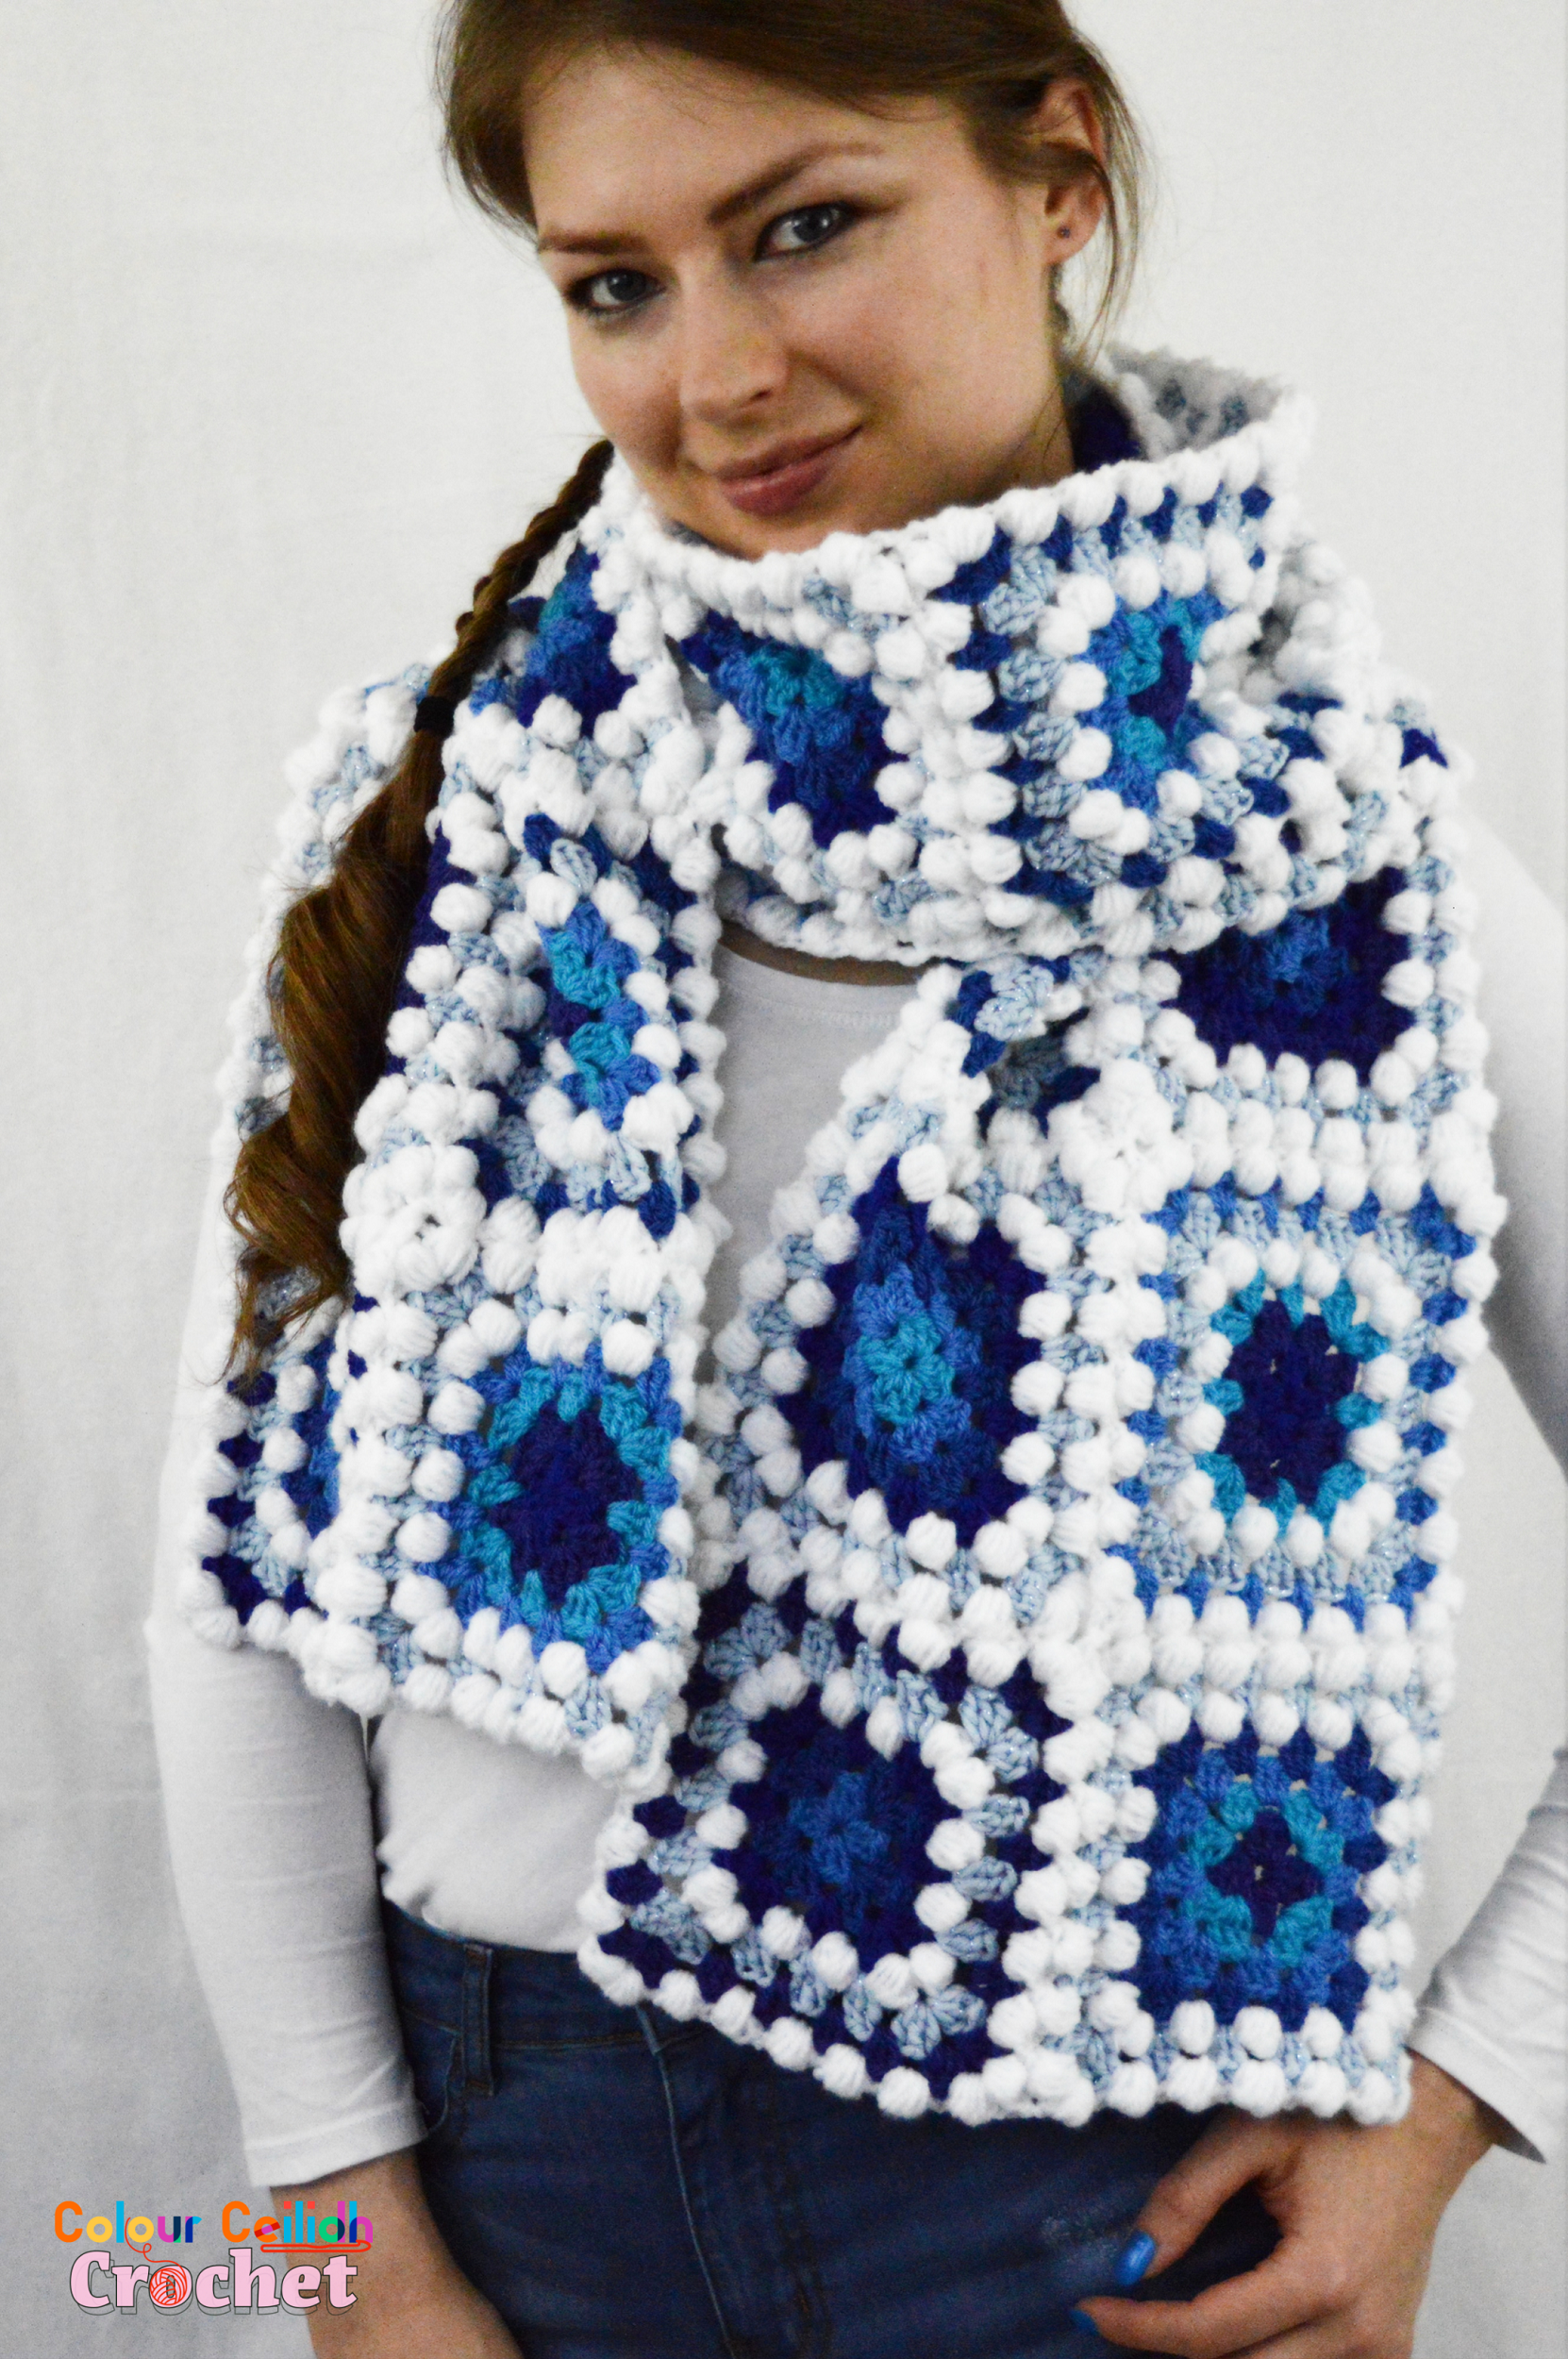
These are the squares that form the base for this Granny Square Scarf Icy Blues. As you can see, I created them by playing around with blue colours as well as white for an eye-catching contrast.
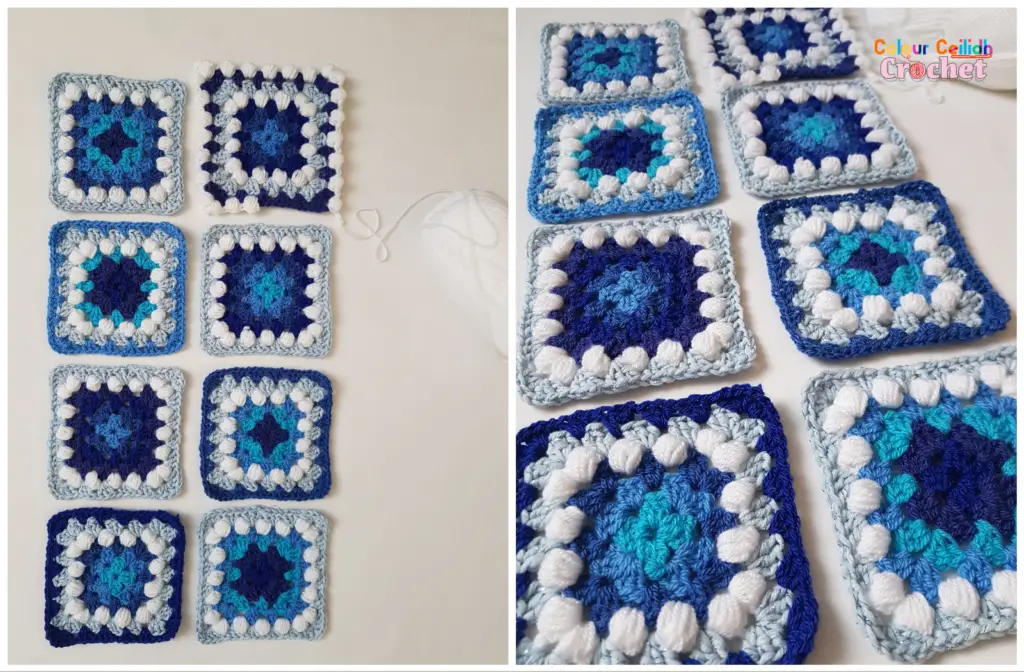
Granny Squares & Puff Stitch
In my granny square top I used the puff stitch as my joining-as-you-go method. This then gave me an idea of extending my grannies by adding yet another row of a cute blue colour and incorporating the puff stitch rounds between granny stitch rounds so that the puff stitch was sitting in the middle of the squares, forming “squares within squares”. Which I thought was pretty cool!
Pattern Information
Project level: easy
This Granny Square Scarf Icy Blues is simple to make, yet so eye-catching, with blue granny stitch rounds contrasted with white puff stitch, forming “squares within squares”. The granny squares are joined-as-you-go with the puff stitch.
Overview
- Make 3 granny squares for each of the 8 colour schemes in 2 types of crochet patterns (the only difference is the position of the puff stitch) – a total of 24 granny squares, Rnds 1-6.
- Join them together with the puff stitch, Rnd 7.
Gauge
My granny squares measure about 13.5 cm/ 5.3 in (Rnds 1-6) and about 14.5 cm/ 5.7 in including the last puff stitch joining round.
Finished Measurements
My Granny Square Scarf Icy Blues is about 29 cm/ 11.4 in wide and about 186 cm/ 73.2 in length.
Notes
For fast results, if you weave in the ends as-you-go (as My Poppet Blog describes it, tuck the yarn tail along the top of the row you’re crocheting over, and crochet right over it), you’ll only have one or two ends to weave in for each granny square. And to weave in those ends, you can do so when you make your puff stitch. The puff stitch can also be where the last ends can be hidden, by looping the tails around the puffs on the wrong side of your scarf.
When you start following the pattern remember if you struggle with joining new yarn/ changing yarn colour using the slip stitch method after fastening off in the previous round, there is a helpful photo tutorial beneath the written pattern, that also shows you how to connect your granny squares. It also talks about crocheting the puff stitch from the wrong side.
This is your basic granny square pattern with ch-1 in the corners and a puff stitch for added interest.
One round = one colour. To change colour between rounds, instead of fastening off, I like to just draw up a loop of new colour after I’ve joined the last round with the slip stitch and then pull the old colour yarn loop in by the tail until it’s level with the last round and disappears out of sight, and only the new colour yarn loop is sitting on top where my new round begins.
[UPDATE: Here’s how I change yarn color now, so that there are no tails to weave in between rounds. If you use this method, you might not need to use the slip stitch join. Check out my tutorial How To Change Yarn Color In Crochet!]
The Yarn
I used two weights of yarn, just because the sparkly aran weight one looked so pretty next to the others in DK that I couldn’t help but combining them all together. So use the larger hook for thicker yarn and smaller hook for thinner yarn.
Materials
- Yarn, in weight 3/ light/ DK/ light worsted. I used Stylecraft Special DK in White (3 x 100g skeins), Lapis (1 x 100g skein), Royal (1 x 100g), Lobelia (1 x 100g), Turquoise (1 x 100g), Aster (1 x 100g).
- Yarn, in weight 4/ medium/ aran/ afghan/ worsted. I used Stylecraft Starlight in Bergman Blue (2 x 100g skeins). OR GET YOUR YARN HERE AT LOVE CRAFTS!
- Crochet hooks, sizes G/ 7/ 4.5 mm & H/ 6/ 5 mm.
- Scissors
- Measuring tape
- Tapestry/ yarn needle
Abbreviations
- ch: chain
- dc: double crochet
- hdc: half double crochet
- hdc5tog (puff stitch): half double crochet 5 together. [Yarn over, insert hook into indicated stitch/ space, draw up a loop (stretch it to at least hdc height)] five times, yarn over, draw yarn through all 11 loops on hook
- rep: repeat
- rnd: round
- sc: single crochet
- sl: slip
- st: stitch
- yo: yarn over
Granny Square I (Make 3)
With Lobelia, ch 5, sl st to ch-1 to form a ring.
Rnd1 (Lobelia) Ch 3 (counts as dc), 2 dc in ring, *ch 1, 3 dc in ring; rep from * two more times, join with sc to top of ch-3.
Rnd2 (Turquoise) Ch 3 (counts as dc), (2 dc, ch 1, 3 dc) in same space, *(3 dc, ch 1, 3 dc) in next space; rep from * two more times, join with sl st to top of ch-3.
Rnd3 (Aster) Ch 3 (counts as dc), 2 dc in same space, *(3 dc, ch 1, 3 dc) in next space, **3 dc in next space; rep from * around, ending your last rep at **, join with sl st to top of ch-3.
Rnd4 (Lapis) Ch 3 (counts as dc), 2 dc in same space, *3 dc in next space, (3 dc, ch 1, 3 dc) in next space, **3 dc in next space; rep from * around, ending your last rep at **, join with sl st to top of ch-3. Fasten off.
Join White with a slip stitch (as detailed in the tutorial below) in any space.
Rnd5 (White) Work ch 2 the first time, and hdc thereafter (counts as hdc), hdc5tog, hdc in every non-corner space and (hdc, hdc5tog, hdc, ch 3, hdc, hdc5tog, hdc) in every corner space around, join with sl st to top of ch-2. Fasten off.
Join Bergman Blue with a slip stitch (tutorial below) in any space.
Rnd6 (Bergman Blue) Work ch 3 the first time, and dc thereafter (counts as dc), 2 dc in every non-corner space and (3 dc, ch 1, 3 dc) in every corner space around, join with sl st to top of ch-3. Fasten off.
Granny Square II (Make 3)
Make same as Granny Square I using Aster for Rnd1, Lapis for Rnd2, Royal for Rnd3. Rnd4 is the same as Granny Square I Rnd5 (so puff stitch in White), Rnd5 is the same as Granny Square I Rnd6 (so granny stitch in Bergman Blue). Make same as Granny Square I using Lobelia for Rnd6.
Granny Square III (Make 3)
Make same as Granny Square I using Royal for Rnd1, Lobelia for Rnd2, Turquoise for Rnd3. Rnd4 is the same as Granny Square I Rnd5 (so puff stitch in White), Rnd5 is the same as Granny Square I Rnd6 (so granny stitch in Bergman Blue). Make same as Granny Square I using Aster for Rnd6.
Granny Square IV (Make 3)
Make same as Granny Square I using Turquoise for Rnd1, Aster for Rnd2, Lapis for Rnd3, Royal for Rnd4, White for Rnd5 & Bergman Blue for Rnd6.
Granny Square V (Make 3)
Make same as Granny Square I using Aster for Rnd1, Lapis for Rnd2, Royal for Rnd3, Lobelia for Rnd4, White for Rnd5 & Bergman Blue for Rnd6.
Granny Square VI (Make 3)
Make same as Granny Square I using Lobelia for Rnd1, Turquoise for Rnd2, Aster for Rnd3. Rnd4 is the same as Granny Square I Rnd5 (so puff stitch in White), Rnd5 is the same as Granny Square I Rnd6 (so granny stitch in Bergman Blue). Make same as Granny Square I using Lapis for Rnd6.
Granny Square VII (Make 3)
Make same as Granny Square I using Turquoise for Rnd1, Aster for Rnd2, Lapis for Rnd3. Rnd4 is the same as Granny Square I Rnd5 (so puff stitch in White), Rnd5 is the same as Granny Square I Rnd6 (so granny stitch in Bergman Blue). Make same as Granny Square I using Royal for Rnd6.
Granny Square VIII (Make 3)
Make same as Granny Square I using Royal for Rnd1, Lobelia for Rnd2, Turquoise for Rnd3, Aster for Rnd4, White for Rnd5 & Bergman Blue for Rnd6.
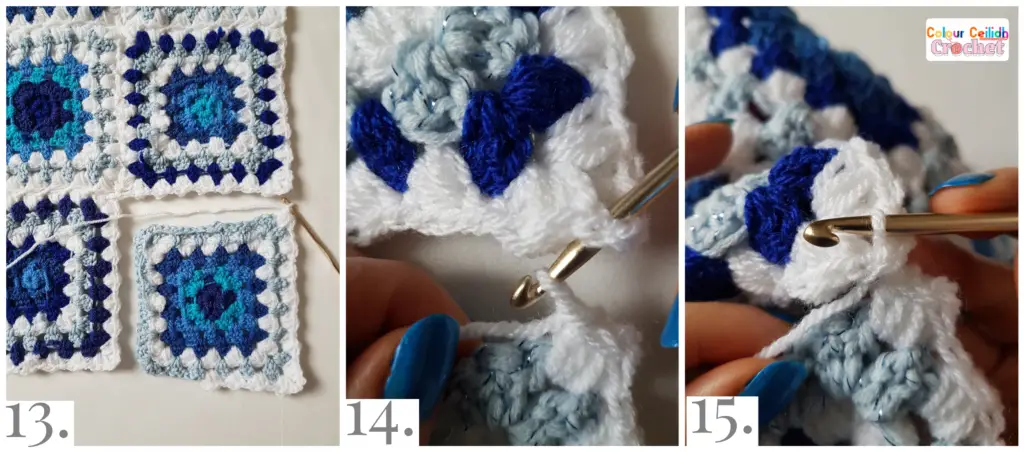
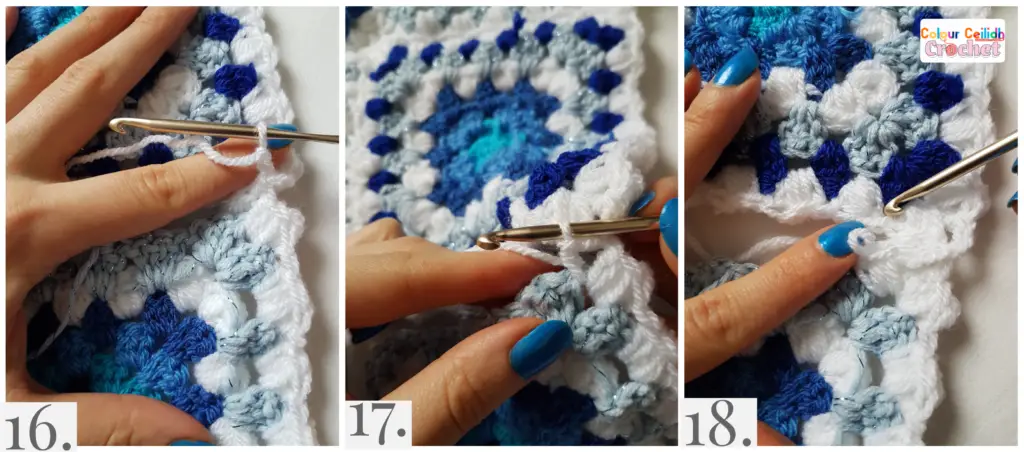
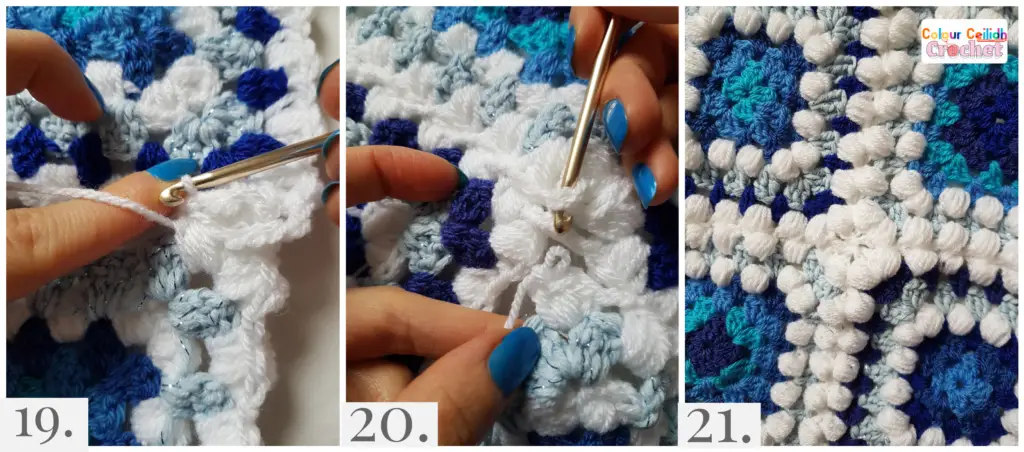
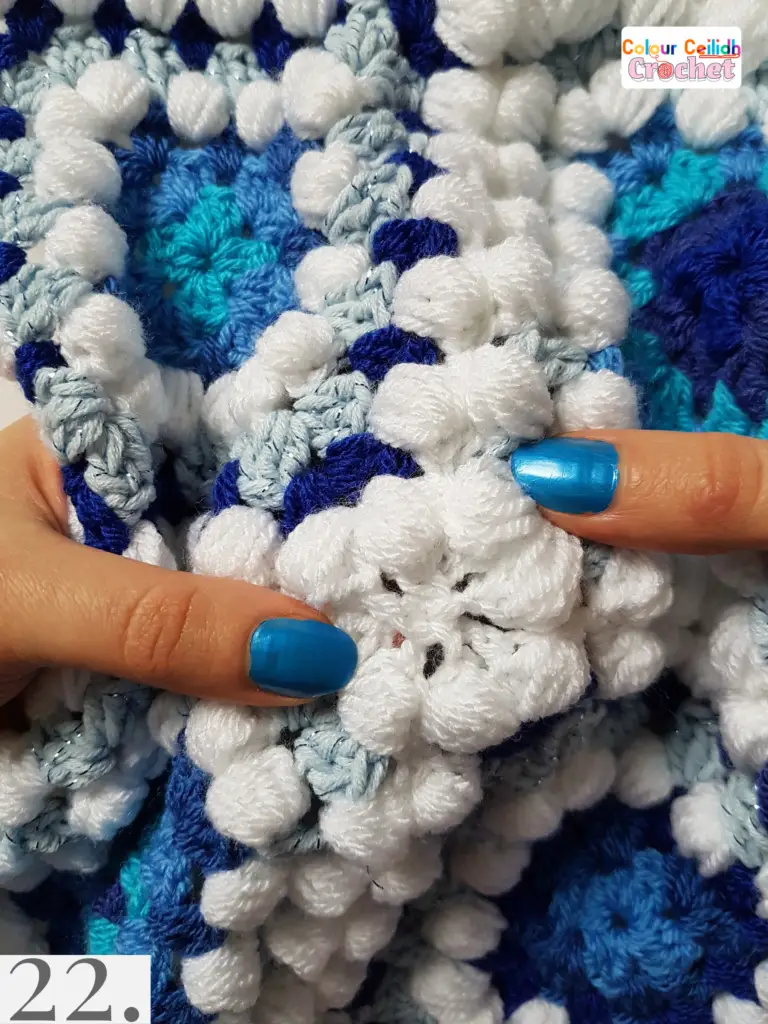
Joining New Yarn With A Slip Stitch & Joining Granny Squares With The Puff Stitch
Below is my photo tutorial for the methods I use to join new yarn and joining granny squares. For my puff stitch, I like to surround it with half double crochet stitches on either side in my granny stitch projects. So I make hdc, hdc5tog (puff stitch), hdc into every space around, and no chain 1.
Joining New Yarn With A Slip Stitch In Two Easy Steps

The Puff Stitch
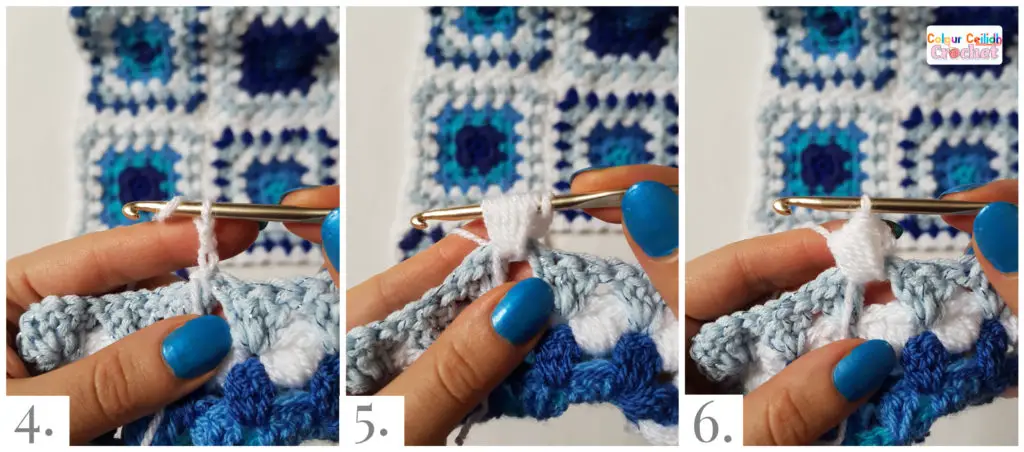
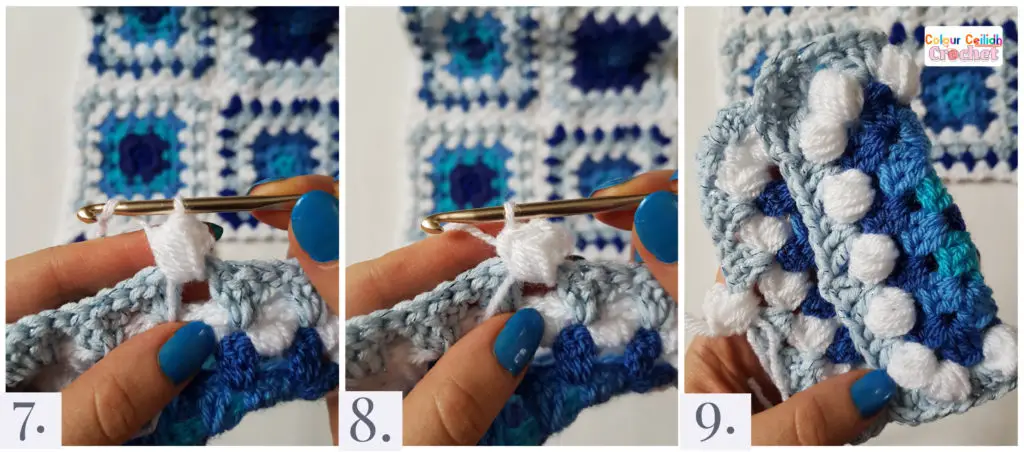
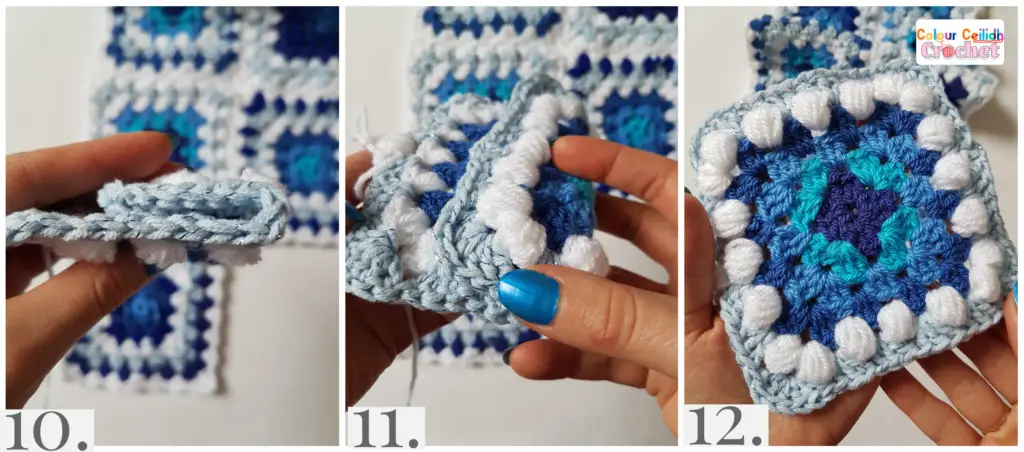
Joining Granny Squares With The Puff Stitch
And that’s it!
Well Done!
Hopefully you’re >>> en-joining <<< (see what I did there? ;D) your Granny Square Scarf Icy Blues & I’l see you next time.
If you enjoyed my free pattern for this granny square scarf, please share the link to this post with your friends, subscribe to my email list (the form pops up when you click around or come back again), Pin your favourite image by hovering over it and follow me on Pinterest so you never miss a pin, like my Facebook page and follow me on Instagram to see behind the scenes and for more color in your life.
Happy Crocheting!
Justina