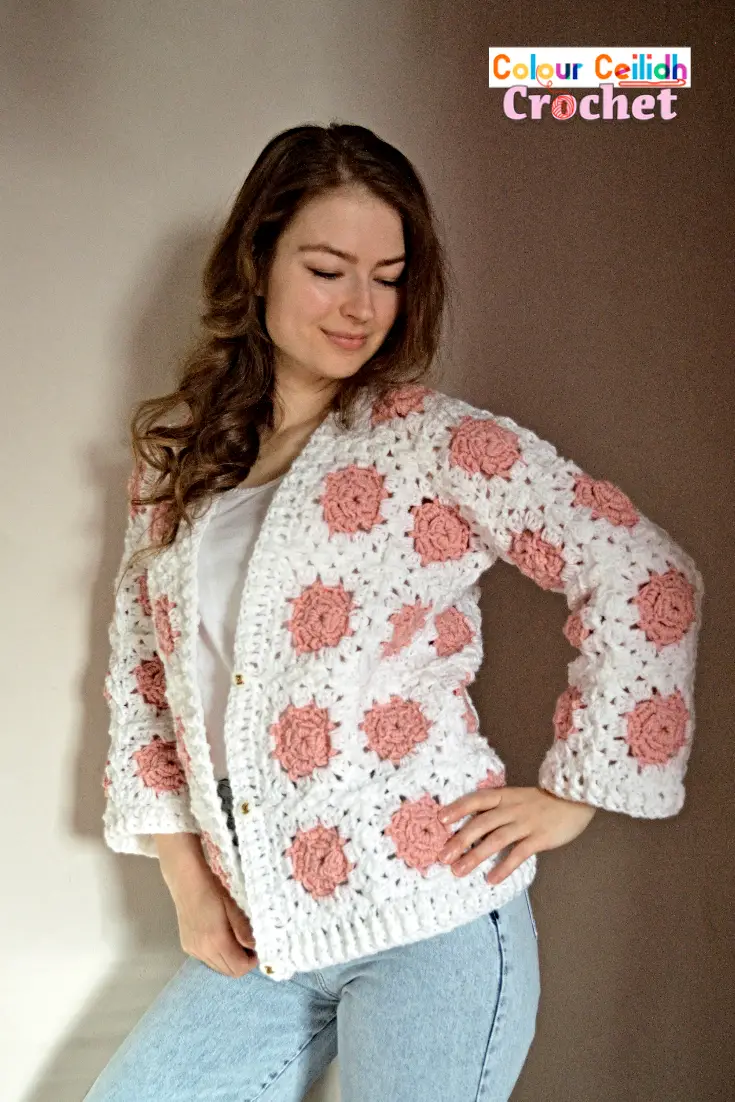
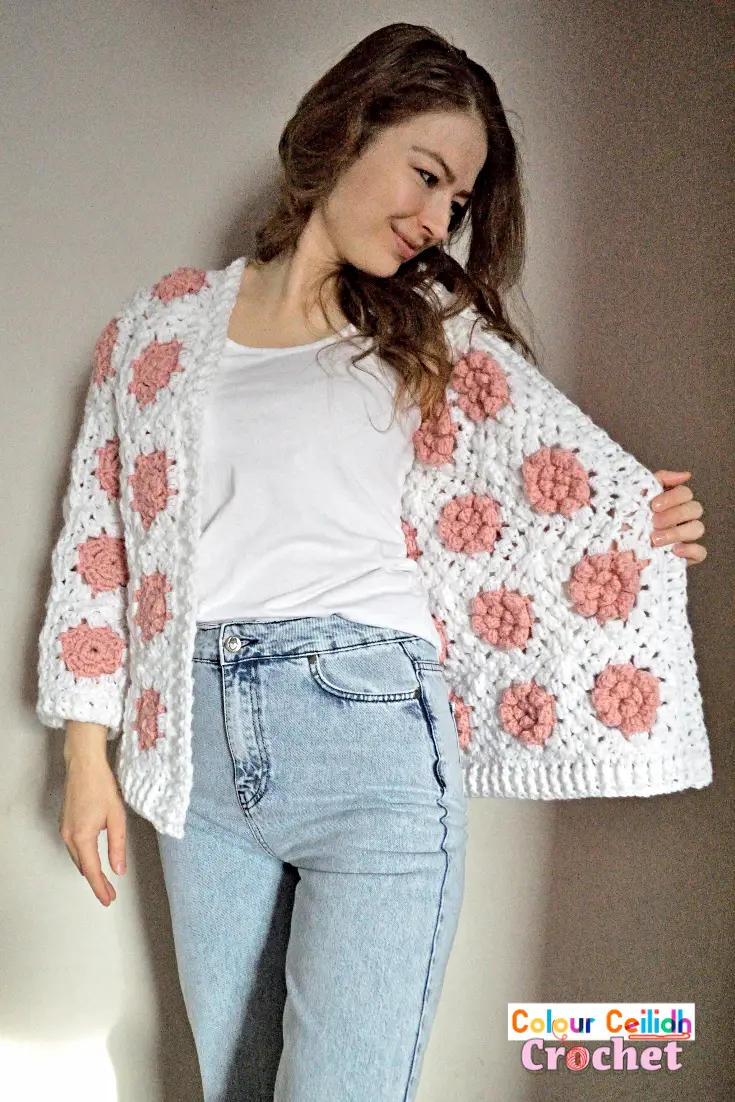
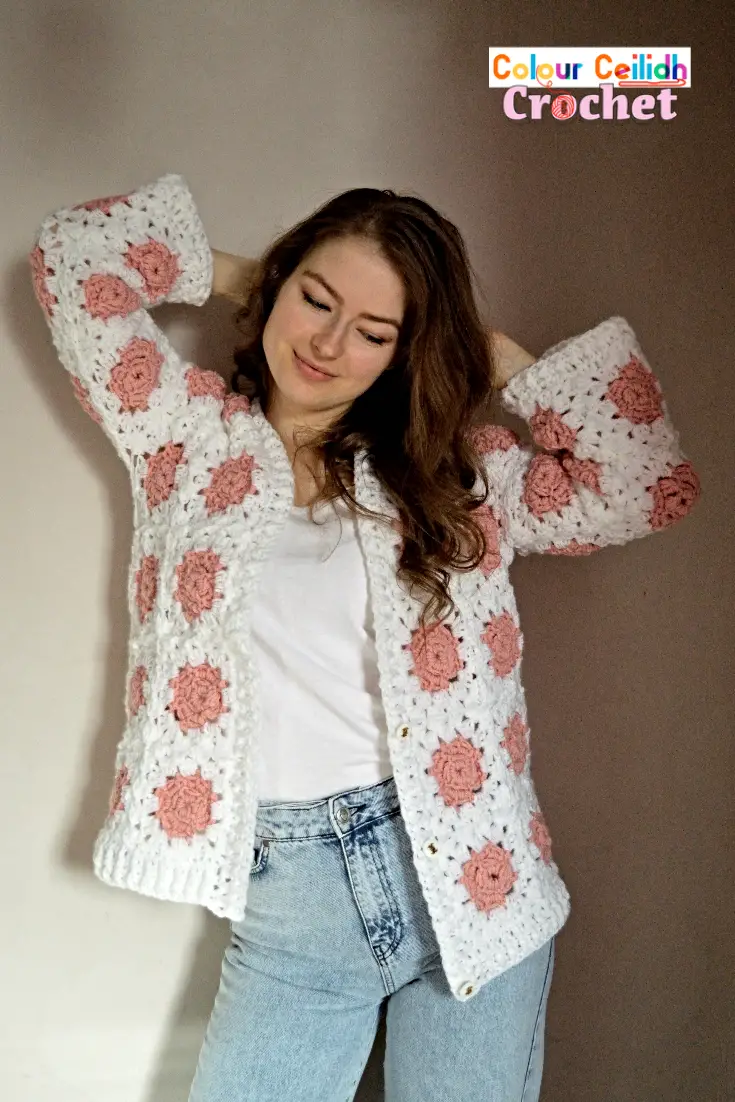
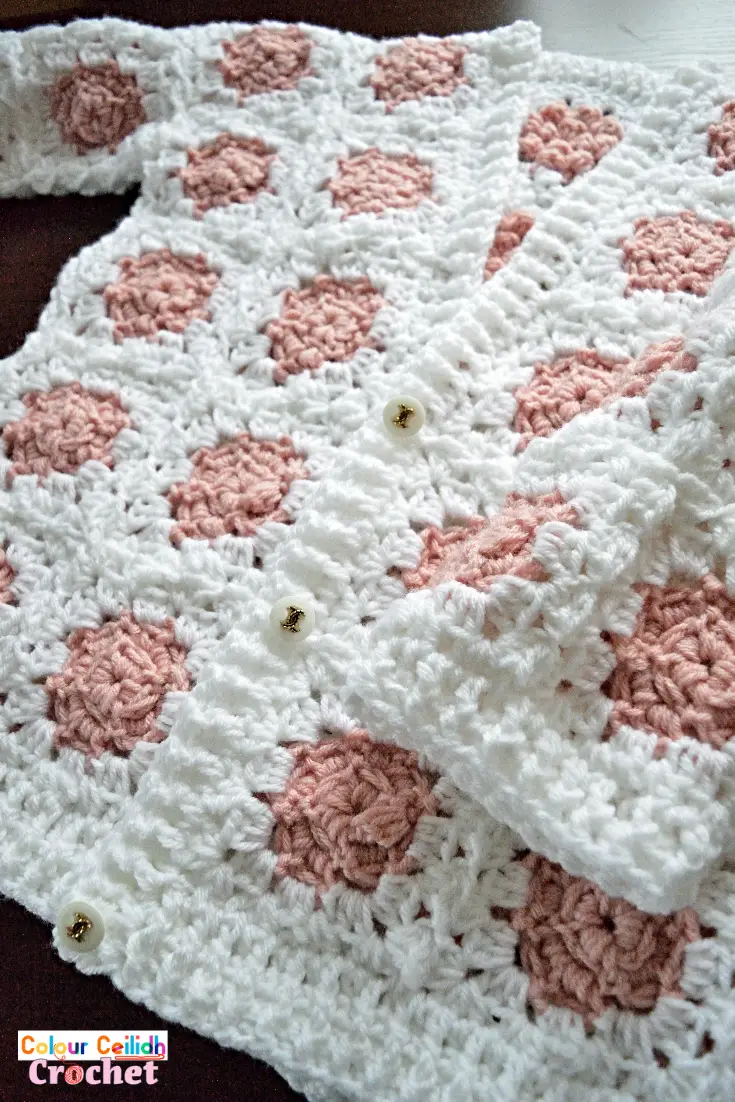
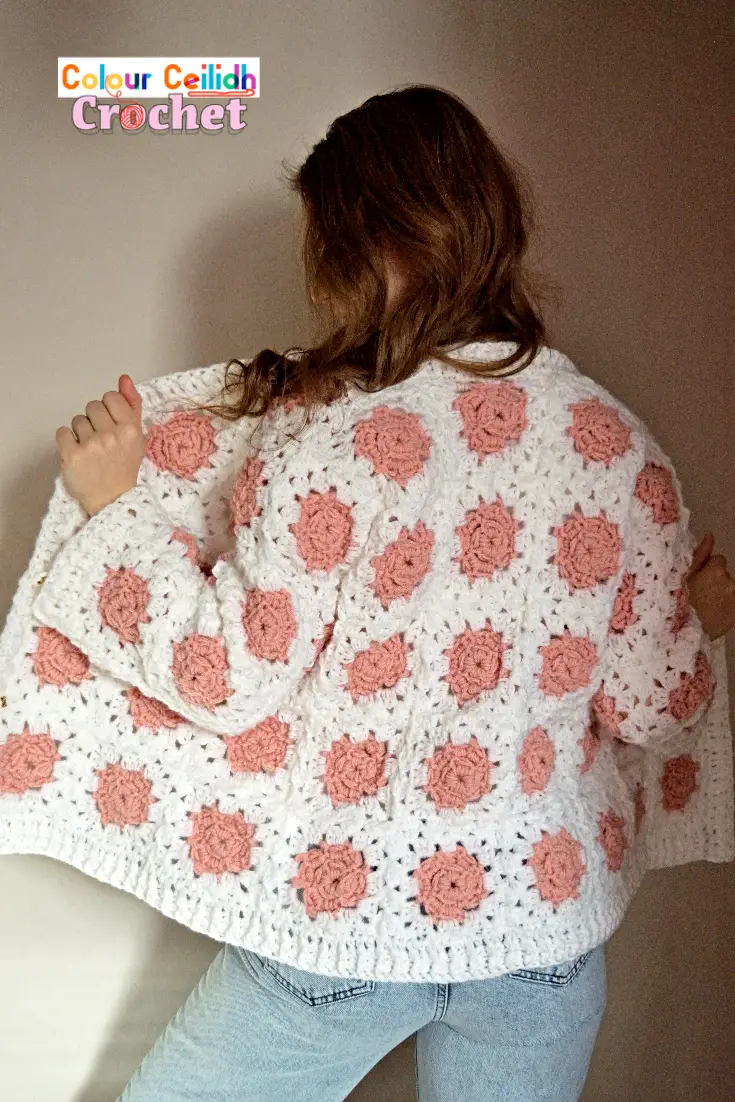
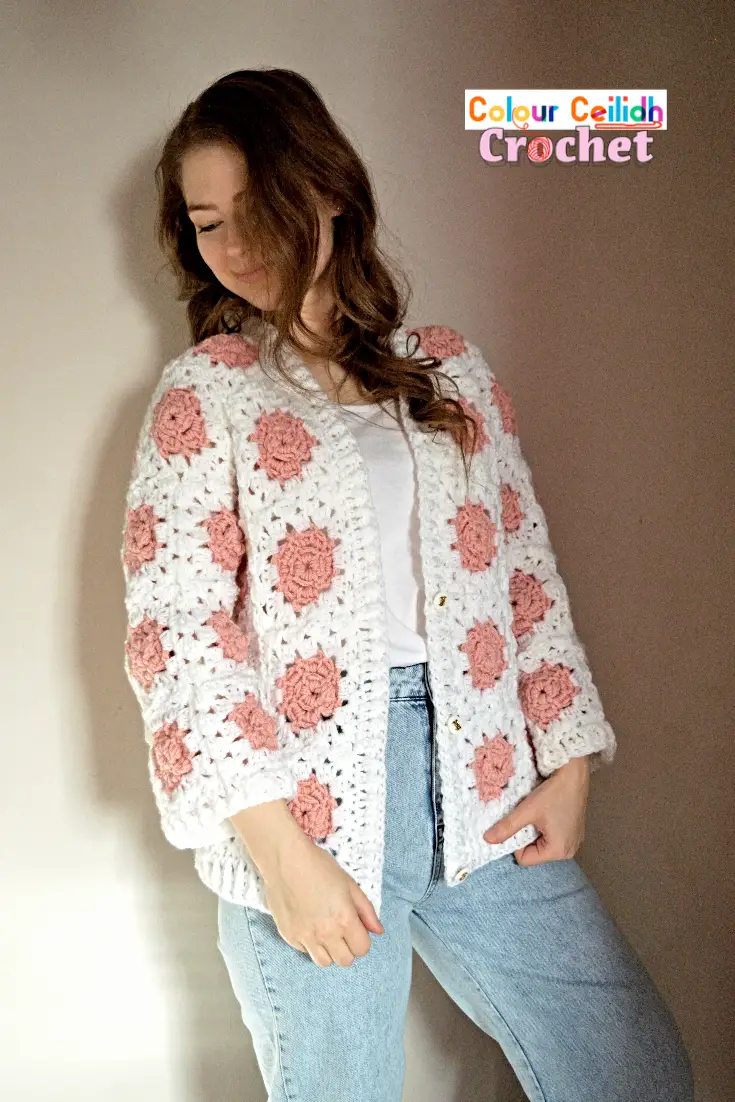
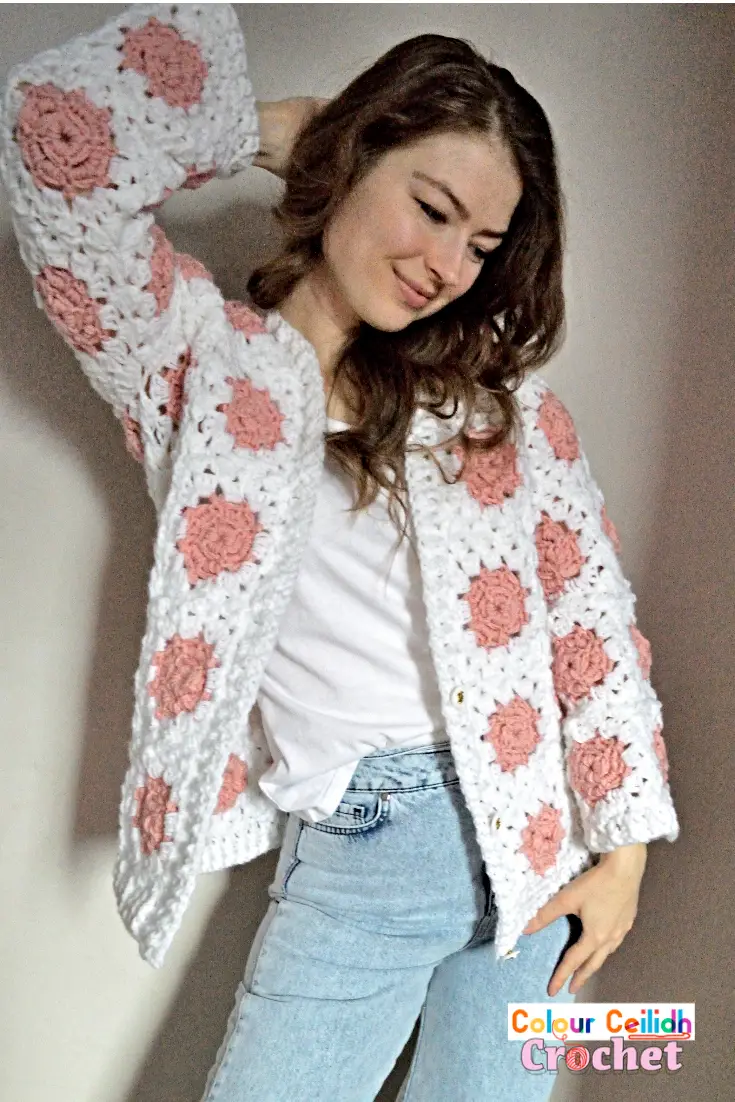
This crochet granny square cardigan is made with crochet rose flower granny squares that are designed to look more natural and artistic, almost like you’re looking at pictures of roses. I love how the sleeves don’t have a lot of bulk in this cardigan and are so simple. This free pattern has a step-by-step video tutorial, is straightforward & easy to follow and there is no seaming involved if you choose to join as you go.
To get a closer look at the roses, please watch the YouTube tutorial (link below).
This post contains affiliate links to products. I may receive a small commission for purchases made through these links.
It All Begins with Yarn…
For this crochet cardigan I used a 9 mm hook and Lion Brand Vanna’s Choice in White and Pink, which is a worsted weight yarn.
…And Inspiration…
Have you ever looked at a blanket and thought, I wonder what it would look like as a cardigan? (LOL) I like blankets, but I probably like making cardigans more! I’ve seen lots of beautiful flower granny squares in blankets, but for a while now I wondered what kind of flower square I’d like to wear as an item of clothing. Well this is my answer! I chose the classic English rose.
Customize Your Cardi
You can easily change the length of your cardigan by adding or removing a row of granny squares at the bottom.
Add Some Buttons!
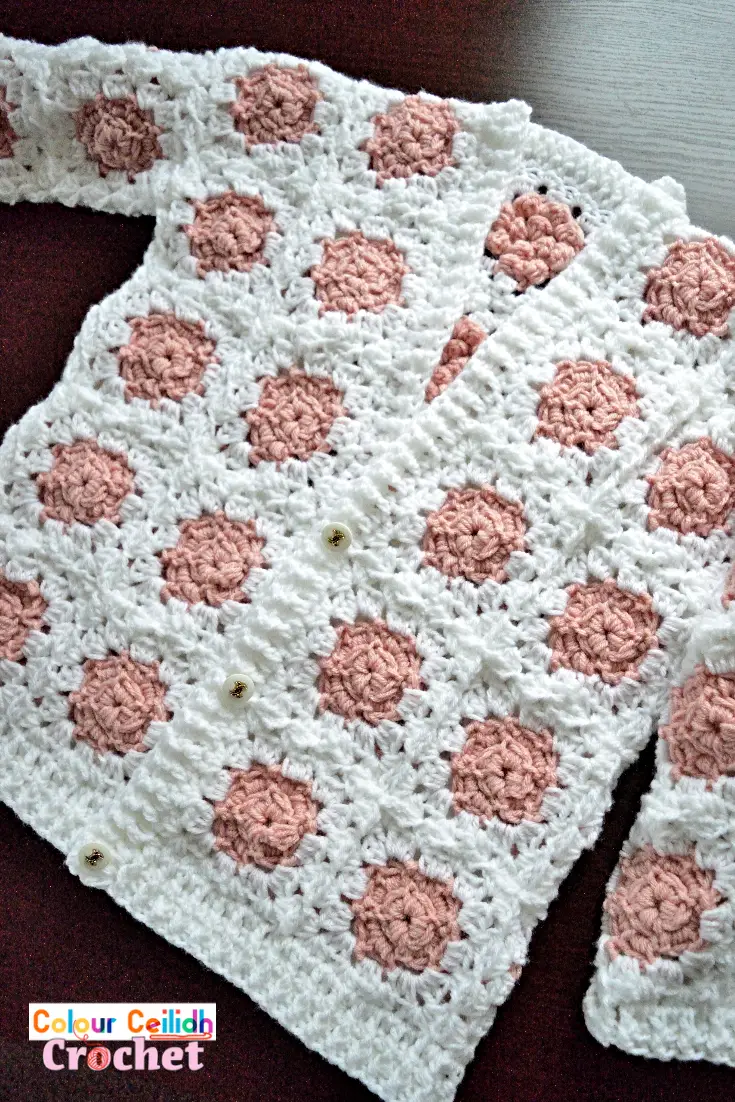
You can also turn your open-front cardigan into a V-neck by adding a few buttons that are about 1″ wide . Simply sew them on and you’re ready to go as the gaps between your ribbing stitches will serve as ready-made button holes.
I was looking for 1″ or bigger buttons when I came accross these… The ones in the picture are actually about 0.8″ or 2 cm wide but they were so pretty that I had to use them in the end. They hold well, but that’s probably the smallest I would go. You will know best what size buttons you need once you make your cardigan and take a look at the gaps between your stitches in the ribbing at the front.
I have to say, I was so excited to pick out the buttons! I was so ridiculously excited that I already can’t wait to do it again for my next project! And I decided there and then that I should really use more buttons in my projects as I feel the same high as when I’m picking out new yarn! (LOL)
Crochet Granny Square Cardigan “Rose” – Free Pattern
- Love it? PIN it!.
- You can add this pattern to your Ravelry queue here.
- Ready to crochet but don’t want the ads in your way? PRINT it here*.
* a print friendly version for a small fee.
Description
This crochet granny square cardigan is made with crochet rose flower granny squares that are designed to look more natural and artistic, almost like you’re looking at pictures of roses. I love how the sleeves don’t have a lot of bulk in this cardigan and are so simple. This free pattern has a step-by-step video tutorial, is straightforward & easy to follow and there is no seaming involved if you choose to join as you go.

Sizes
This cardigan is available in 2 sizes but they actually cover 9 sizes (XS, S, M, L, XL, 2X, 3X, 4X, 5X). The first cardigan size is XS-L which covers XS, S, M & L and I also call it “the smaller sizes” in the video.
And the second cardigan size is XL- 5X which covers XL, 2X, 3X, 4X & 5X. I also refer to it as “the larger sizes” in the video. How original, I know…
The cardigan is approx 24.5 / 29 inches long (but in reality crochet garments can stretch by an additional 1 – 2″ when worn, also depends on your tension). Model is 5’7″, wears size XS – L and is a size S/M.
These sizes are based on the Craft Yarn Council standard body measurements and sizing. But if you would like to double check your size, search for “Craft Yarn Council woman size charts”.
Care Instructions
Lion Brand Vanna’s Choice yarn is a 100% acrylic. It’s machine washable at 30 C / 86 F.
Pattern Notes
- Project Level: Easy
- Read this if you want to learn how I change color without tails. To minimise weaving in the ends and because I love working with color so much I developed a method of how to change color in crochet without tails.
- The cardigan is available in sizes XS (S, M, L, XL, 2X, 3X, 4X, 5X) which are divided in 2 groups: “the smaller size cardigan” which covers XS, S, M, L and “the larger size cardigan” which covers XL, 2X, 3X, 4X and 5X. When I give you measurements and numbers, I will summarize it in two numbers for convenience. E.g. the cardigan length is 24.5 / 29 inches long, which means that 24.5″ refers to the sizes XS, S, M & L and 29″ refers to the larger size cardigan (sizes XL, 2X, 3X, 4X & 5X).
Crochet Granny Square Cardigan “Rose” – Video Tutorial
Here’s a link to the Crochet Rose Flower Granny Square | Easy Crochet Granny Square Cardigan video on YouTube.
Materials
- Lion Brand Vanna’s Choice (4 / Medium / Aran weight, 100 g / 3.5 oz, 156 m / 170 yd, 100% acrylic) 6/7 skeins in White & 4/5 skeins in Pink (the first number refers to the smaller sizes, and the second number refers to the larger sizes).
- 9 mm crochet hook.
- Optional: 3 or 4 approx 1″ wide buttons. I got mine from eBay.
Gauge
Following the pattern below, one granny square (6 rnds) is approx 4.6-4.8″ wide.
Abbreviations (US Terms)
- BPdc: back post double crochet
- ch: chain
- dc: double crochet
- dc3tog: double crochet three together. Work 3 partial double crochet stitches into the same stitch or space indicated, leaving the last loop of each on the hook. So yarn over, insert hook in the indicated stitch / space, yarn over and pull through, yarn over and pull through 2 loops and stop there. Repeat 2 more times. You will have 4 loops on the hook. Yarn over and draw through all loops on the hook
- FPdc: front post double crochet
- hdc: half double crochet
- rep: repeat
- sc: single crochet
- sl: slip
- st: stitch
- t: turn
Crochet Granny Square Cardigan “Rose” Pattern:
Pattern Overview – 3 Easy Steps
- Make your first granny square.
- As you make more, join them into the body shape shown in the diagram below.
- Add ribbing!
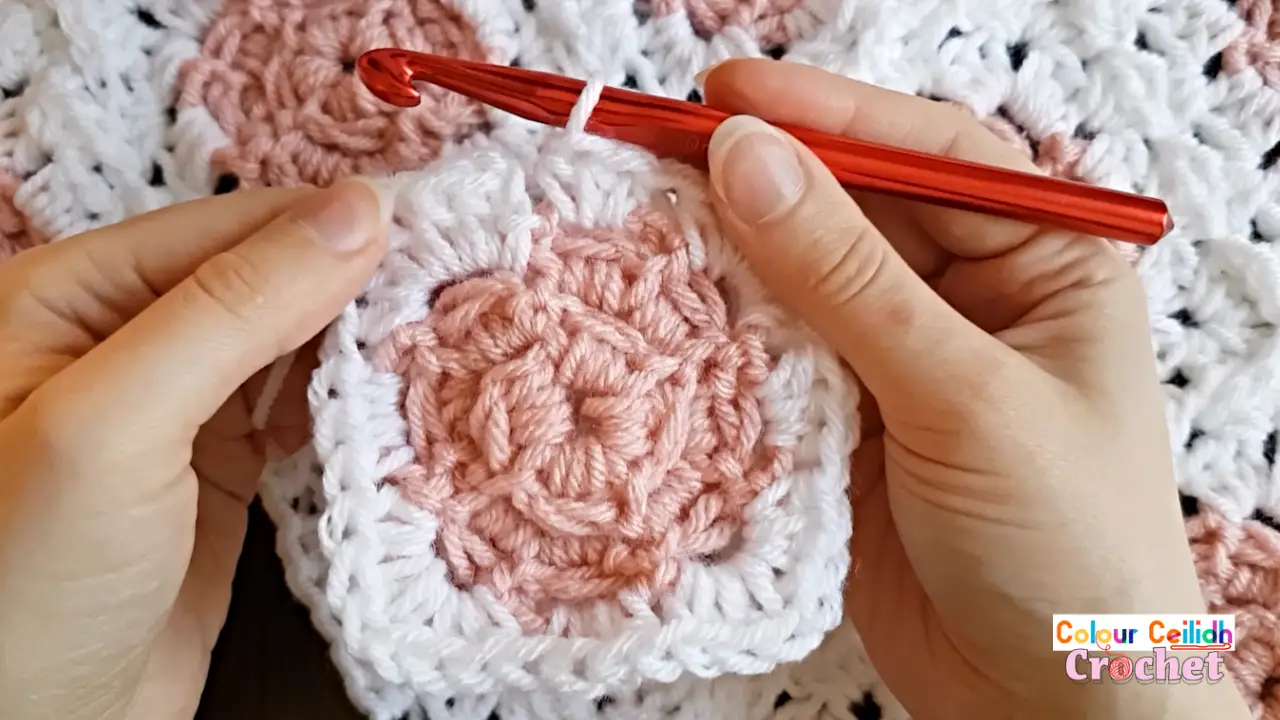
1. Make Your First Granny Square.
For work in progress shots and close-ups of the granny square, please refer to the video tutorial (link above).
With Pink, ch 4, sl st to 1st ch to form a ring.
Rnd1 (Pink) *Ch 1, dc3tog, sl st (petal formed); rep from * 3 times. (4 petals)
Rnd2 (Pink) *Ch 3, sl st to next sl st in between petals; rep from * around (end with the last sl st just before 1st ch-3). (4 ch-3 loops)
Rnd3 (Pink) (Sl st, ch 1, dc3tog, sl st, ch 1, dc3tog, sl st) in same ch-3 space (2 petals formed) and every space. (8 petals)
Rnd4 (Pink) Rep rnd2. (8 ch-3 loops)
Rnd5 (White) Sl st in same ch-3 space, ch 2 (counts as hdc), (2 hdc, ch 1, 3 hdc) in same space (corner made), *3hdc in next space, (3 hdc, ch 1, 3 hdc) in next space; rep from * 2 times, 3 hdc in next space, join with sl st to top of ch-2. (40 sts incl 4 corners)
Rnd6 (White) Ch 2 (counts as hdc), 2 hdc in same space, make (3 hdc, ch 1, 3 hdc) in corner spaces and 3 hdc in other spaces, join with sl st to top of ch-2, fasten off. (52 sts incl 4 corners)
2. Join Granny Squares Together.
As you make more granny squares, join them into the body shape shown in the diagram below. The red line represents the shoulder seam. My general advice is that you start by making the back piece first, then the front pieces, and then the sleeves.

A Couple of Things to Consider
Should I Align the Squares in any Specific Way?
The rose is asymmetric on purpose so it looks like a picture of a natural flower. Before you start joining your squares, think about how you would like them to be aligned. Take a look at your flower. To me I could see slight differences as I was turning the square around – the rose looked as if it was “photographed” from different angles. And when I stood in front of the mirror with my square considering which way to orient it so I love the way my flower looked the best, I decided to arrange all my squares in the exact same way – with the yarn tails pointing downwards. You see you need to consider this sort of thing now, before you start joining them together. Or, you could just join them in a random way too!
To Seam or Not To Seam?
Option 1. Join the squares in the layout shown in the diagram, then fold the cardigan and seam the sides and the sleeves.
Option 2 . When you start joining the squares in the front, so you don’t have to do any seaming later, remember to leave an opening for the armhole but still join as-you-go on the cardigan sides and the shoulders.
Made a mistake? Even if you make a mistake, I found that it’s easy to undo a little bit of your last round so you can go back and join again.
Join Granny Squares As-You-Go in the Last Round
Finally, this is the last piece of the puzzle you need before you’re all set to go and enjoy the making of your new cardigan! Isn’t this exciting?
Join Your First Two Squares Together
We’ll start joining in the corner.
Start making the corner but stop after the first 3 hdc. Remove your hook from the loop, insert the hook front to back through the corner space of the other square you’re joining with, pick up the loose loop, pull it up and ch 1, 3 hdc in the same corner space to complete the corner. *Remove the hook from the loop, insert the hook front to back through the next space along of the other granny, pick up the loose loop, pull it up and ch 1, and make 3 hdc in the next space again. Rep from * until you joined the second corner with a ch 1.
When You Join With Two or More Sides
After you’ve joined a few squares together, you will need to start joining on more than one side. That’s when I start joining with diagonal squares in the corners whenever diagonal squares are present.
For more details, see the video tutorial.
So What About the Armholes?..
Congratulations, you’ve come this far! In the last round, one granny square has 4 clusters per side.
Sizes XS, S, M & L. Leave 6 granny clusters from the shoulder down for the armhole opening (1.5 granny squares). The armhole circumference will be 12 granny clusters in total.
Sizes XL, 2X, 3X, 4X & 5X. Leave 8 granny clusters from the shoulder down for the armhole opening (2 full granny squares). The armhole circumference will be 16 granny clusters in total.
…And The Sleeves?
So you made your armholes, yay! Now simply join some squares into the armhole openings to begin making your sleeves.
Sizes XS, S, M & L. Your sleeve is a 3 X 3 square. Start with the middle or top square where your shoulder is. You will need to find the half-way points of the square you’re joining with and the adjacent square you join with last. Then join a square on either side of the middle square, starting and ending with half-way points of the squares you’re joining with. Keep “growing” the length of your sleeve until you have a full sleeve.
Sizes XL, 2X, 3X, 4X & 5X. Your sleeve is a 3 X 4 rectangle. Start anywhere and simply extend your body by adding 2 squares at the front and 2 squares at the back. Keep “growing” the length of your sleeve until you have a full sleeve.
3. Add Ribbing!
We’ll be adding ribbing in the following order:
- cardigan bottom,
- cardigan front around the neck,
- and the sleeves.
Turn Your Cardigan Around
First, facing the right side (although it doesn’t really matter), turn your cardigan upside down and find the top right corner where you’ll start your 1st row of ribbing.
How to Join New Yarn
To jon new yarn, simply use the slip stitch method: make a slip knot on your hook, insert hook in the space indicated, yarn over and pull through the fabric & the slip knot.
Ribbing Rows
Row1 (White) Ch 3 (counts as dc). Make dc for every hdc in granny clusters and every granny square corner where granny squares are joined together. When you make the front ribbing, make 2 dc for every row of ribbing and an extra dc in the first and last corners of the row for suppleness. Turn.
Row2 (White) Ch 2, skip the first post below, *FPdc around the next post, BPdc around the next post. Rep from *, t.
Row3 (White) Ch 2, skip the first post below. Make FPdc for every front ridge and BPdc for every back ridge to continue growing ridges, t.
How Many Rows of Ribbing?
It’s up to you but I did 3 rows of ribbing at the bottom of the cardigan and 2 rows at the front around the neck and 2 rows for the sleeves.
Notes
- When you crochet around the neck area, make twice as many sts in the 1st row to allow for stretching.
- And when you make the ribbing for the sleeves, you will crochet in the round as there’s no need to turn. Simply join with a sl st to the top of ch-2 at the end of each rnd and continue as normal.
More Ideas
Your Crochet has some pretty Flower Garden Crochet Blanket ideas. Moara Crochet has a nice Crochet Rose Granny Square. Lastly, Crafty Kitty Crochet has a sweet Rose Granny Square Crochet Pattern.
Well Done!
I hope you enjoyed this free crochet pattern for my crochet granny square cardigan “Rose”. What should I crochet next? See you in my next pattern!
Happy crocheting!
Justina