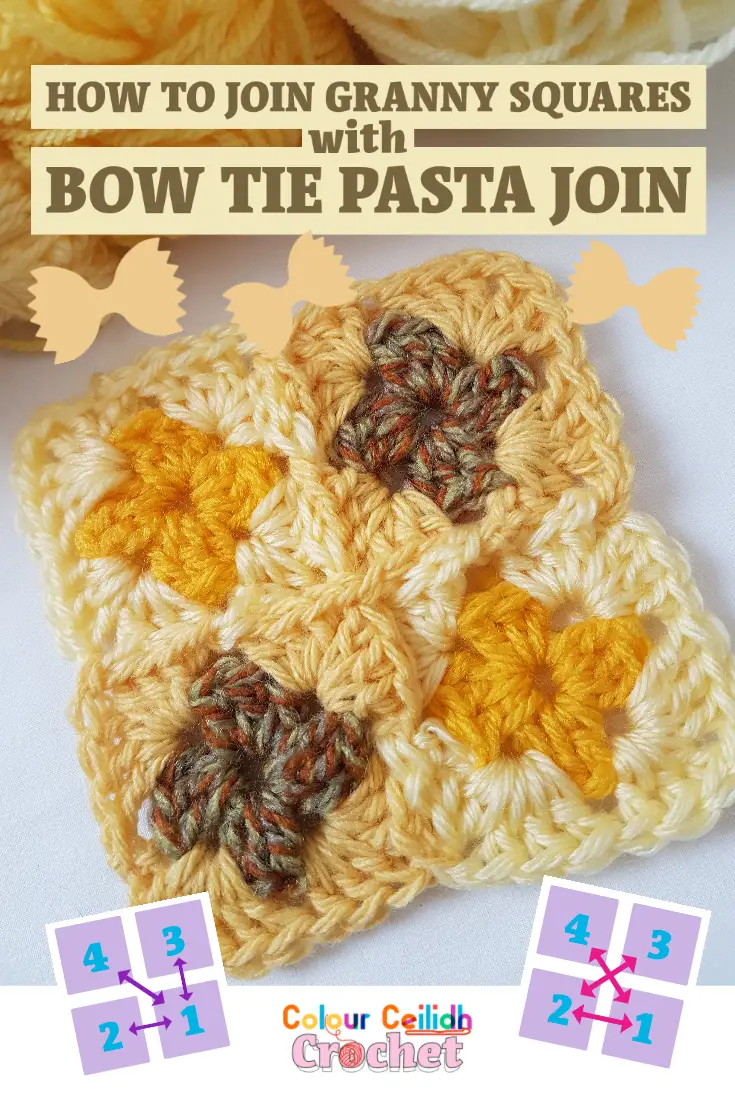
This method of How To Join Granny Squares With Bow Tie Pasta Join is my favourite for joining granny squares together. It’s simple, seamless, and decorative. I love the braided look on the sides of the squares where they are joined. And I love to watch the bow tie pasta shapes emerge in the corners diagonally between the granny squares as I build my project.
Not to mention joining my squares immediately into my project and avoiding a big procrastination-inducing pile of granny squares!
Simple Principle
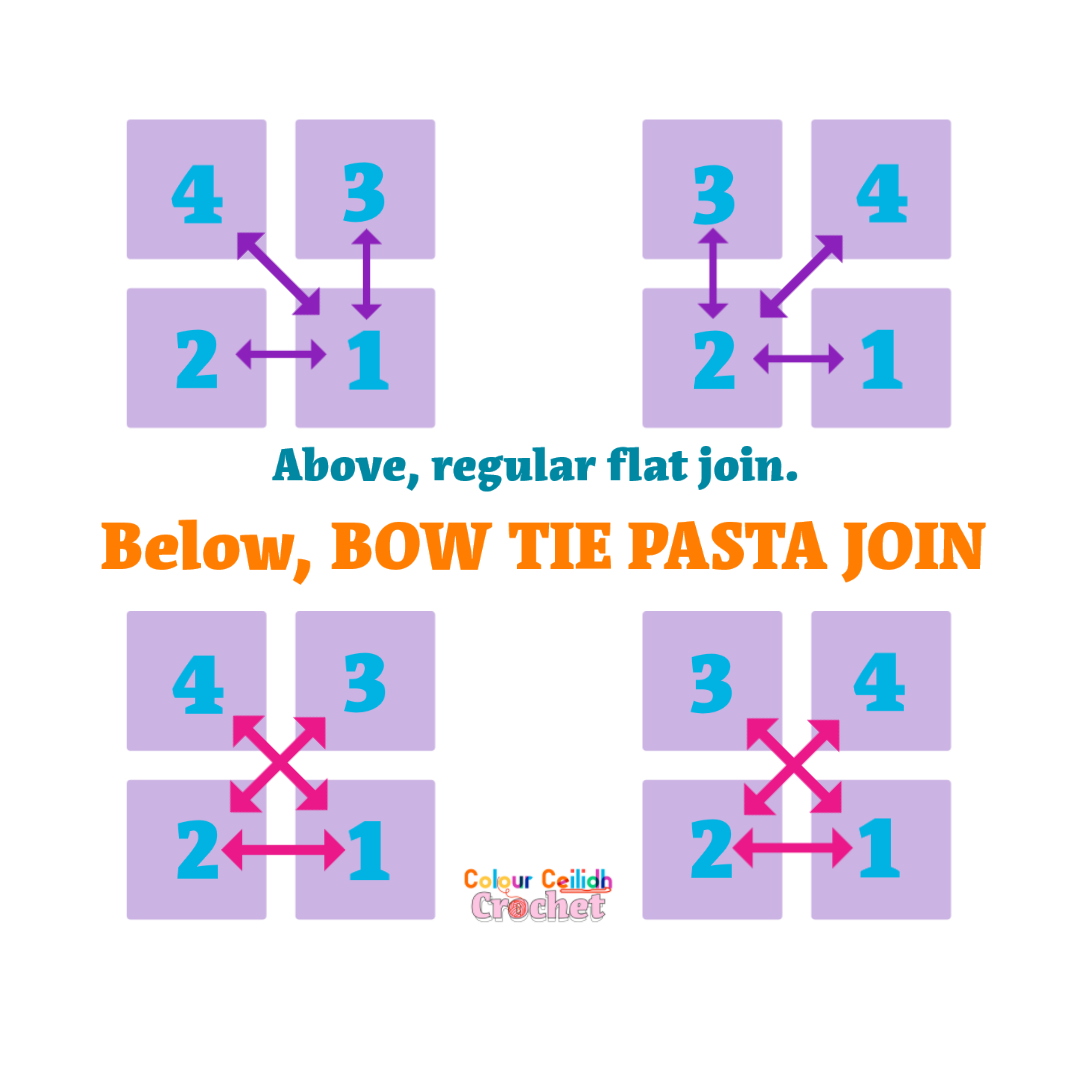
The Bow Tie Pasta Join is a method that uses the flat join for the braided look and easy learning, and a diagonal way of joining the top squares to the bottom squares.
Flat Join
The principle of connecting granny squares with a flat join is very simple and can be described in 3 steps:
- When you are ready to join, remove the hook from your loop.
- Insert the hook front to back through the space you want to join with.
- Pull up the loose loop and chain 1.
How Do You Know When To Join?
You are ready to join your grannies together when you are crocheting your last round (or joining round), and you are about to start your third corner’s chain-1. So you’ve travelled around the square, you’ve completed your first two corners and there’s only one side to go. You’ve made your first 3 double crochet cluster into your corner and you have your hook at the ready.
You can start joining in any corner, but it’s easier to wait until most of the last round is done, since the other granny (and later the whole project as it gets bigger) might get in the way and pull on your hand (and thus affect the tension) while you’re trying to finish the round.
The Order Of Joining Granny Squares
If you’re making a granny square blanket and you’re joining as you go, it probably goes something like this:
- You make your first granny square.
- You join your second square to the side of the first one. And continue to join them in line until you reach the desired width.
- You join subsequent squares on top of the others either coming from the right or from the left and you probably connect the first top square (square 3 in the diagram below) to the square directly below it.
- For every 2 x 2 granny square patch you probably connect the last square (square 4 in the diagram below) to the one below it that is diagonally opposite (you kind of have to, because otherwise you will leave large gaps).
For simplicity’s sake, let’s say your blanket is 2 by 2 granny squares. In the diagram below, it doesn’t matter if you join your 3rd granny from the left or from the right, the end result still looks pretty much the same (for more details, see How To Join Granny Squares As You Go With A Flat Join).
Bow Tie Pasta Join
But if you always join your top level grannies (3rd & 4th in the diagram) to the ones below that are diagonally opposite, you’ll get what I call the Bow Tie Pasta Effect.
All you need to do to try this method is to resist the temptation to join square 3 to the one directly below it, and join it diagonally instead (pink arrows).
How To Join Granny Squares With Bow Tie Pasta Join
For this tutorial, we are referring to the bottom part of the diagram above (pink arrows). To see the explanation for the purple arrows, see How To Join Granny Squares As You Go With A Flat Join.
This tutorial is for a granny square that has a ch-1 in the corners and no chains or a chain-1 in between the clusters. If you want to have an extra chain for every corner, decide if you want to place it before or after the joining chain 1.
First Two Squares
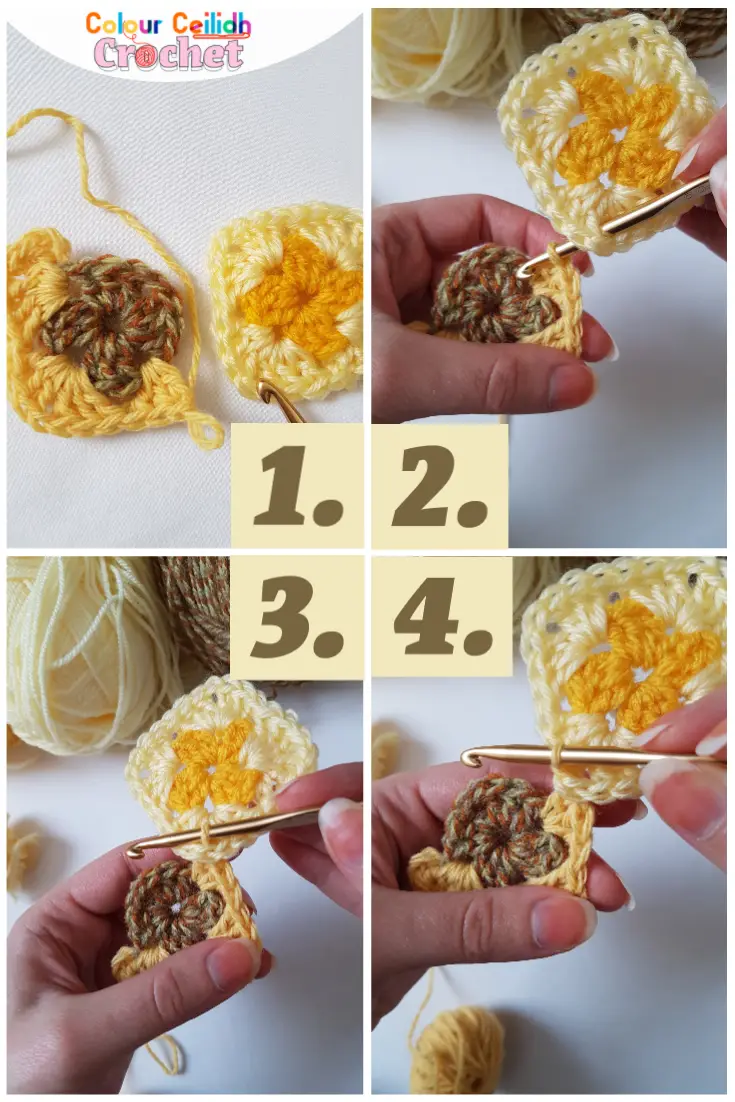
- Make your first granny square in full and make your second granny square so that in the last round you have one full side incomplete. Make your first corner cluster, remove the hook from the loop and insert the hook through the corner space of the finished granny square where the hook is pointing, front to back.
- Pull up the loop.
- – 4. Chain 1 to secure the join. Good job, you joined two corners!
Now the rest of the tutorial is repeating the steps you’ve just learnt. But it’s nice to see the whole process in photos!
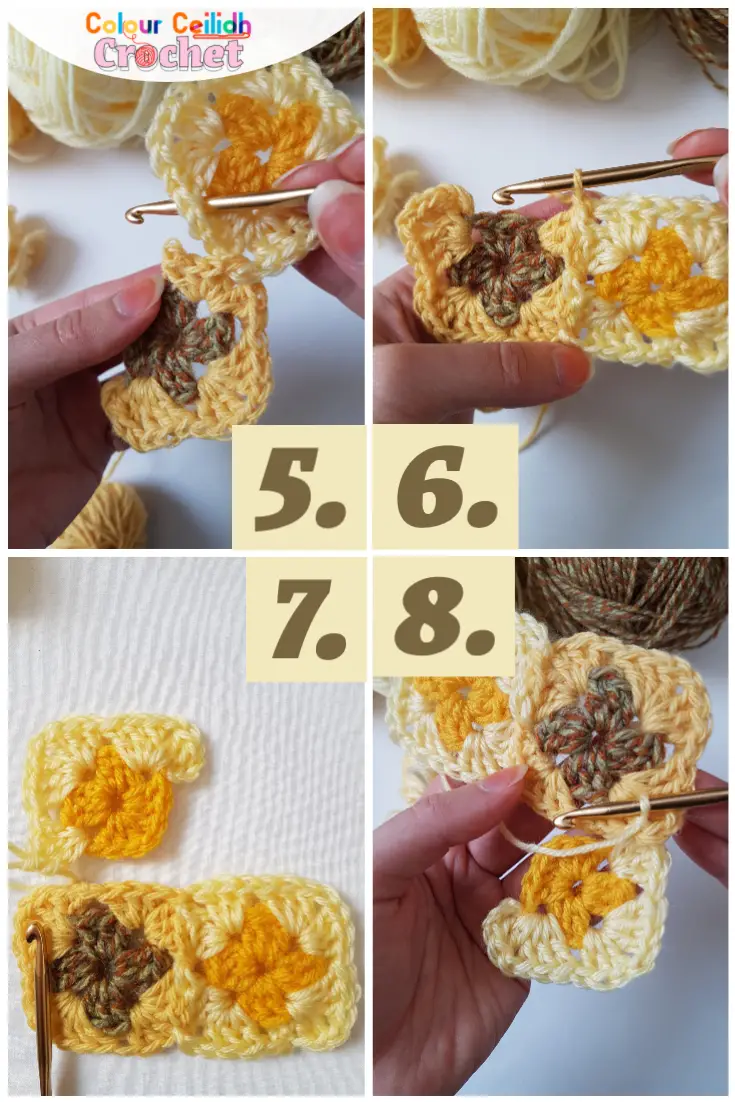
5. Complete the corner by making the second 3 dc cluster, remove the hook from the loop and insert the hook front to back through the next space between clusters.
6. Continue along the edge of your granny square and complete your last round. Good job, you connected two squares!
Third Granny Square
7. I’m going to start connecting my top level grannies starting from the left in the corner space where the hook is pointing.
8. This is what it looks like when you’re holding your project in your hands.
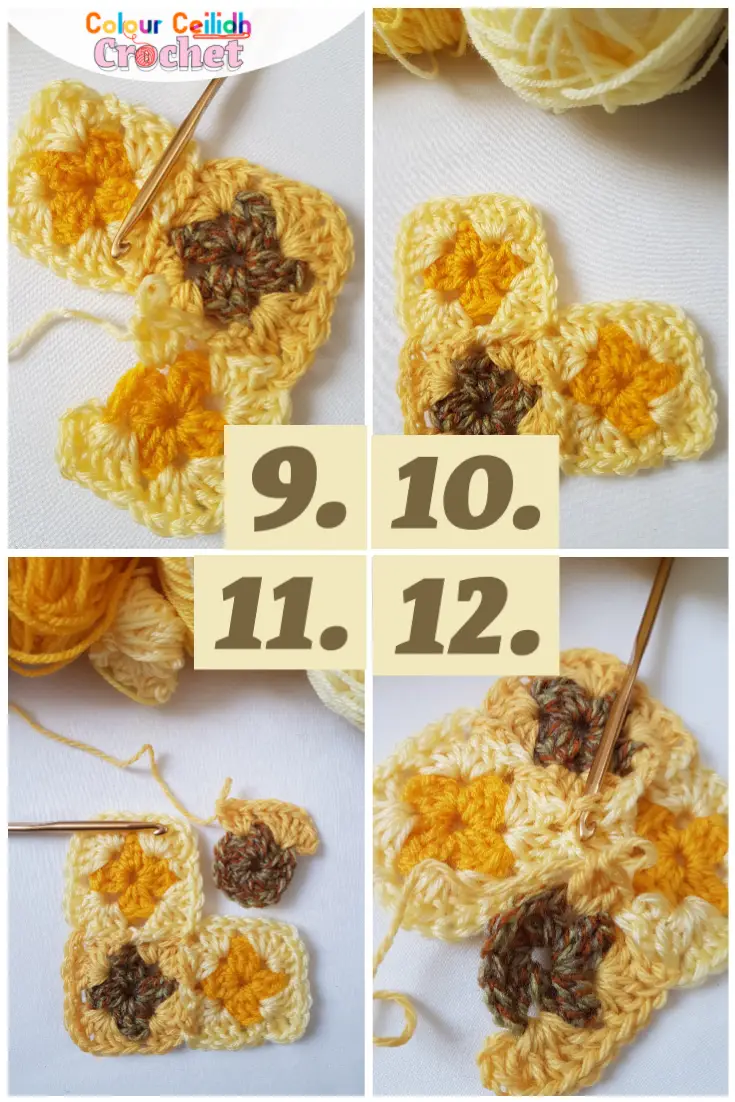
9. Now for the fun part. For this method to work, when you are connecting your third granny square, you need to make sure you pick the diagonal corner space to join with where the hook is pointing and not the corner space of the granny directly below .
10. One diagonal join complete. Third square done.
Last Granny
11. For the fourth square, I am starting to join in the corner space where the hook is pointing.
12. And finally make sure that once again you connect to the diagonal corner space and insert your hook front to back to pick up the dropped loop.
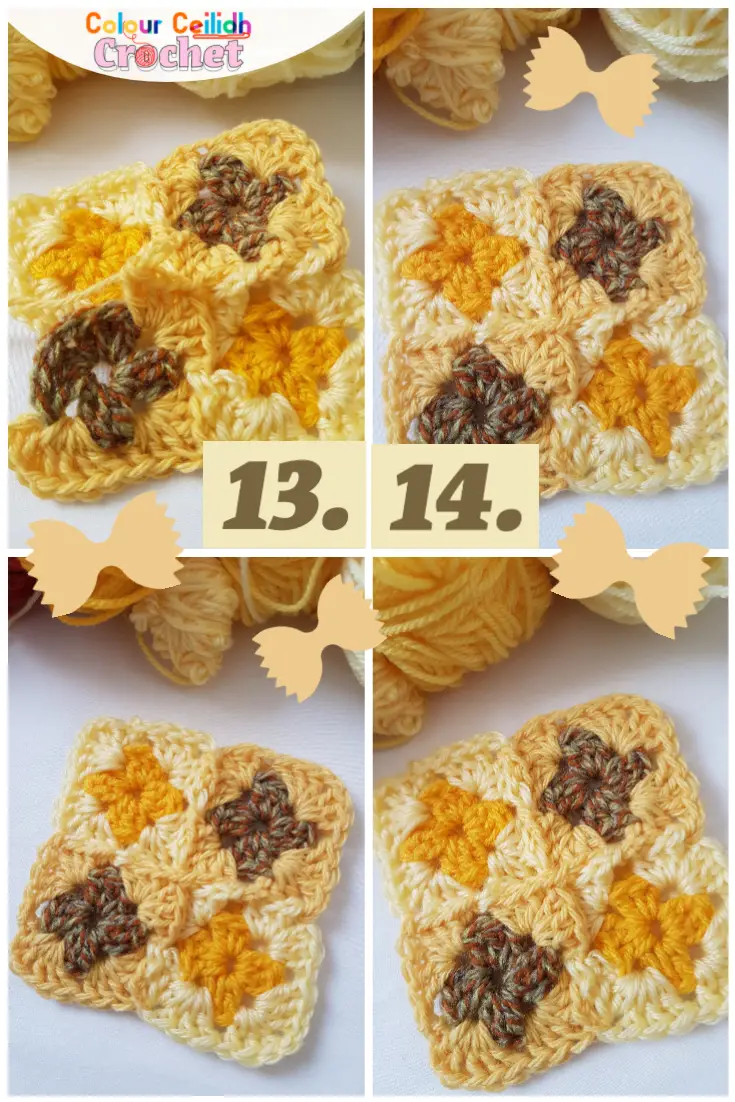
13. Complete your round and…
14. Your bow tie pasta join is complete. Simple, but effective. I love this little join!
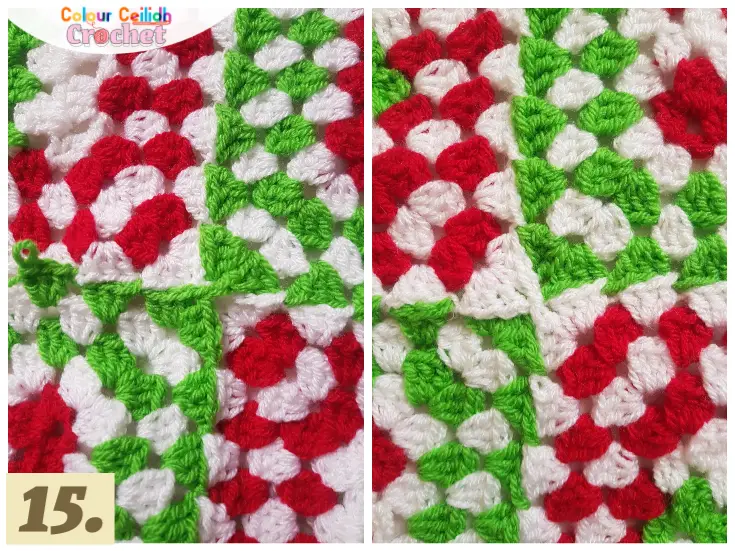
15. And here is what it looks like in different colors. This is my Christmas crochet blanket Candy Cane Lane. I love the little addition of cute in-built bows next to my candy cane appliques (see the link for the full picture).
More Bow Tie Pasta Join Ideas
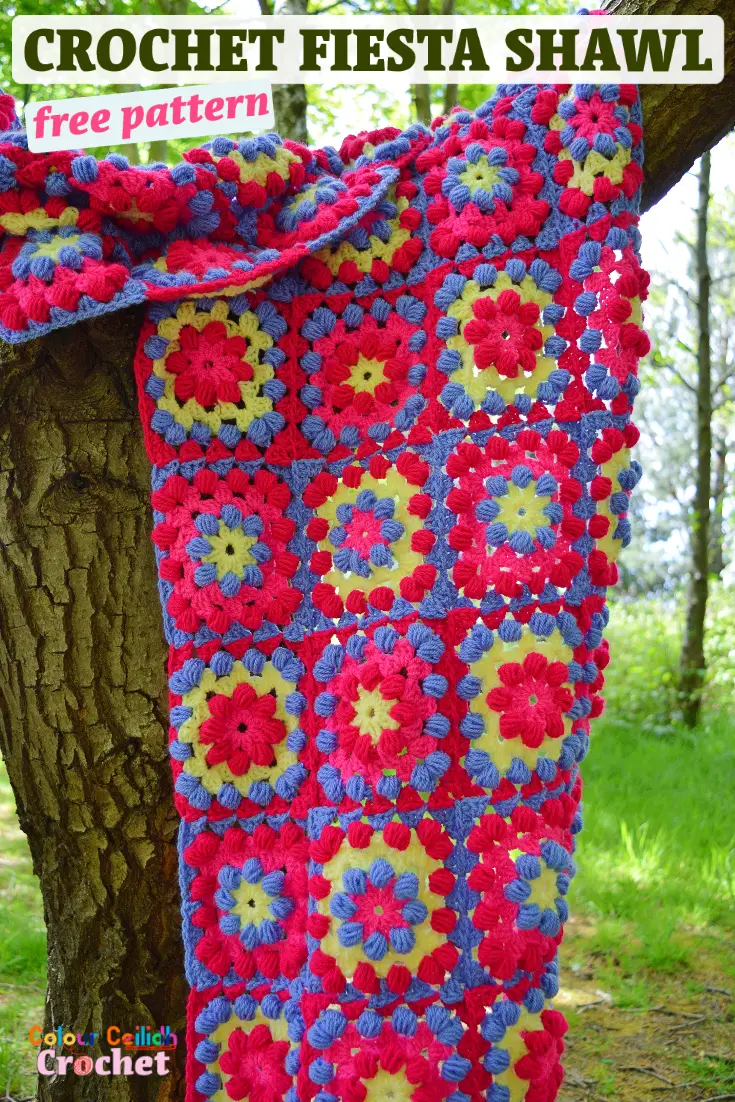
For example, this rectangular shawl (image below) is joined entirely with little bow tie connections. In a project like this, which is like a little mini granny blanket, it looks neat, tidy & predictable. And the braided effect of the flat join really completes the look. Your crochet blanket will be so pretty you’ll want to wear it lol!
Well Done!
I really appreciate you visiting here, so a big thank you!
If you enjoyed this little photo tutorial How To Join Granny Squares With Bow Tie Pasta Join, please share the link to this post with your friends, subscribe to my email list (the form pops up when you click around or come back again), Pin your favourite image by hovering over it and follow me on Pinterest so you never miss a pin, like my Facebook page and follow me on Instagram to see behind the scenes and for more color in your life.