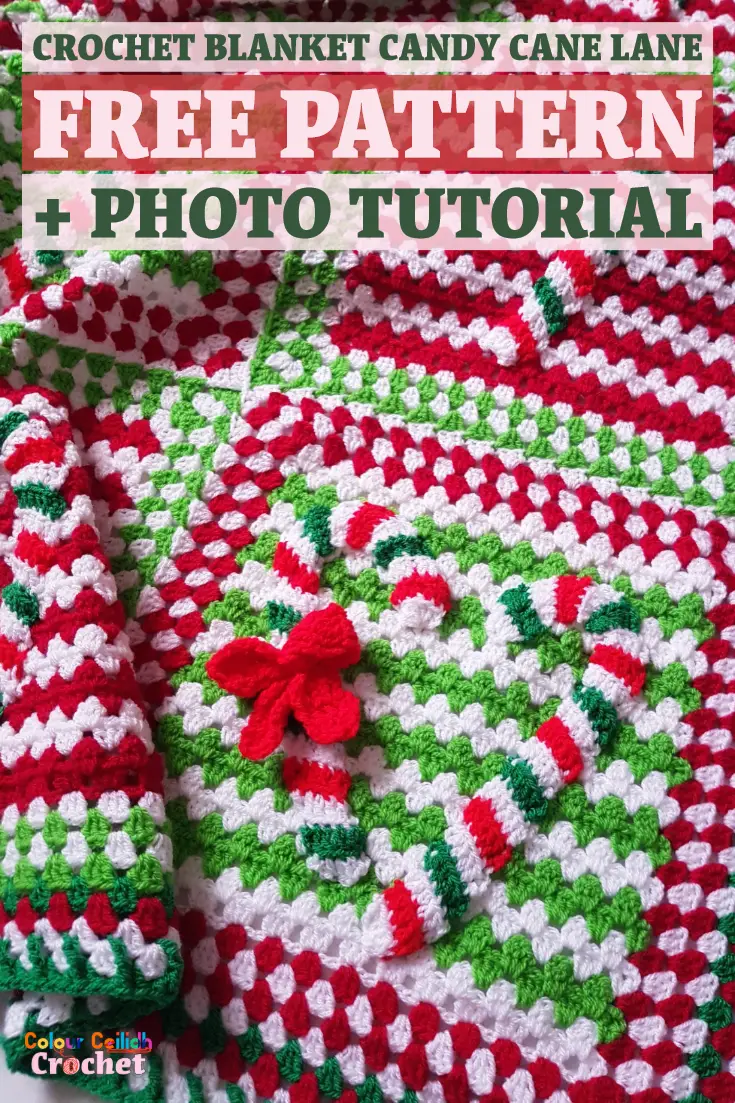
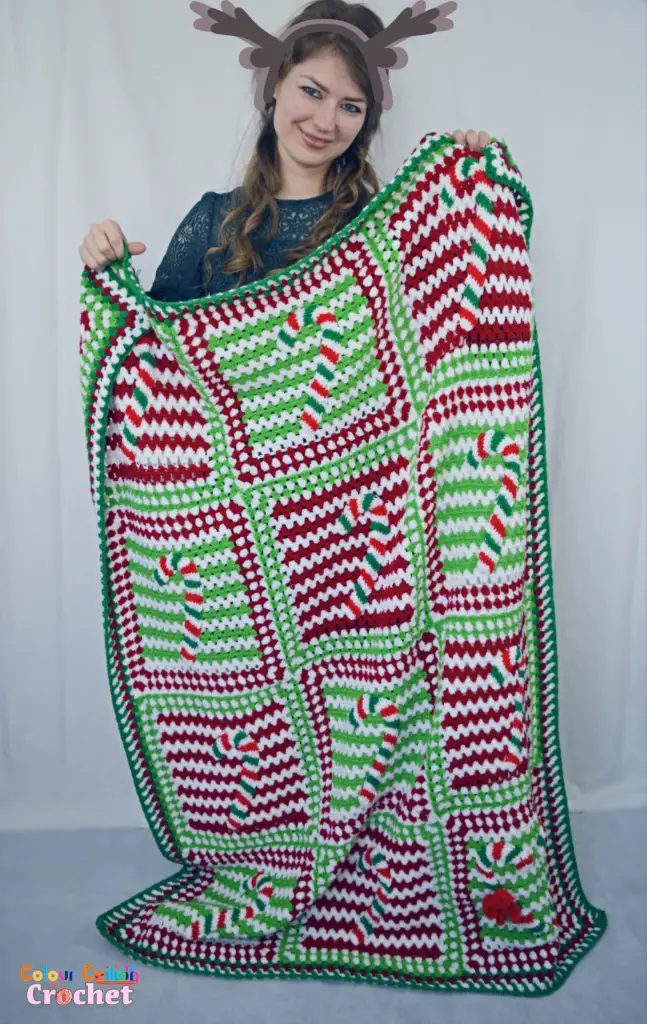
This free pattern for my crochet blanket Candy Cane Lane was made with love for all of you who, like me, perhaps were looking for beautiful crochet candy cane blanket ideas on the net and wished they had stumbled upon something like this- something simple, colourful and festive!
This post contains affiliate links to products. We may receive a commission for purchases made through these links.
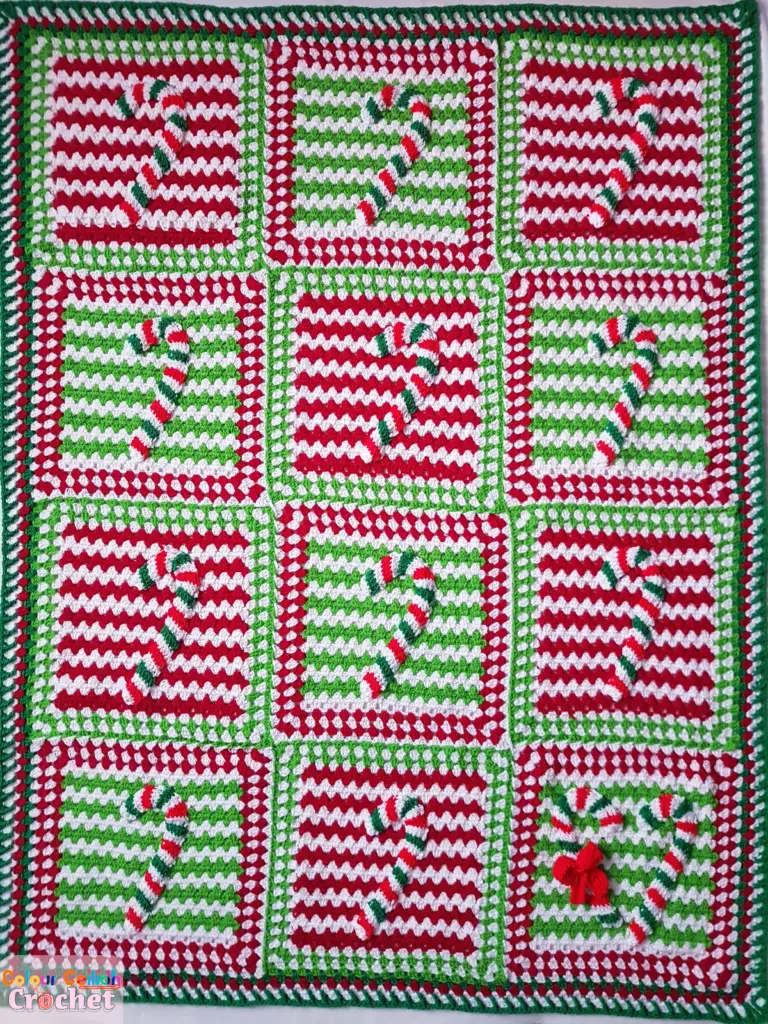
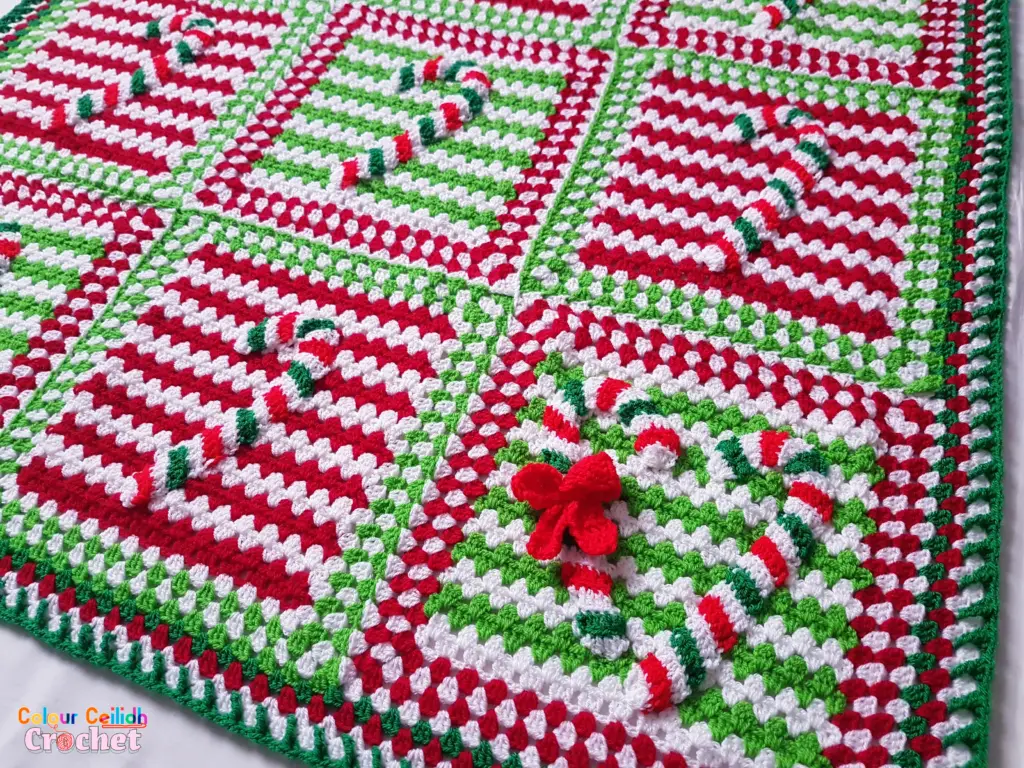
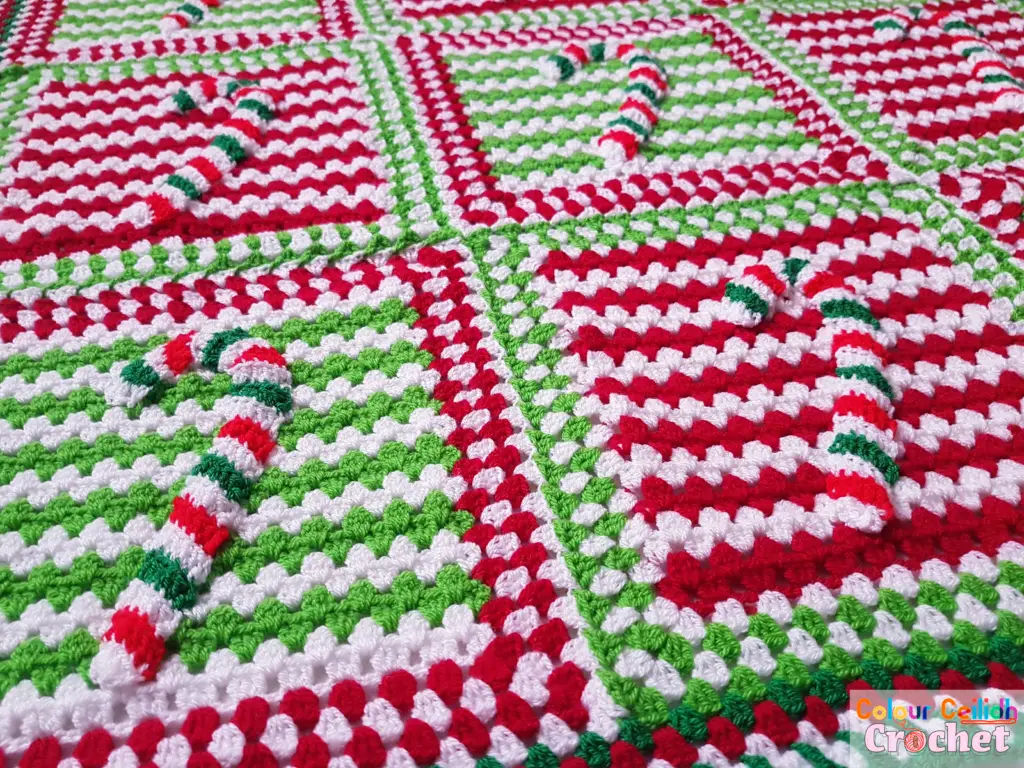
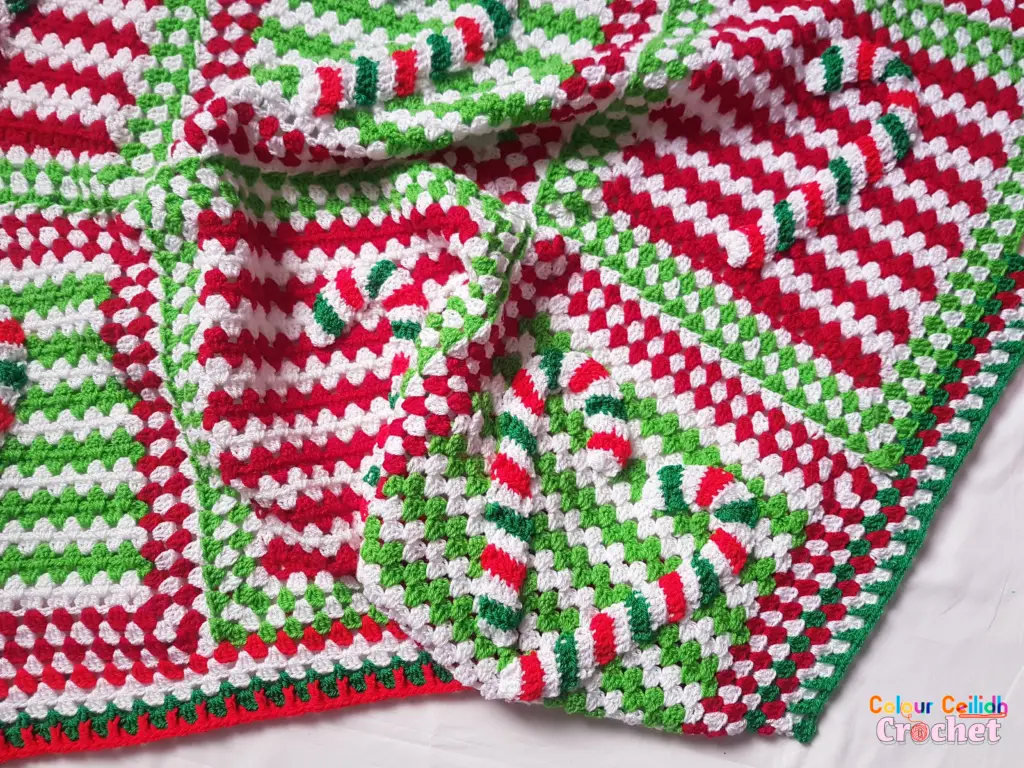
This crochet blanket features stripy granny squares embelished with crochet candy cane appliques and a border made of granny and ribbed stitches to complement the candy cane stripes. If you wish, once you’re finished, you can go daft with crochet bows and add one for every corner of the blanket or even one for every candy cane, but I opted for just one bright red crochet ribbon tied into a bow on the crochet candy cane heart, all ready for gifting.
To get your instant, printable & ad-free pattern pdf, click HERE for Etsy.

Inspiration
The inspiration for this crochet blanket was Christmas movies! Although I can assure you, I’ve never seen such a blanket anywhere else and I never copy-crochet what I see in the movies or anywhere else. That would be so boring (for me) lol. I’m just like “ooh that looks so cozy/ cute” and carry that image in my head for a bit, like a (candy cane) candy in my pocket, admiring it and taking it in, and then I just start improvising, scribbling, imagining, colour matching, yarn researching, and by the time I’m finished any project turns out to be totally different than the object of my inspiration! That’s because my imagination is like a mini-factory. And another inspiration for this blanket is the lack of my blanket image the-way-I-imagined-it on the net! Whenever I look for something and don’t find the exact picture to what I litterally have in mind, I get really frustrated. That’s probably the main reason I started this blog. I just wanted to colour the world with my designs 🙂 You can read more about me here.
Crochet Blanket Candy Cane Lane
Materials
- Stylecraft Special DK (3/ light) yarn in White (6 x 100g skeins), Lipstick (3 x 100g skeins), Grass Green (2 x 100g skeins), Kelly Green (1 x 100g skein) and Matador (1 x 100g skein). OR GET YOUR YARN HERE AT LOVE CRAFTS!
- Size 7/ 4.5 mm crochet hook
- Scissors
- Tapestry/ yarn needle
- Measuring tape
- Pins
Pattern Information
Project level: easy
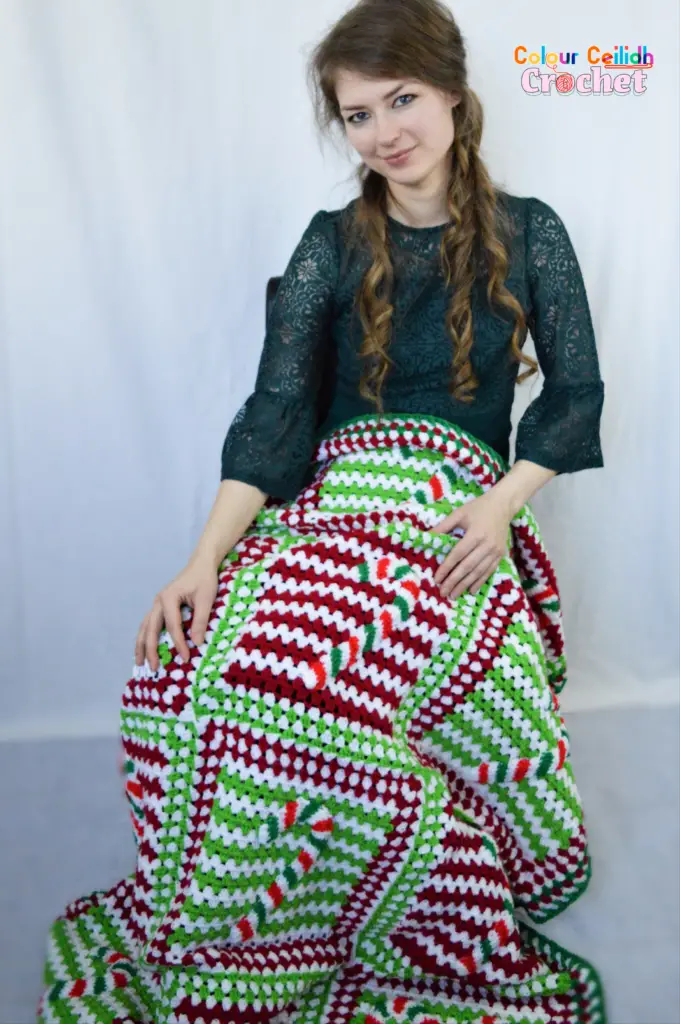
The gauge is 16 dc x 9 dc rows = 4″ x 4.2″ and the finished measurements are 144 cm/ 56.5 in x 111 cm/ 43.5 in.
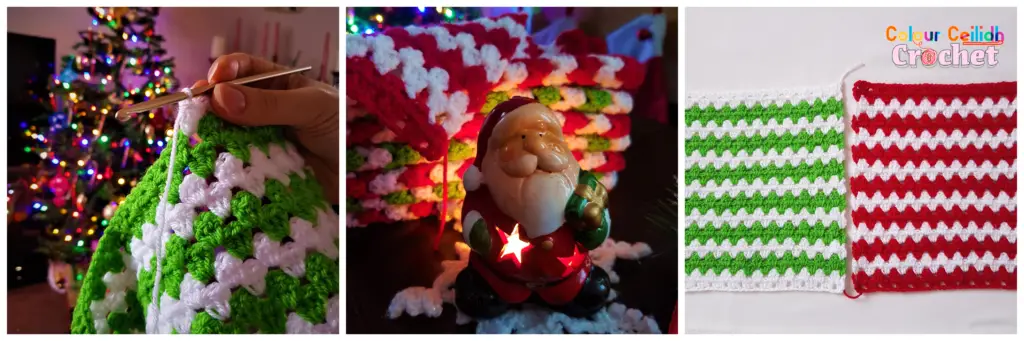
Using simple but effective bright festive colours, the pattern is worked in granny stitch, double crochet and front post stitches. There is a choice of two borders for this crochet blanket, the green-ribbed and the red-ribbed border. My favourite is the green-ribbed border but the red one came very close as I couldn’t decide between the two for a whole day!
Abbreviations
- ch: chain
- dc: double crochet
- dc2tog: double crochet 2 together. Yarn over, insert hook into indicated stitch/ space, pull up a loop, yarn over, pull through 2 loops, yarn over, insert hook into the same or next stitch/ space (as indicated) and pull up a loop, yarn over and pull through 2 loops, yarn over and pull through 3 loops on hook
- dc-blo: double crochet, back loop only
- FP(yoXtimes): front-post-yarn-over-X-times where “X” means how many times you need to yarn over in order to achieve this stitch. Yarn over X amount of times, insert hook from front to back to front around the post stitch indicated and pull up a loop, (yarn over and pull through 2 loops on hook) X+1 times. Read more about why I named it that way here
- FP(yo3times): front-post-yarn-over-3-times stitch or FPdtr, front post double treble crochet stitch. Yarn over three times, insert hook from front to back to front around post of stitch indicated and pull up a loop, (yarn over and pull through 2 loops on hook) four times
- FP(yo4times): front-post-yarn-over-4-times stitch or FPtrtr, front post treble treble. Yarn over four times, insert hook from front to back to front around post of stitch indicated and pull up a loop, (yarn over and pull through 2 loops on hook) five times
- hdc: half double crochet
- rep: repeat
- rnd: round
- sl: slip
- sliding loop: magic loop, magic circle, adjustable loop, magic ring, adjustable ring, drawstring ring
- st: stitch
- t: turn
- tr: treble/ triple crochet (yarn over 2 times)
- yo: yarn over
Pattern Overview
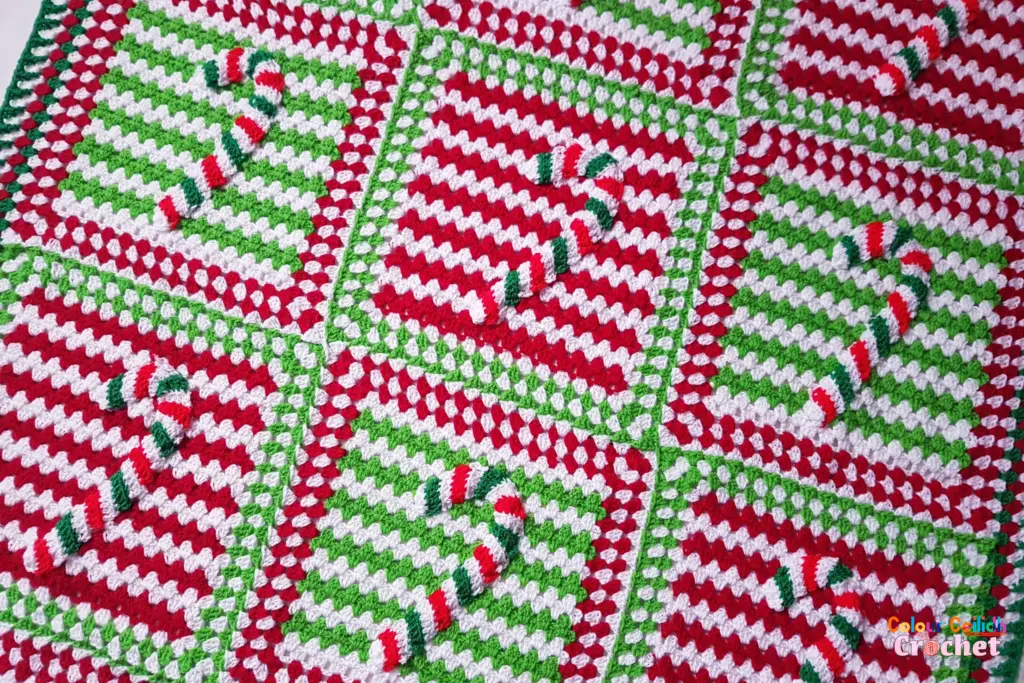
First you need to make 12 squares in granny stripes and give them a 3-round granny stitch border, then make, arrange and stitch on 13 candy cane appliques onto the squares, join the squares with a 4th round of granny stitch and complete the blanket with a 5-round granny border using the front post double treble and front post treble treble stitches in the last round.
Stripy Granny Squares
Make 12:
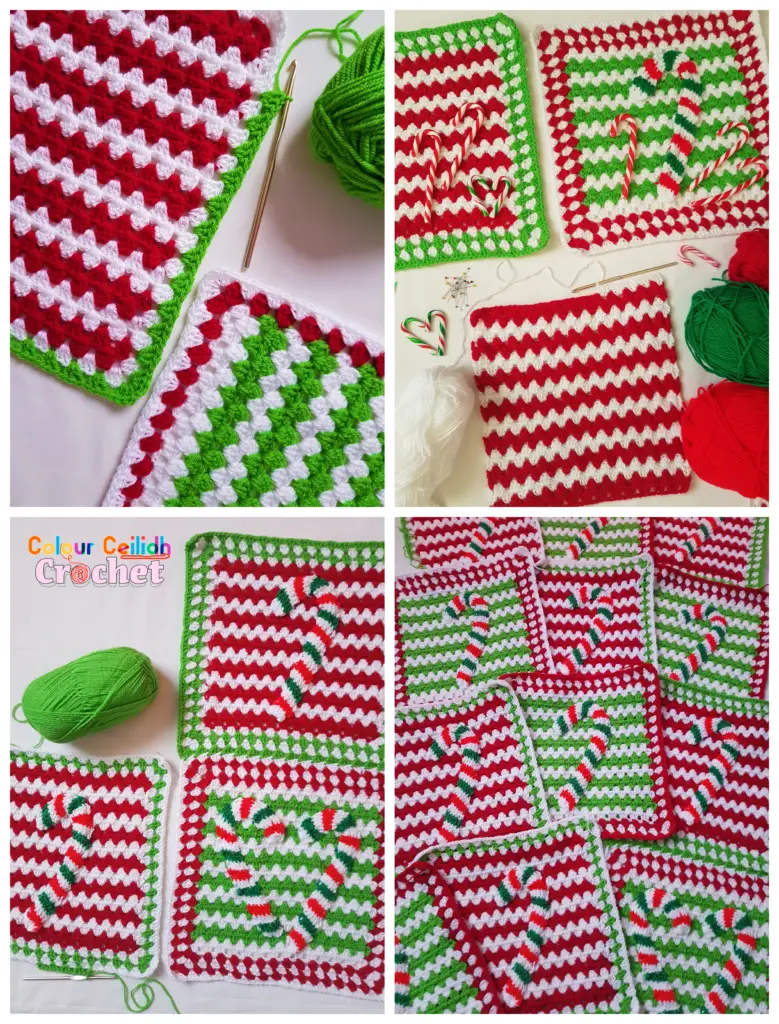
- 6 in White and Grass Green (starting with White)
- 6 in Lipstick and White (starting with Lipstick)
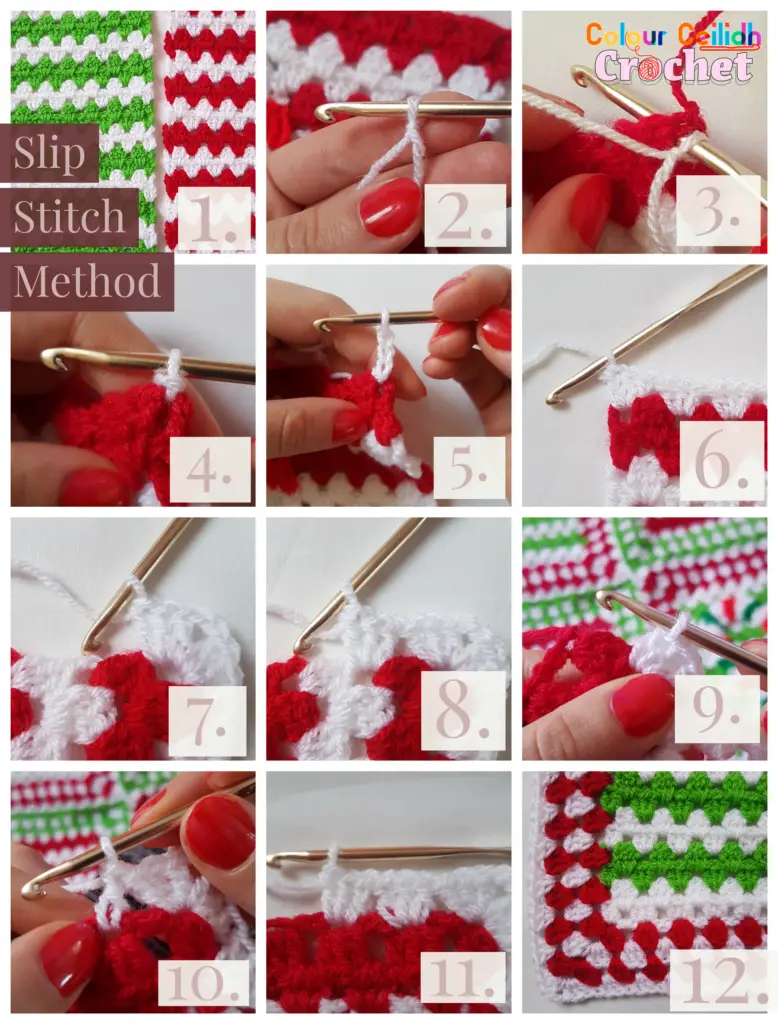
Each square has 26 rows and each stripe is 2 rows of the same colour, so there are 13 stripes per square. To keep the edges neat, fasten off after each colour (end of even numbered rows). I used the slip stitch method (below) to start a new colour (beginning of odd numbered rows).
Chain 43.
Row 1 Dc in 4th st from hook, *skip 2 st, 3 dc in next st, rep from * 11 times accross, skip 2 st, 2 dc in the last st, t.
Rows 2 & all other even numbered rows Ch 3 (counts as dc), *3 dc in next space, rep from * 12 times accross, dc in top of ch-3, fasten off, t.
Row 3 & all other odd numbered rows (join colour in first space between ch-3 and 3-dc cluster) Ch 3 (counts as dc), dc in same space, *3 dc in next space, rep from * 11 times accross, 2 dc in last space, t.
Slip Stitch Method
If you need more help with granny stripes, changing colour and the slip stitch method, Attic24 has a helpful tutorial.
Stripy Granny Square Border
Each square has a 4-round granny stitch mini border with the last round being the joining round. I think it’s best if we make the first 3 rounds, then make the crochet candy canes and stitch them on, and then join the squares together ready for the big whole blanket border.
Using the slip stitch method (above), join the following colours in the top right corner of the stripy granny squares and crochet three rounds in:
- Lipstick – White – Lipstick for the Grass Green & White squares
- White – Grass Green – White for the Lipstick & White squares
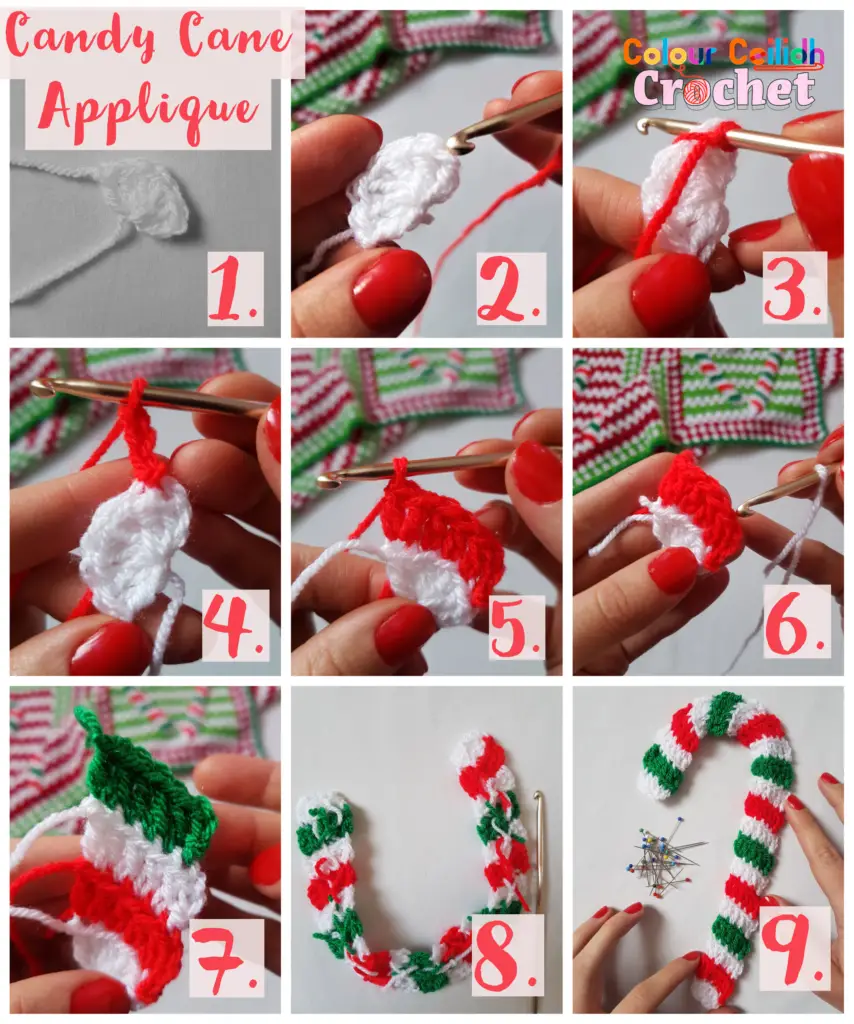
Crochet Candy Cane Appliques
Make 13, one for each stripy granny square and an extra one to make a crochet candy cane heart for the bottom right square. Use the slip stitch method (above)to join new colours. The crochet candy cane applique has 21 rows of double crochet with a repeating colour pattern:
White – Matador – White – Kelly Green
Begin with sliding loop.
Row 1 (White) Ch 3, 5 dc in ring, fasten off.
Row 2 (Matador) (join colour at top of ch-3, back loop) Ch 3, dc-blo in next 3 st, 2 dc-blo in last st, fasten off.
Row 3 (White) (skip top of ch-3, join at next st, back loop) Ch 3, dc-blo in next 3 st, 2 dc-blo in last st, fasten off.
Rows 4- 20 Keep following the crochet pattern as for Row 3 but use the colour pattern as above.
Row 21 (White) (skip top of ch-3, join at next st, back loop) Ch 2, dc-blo in next 2 st, dc2tog (back loop) over next 2 st, fasten off.
Candy Cane Applique Tutorial
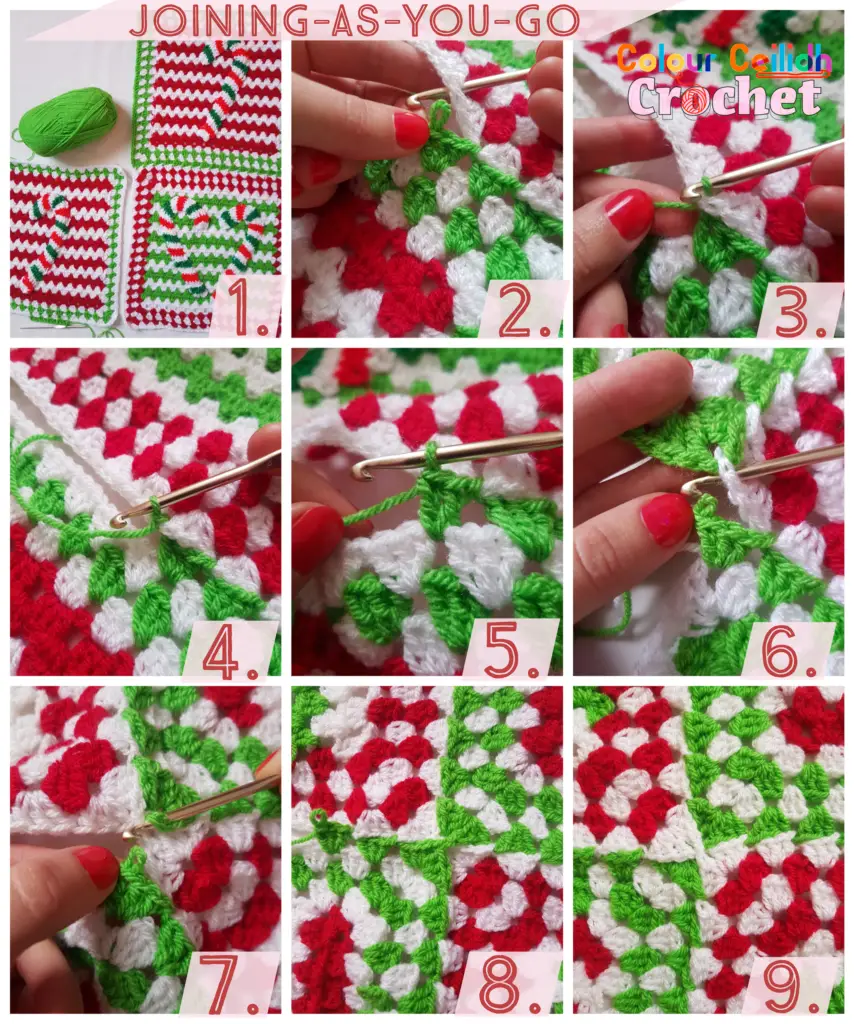
Stripy Granny Square Joining Round
I started joining the stripy granny squares with the bottom right square (with the crochet candy cane heart applique), which is in Grass Green & White stripes and whose last round is in White. For this last round you can choose anywhere to start your round and to join colour (slip stitch method, above). Most convenient places are the free sides that are not touching other squares and that are not to be joined yet. These are the colours for the last joining rounds:
- White for the Grass Green & White stripy squares
- Grass Green for the Lipstick & White stripy squares
Joining As You Go Tutorial
*UPDATE:
I now have a tutorial for How To Join Granny Squares With Bow Tie Pasta Join which says that you need to be joining your grannies diagonally when you approach both 2- and 3- granny squares joining points so that would contradict step 6 above (sorry!). So in step 6, join green with green and white with white. I had accidentally discovered this method when I was crocheting this blanket, and I didn’t understand it fully at the time. If you follow step 6 as it is, you’ll get a more usual look described in my other new tutorial How To Join Granny Squares As You Go With A Flat Join. Also, I recommend you use my new method for joining yarn with no tails to dramatically reduce the weaving in time at the end.
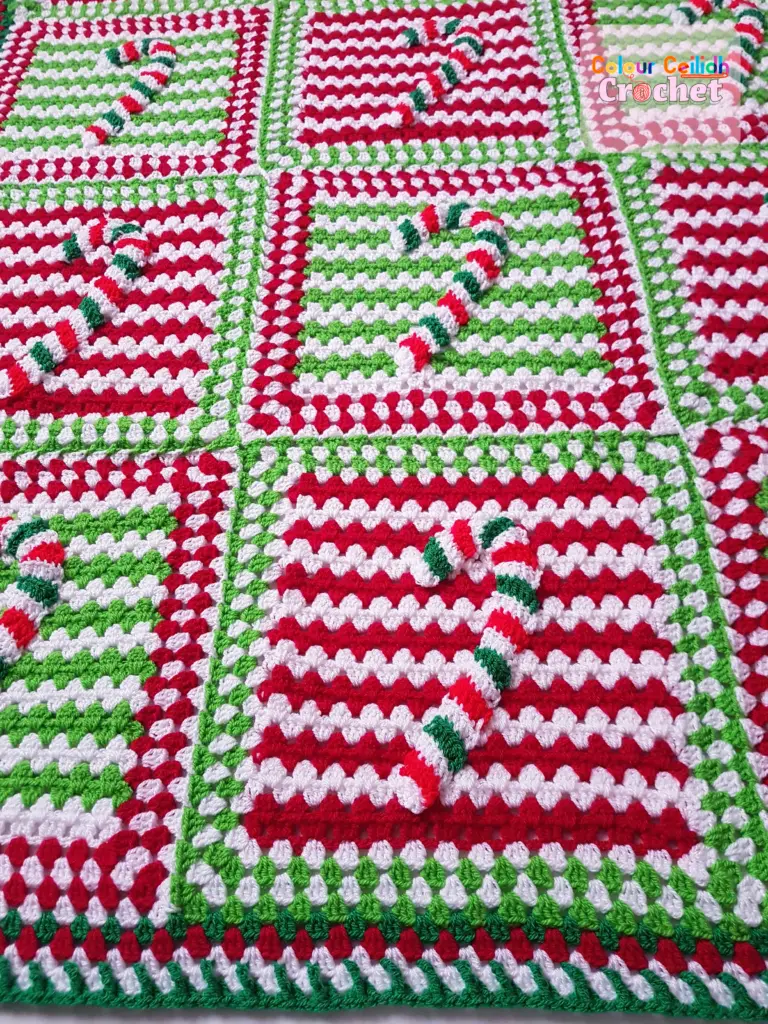
Option 1: Green-Ribbed Border
This was my favourite out of a few that I came up with for this crochet blanket pattern. I like it most because it doesn’t distract from the crochet candy canes which are the main feature but just complements the blanket nicely. Pick a corner to join colour (slip stitch method above).
Rnd 1 (Kelly Green) Ch 3, 2 dc in same space, 3 dc in next space around, except in the 3 corners where the pattern is (3 dc, ch 2, 3 dc) in same ch-2 space, end with 3 dc back at the starting corner, join with hdc to top of ch-3, fasten off.
Rnd 2 (Lipstick) Same as Rnd 1.
Rnds 3 & 4 (White) Same as Rnd 1 but no need to fasten off in Rnd 3.
Rnd 5 (Kelly Green) Ch 3, FP(yo4times) around 1st dc in 3-dc cluster from Rnd 3 (the first dc after ch-2 in the corner), dc in same ch-2 space, [dc, FP(yo3times) around the same 1st dc in 3-dc cluster from Rnd 3, dc] in next space, [dc, FP(yo3times) around 1st dc in 3-dc cluster from Rnd 3 diagnolly below to the right, dc] in next space around, except in the 3 corners where the pattern is [dc, FP(yo4times) around the same 1st st in 3-dc cluster from Rnd 3 as last FP(yo3times), dc, ch 2, dc, FP(yo4times) around 1st dc in 3-dc cluster from Rnd 3 (the first dc after ch-2 in the corner), dc] in same ch-2 space, end with [dc, FP(yo4times) around the same 1st dc in 3-dc cluster from Rnd 3 as the last FP(yo3times), dc] back at the starting corner, join with hdc to top of ch-3, fasten off.
Green Ribbed Border Tutorial
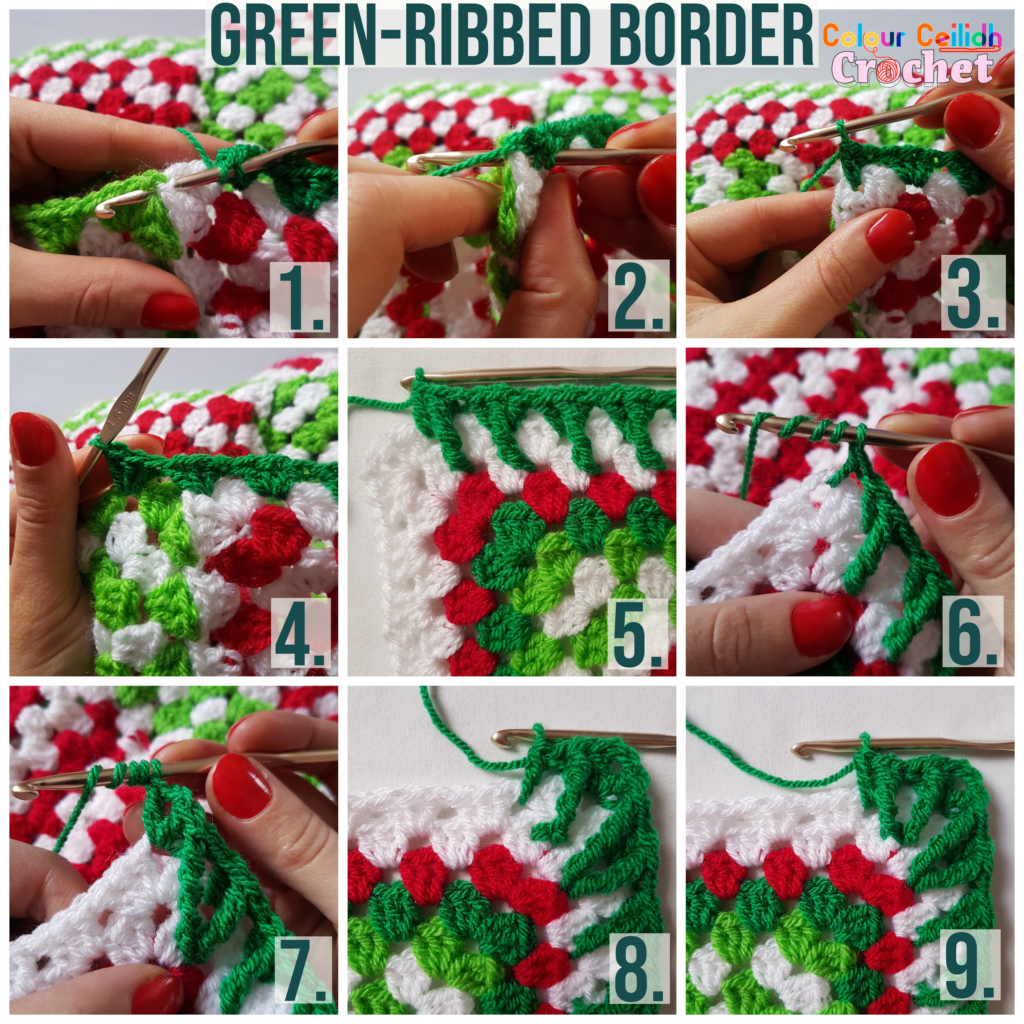
6, 7, 8, 9. As you approach your corners, switch from yarning over 3 times to yarning over 4 times to accommodate for the longer reach, and crochet into first posts from 3-dc clusters on either side of the corner twice, and it doesn’t matter, if your stitch goes above or below the previous FP(yo4times).
Option 2: Red-Ribbed Border
In case you like the look of this red-ribbed border (below), here is a pattern for you. Pick a corner to join colour (slip stitch method above).
Rnd 1 (Matador) Ch 3, 2 dc in same space, 3 dc in next space around, except in the 3 corners where the pattern is (3 dc, ch 2, 3 dc) in same ch-2 space, end with 3 dc back at the starting corner, join with hdc to top of ch-3, fasten off.
Rnd 2 & Rnd 3 (White) Same as Rnd 1 but no need to fasten off in Rnd 2.
Rnds 4 & 5 (Kelly Green) Same as Rnd 1 but no need to fasten off in Rnd 4.
Rnd 6 (Matador) Ch 3, FP(yo4times) around middle dc in 3-dc cluster from Rnd 4 (the second dc after ch-2 in the corner), dc in same ch-2 space, [dc, FP(yo3times) around the same middle dc in 3-dc cluster from Rnd 4, dc] in next space, [dc, FP(yo3times) around the middle dc in 3-dc cluster from Rnd 4 directly below, dc] in next space around except in the 3 corners where the pattern is [dc, FP(yo4times) around the same middle dc in 3-dc cluster from Rnd 4 as last FP(yo3times), dc, ch 2, dc, FP(yo4times) around middle dc in 3-dc cluster from Rnd 4 (the middle dc after ch-2 in the corner), dc] in same ch-2 space, end with [dc, FP(yo4times) around the same middle dc in 3-dc cluster from Rnd 4 as the last FP(yo3times), dc] back at the starting corner, join with hdc to top of ch-3, fasten off.
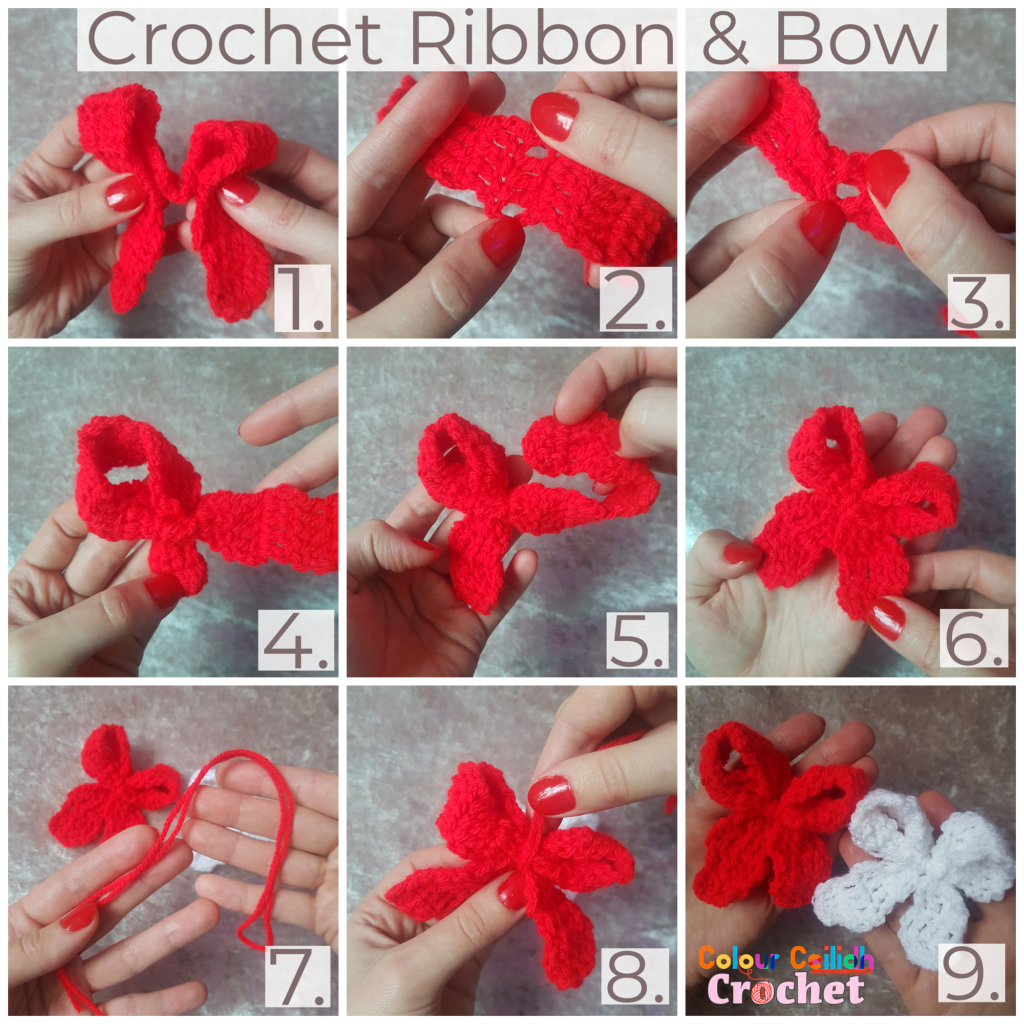
Crochet Bow Embelishment
Decide how many bows and what colours you’d like for your blanket embelishments.
Begin with sliding loop.
Row 1 Ch 3, 4 dc in ring, t.
Rows 2 – 20 Ch 3, dc in next 4 st, t.
Row 21 Ch 2, dc in next 2 st, dc2tog over next 2 st, fasten off.
Well Done!
I hope you like this crochet eye-candy!
Merry Christmas Preparations to you (no matter what time of the year) and-
Happy Crocheting!
Justina