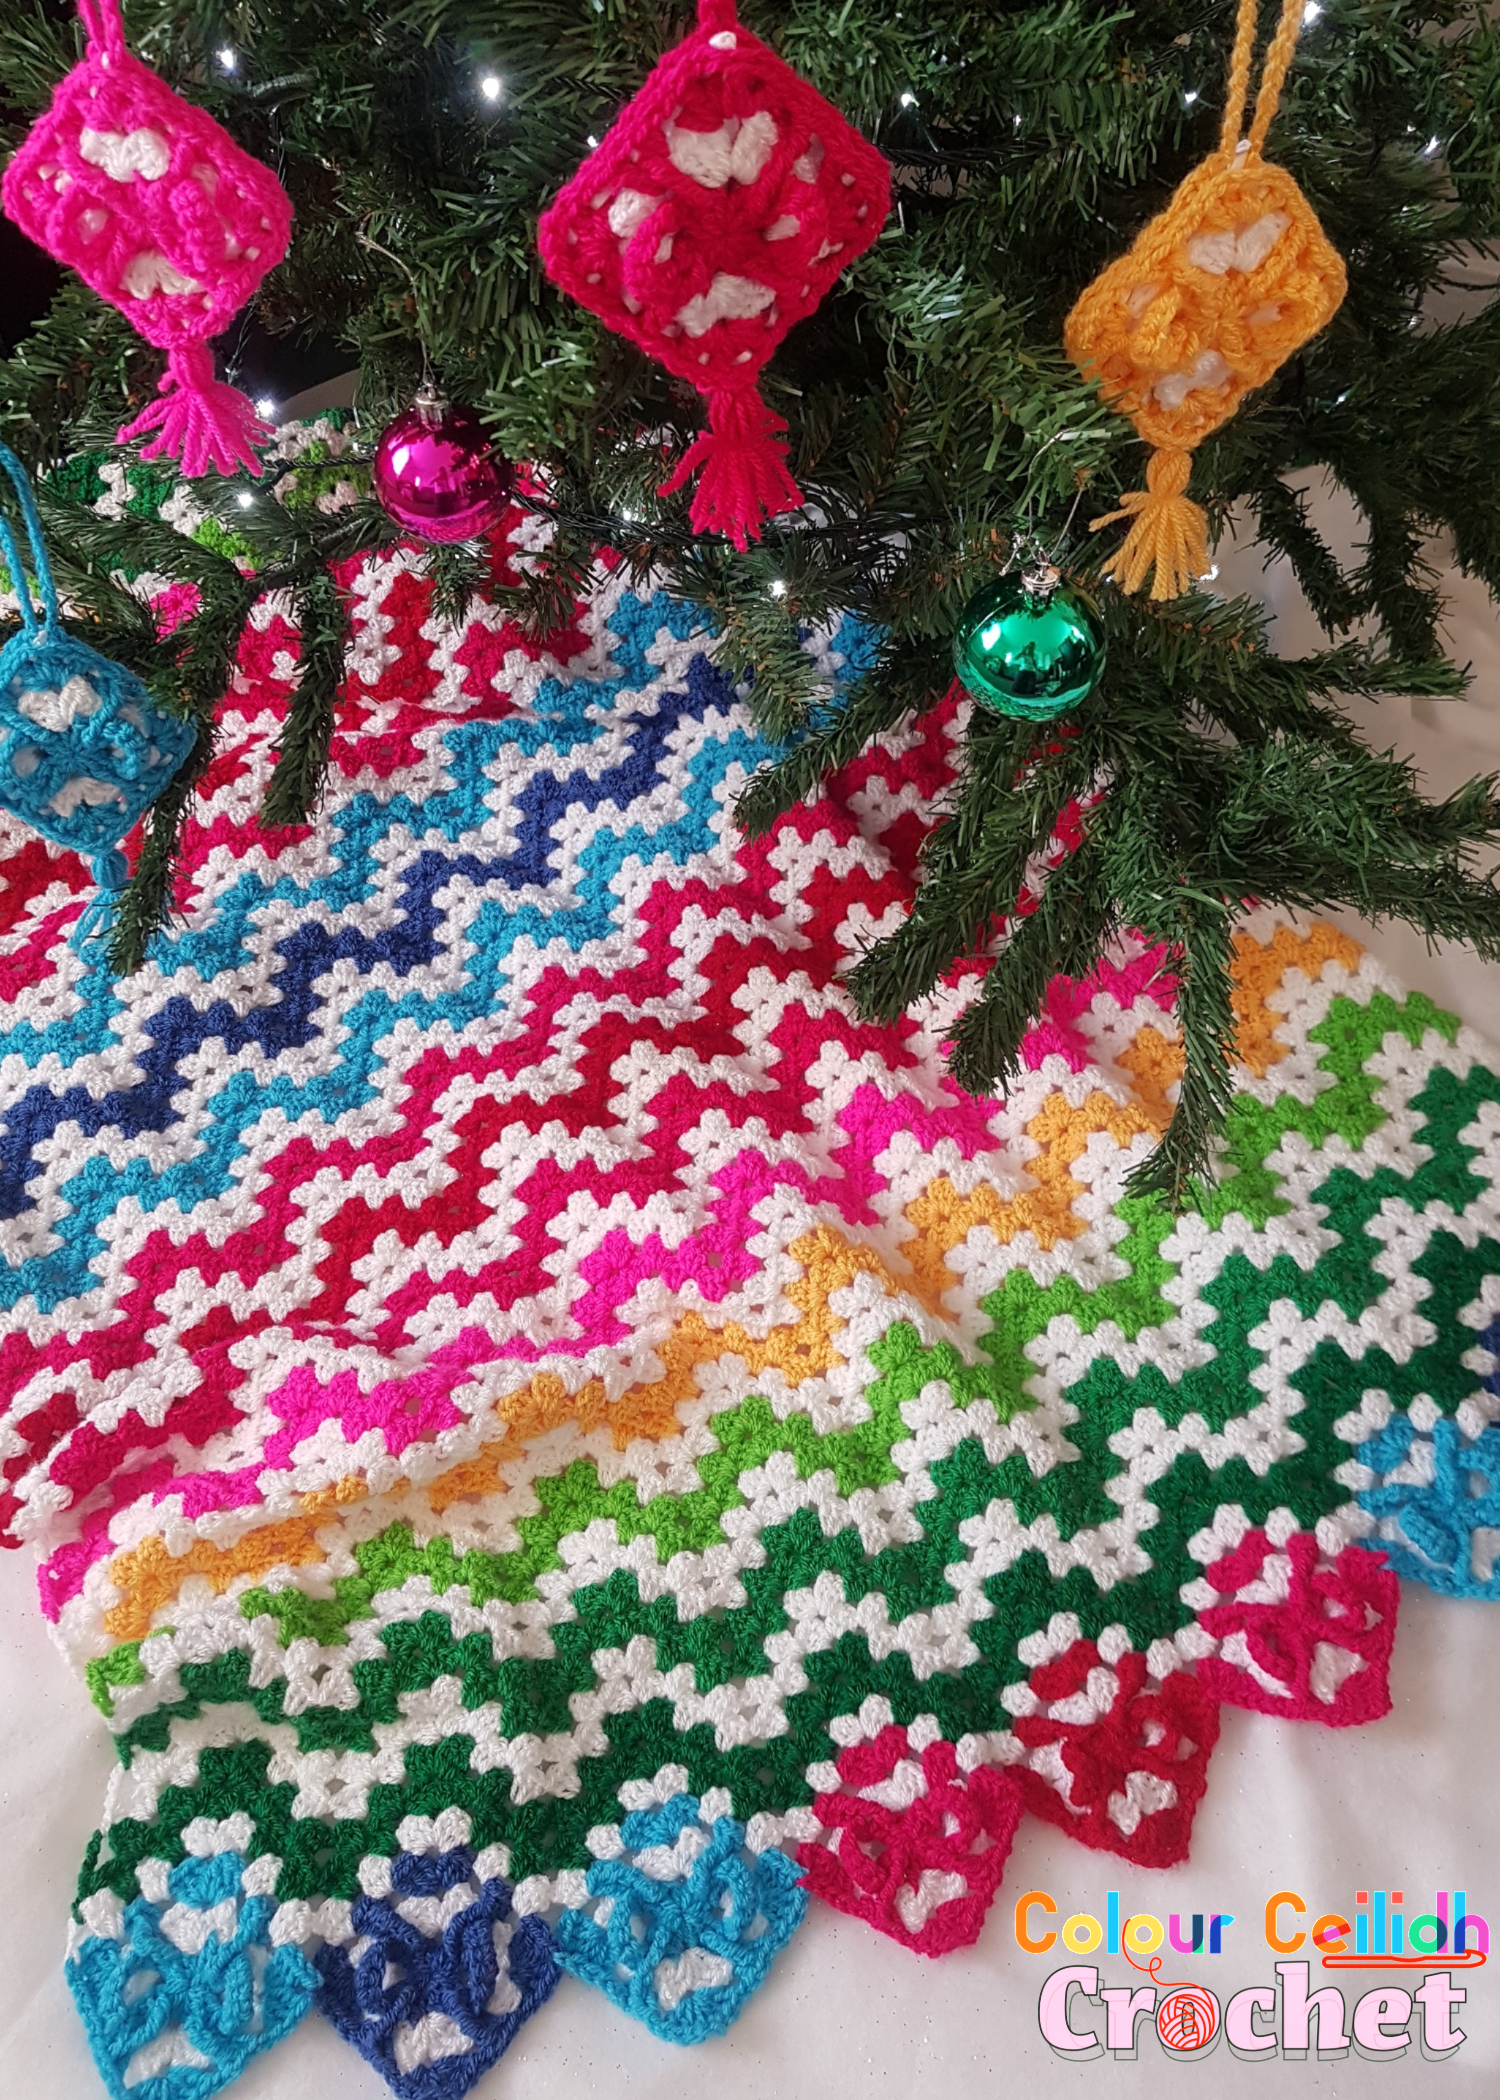
If you are looking for a Christmas crochet pattern for a handmade Christmas gift and you love colours, then look no further – this Christmas crochet blanket in granny ripple stitch also known as chevron is going to be a beautiful present for your loved ones, for a baby’s first Christmas or for a Mom-to-be. Spread some Christmas cheer and love for handmade gifts with my Crochet Blanket Christmas Present! Or simply gift it to yourself – I think that’s what I’m (shamelessly) going to do!
This post contains affiliate links to products. We may receive a commission for purchases made through these links.
This blanket features a crochet granny square that has been transformed into a little crochet gift parcel complete with a cute little crochet ribbon & bow, which you can also make on its own without joining it into the blanket and turn it into alovely crochet Christmas tree decoration or you can also hang it on your door handle for a festive touch. Or make a matching set of both!
Here’s a free crochet pattern for my Granny Square Christmas Crochet Gift Parcel Decorations.
This blanket doesn’t have a border so you’ll be all set to enjoy it once you’re finished! And of course granny stitch always works up fast as you can just set yourself on an autopilot. Win win! For example, I was able to do some homeschooling while working on the blanket as I listened to my son practise his reading. He is 7 and read 4 books that day!
Inspiration
This is going to look silly but that’s how my imagination works. The picture below is my inspiration!

When I was a kid, I lived in the land with proper 4 seasons of the year (Lithuania), not like in Scotland where I live now where everything is a bit of a blur when it comes to seasons! Read more about me here.
Anyway, I used to draw winter a lot, and that picture is how I always used to draw it. I loved dotting the white snowflakes and the yellow stars on the blue background, adding the green Christmas trees everywhere and adding the white ground and a little log house in the distance. And the Christmas trees had to be covered in snow of course!
I’ve always loved these colours for winter.
But I also wanted to improve this picture and add Christmas presents underneath the Christmas trees. And I wanted to use a granny stitch as it’s so simple and cozy for the festive season.
Then my daughter’s skirt caught my eye, and it all came together. I had made this skirt for her when she was a toddler. It had granny squares for a cute border and was worked in the chevron stitch. As I was looking at it I could see how I could use the pointy outline of the stitch for my Christmas trees, how I could turn the granny squares into little gift parcels and how I could add layers of snow on my Christmas trees. And I could see how much fun I was going to have making it!
Thankfully I didn’t have to invent any stitch combinations as I had done in my Crochet Banket “Starry Halloween Night” and I could go straight to picking out some cheerful colours for my blanket!
Crochet Blanket Christmas Present
Materials
- Stylecraft Special DK (3/ Light) yarn in White (3x 100g skeins), Green (1x 100g skein), Kelly Green (1x 100g skein), Grass Green (1x 100g skein), Saffron (1x 100g skein), Fiesta (1x 100g skein), Bright Pink (1x 100g skein), Lipstick (1x 100g skein), Turquoise (1x 100g skein) and Lapis (1x 100g skein). OR GET YOUR YARN HERE AT LOVE CRAFTS!
- Size 7/ 4.5 mm crochet hook
- Scissors
- Tapestry needle
- Measuring tape
Pattern Information
The gauge is 16 dc x 9 dc rows = 4″ x 4.2″ and the finished measurements are 117 cm/ 46 in x 77 cm/ 30 in.
The pattern is worked in chevron/ granny ripple crochet stitch with adapted granny squares joined in at the top and bottom of the blanket edges. The adapted granny squares feature a gift parcel look complete with criss-cross crochet ribbons and bows in the middle.
My Little Rant About Tall Crochet Stitch Names
A little confession- I sort of made up a stitch name FP(yo4times) (below). It’s simply your well-known front post/ raised stitch but with more yarning over than the dtr and it’s for a good cause – to make the gift parcel ribbons!
I don’t know about you, but I get really confused sometimes with how many times I need to yarn over for various tall crochet stitches… I needed to vent somewhere, so I wrote a little post about it and you can read it here.
Abbreviations
ch: chain
dc: double crochet
FP(yo4times): front-post-yarn-over-4-times stitch/ FPtrtr. Yarn over four times, insert hook from front to back to front around post of stitch indicated and pull up a loop, [yarn over and pull through 2 loops on hook] five times
hdc: half double crochet
rep: repeat
rnd: round
sc: single crochet
sliding loop: magic loop, magic circle, adjustable loop, magic ring, adjustable ring, drawstring ring
st: stitch
t: turn
tr: treble/ tripple crochet
yo: yarn over
Bottom Edge
Begin with making 9 Granny Square Christmas Crochet Gift Parcels (pattern below) joined up together in a line on the opposite corners (explained below) where Round 2 is White and Rounds 1 & 3 are in the following colours: 4 squares in Turqoise, 2 squares in Lapis, 2 squares in Bright Pink and 1 square in Lipstick.
Arrange and join your squares together as-you-go to form the bottom edge in this order of colours from left to right:
Turqoise – Lapis – Turqoise – Bright Pink – Lipstick – Bright Pink – Turqoise – Lapis – Turqoise.
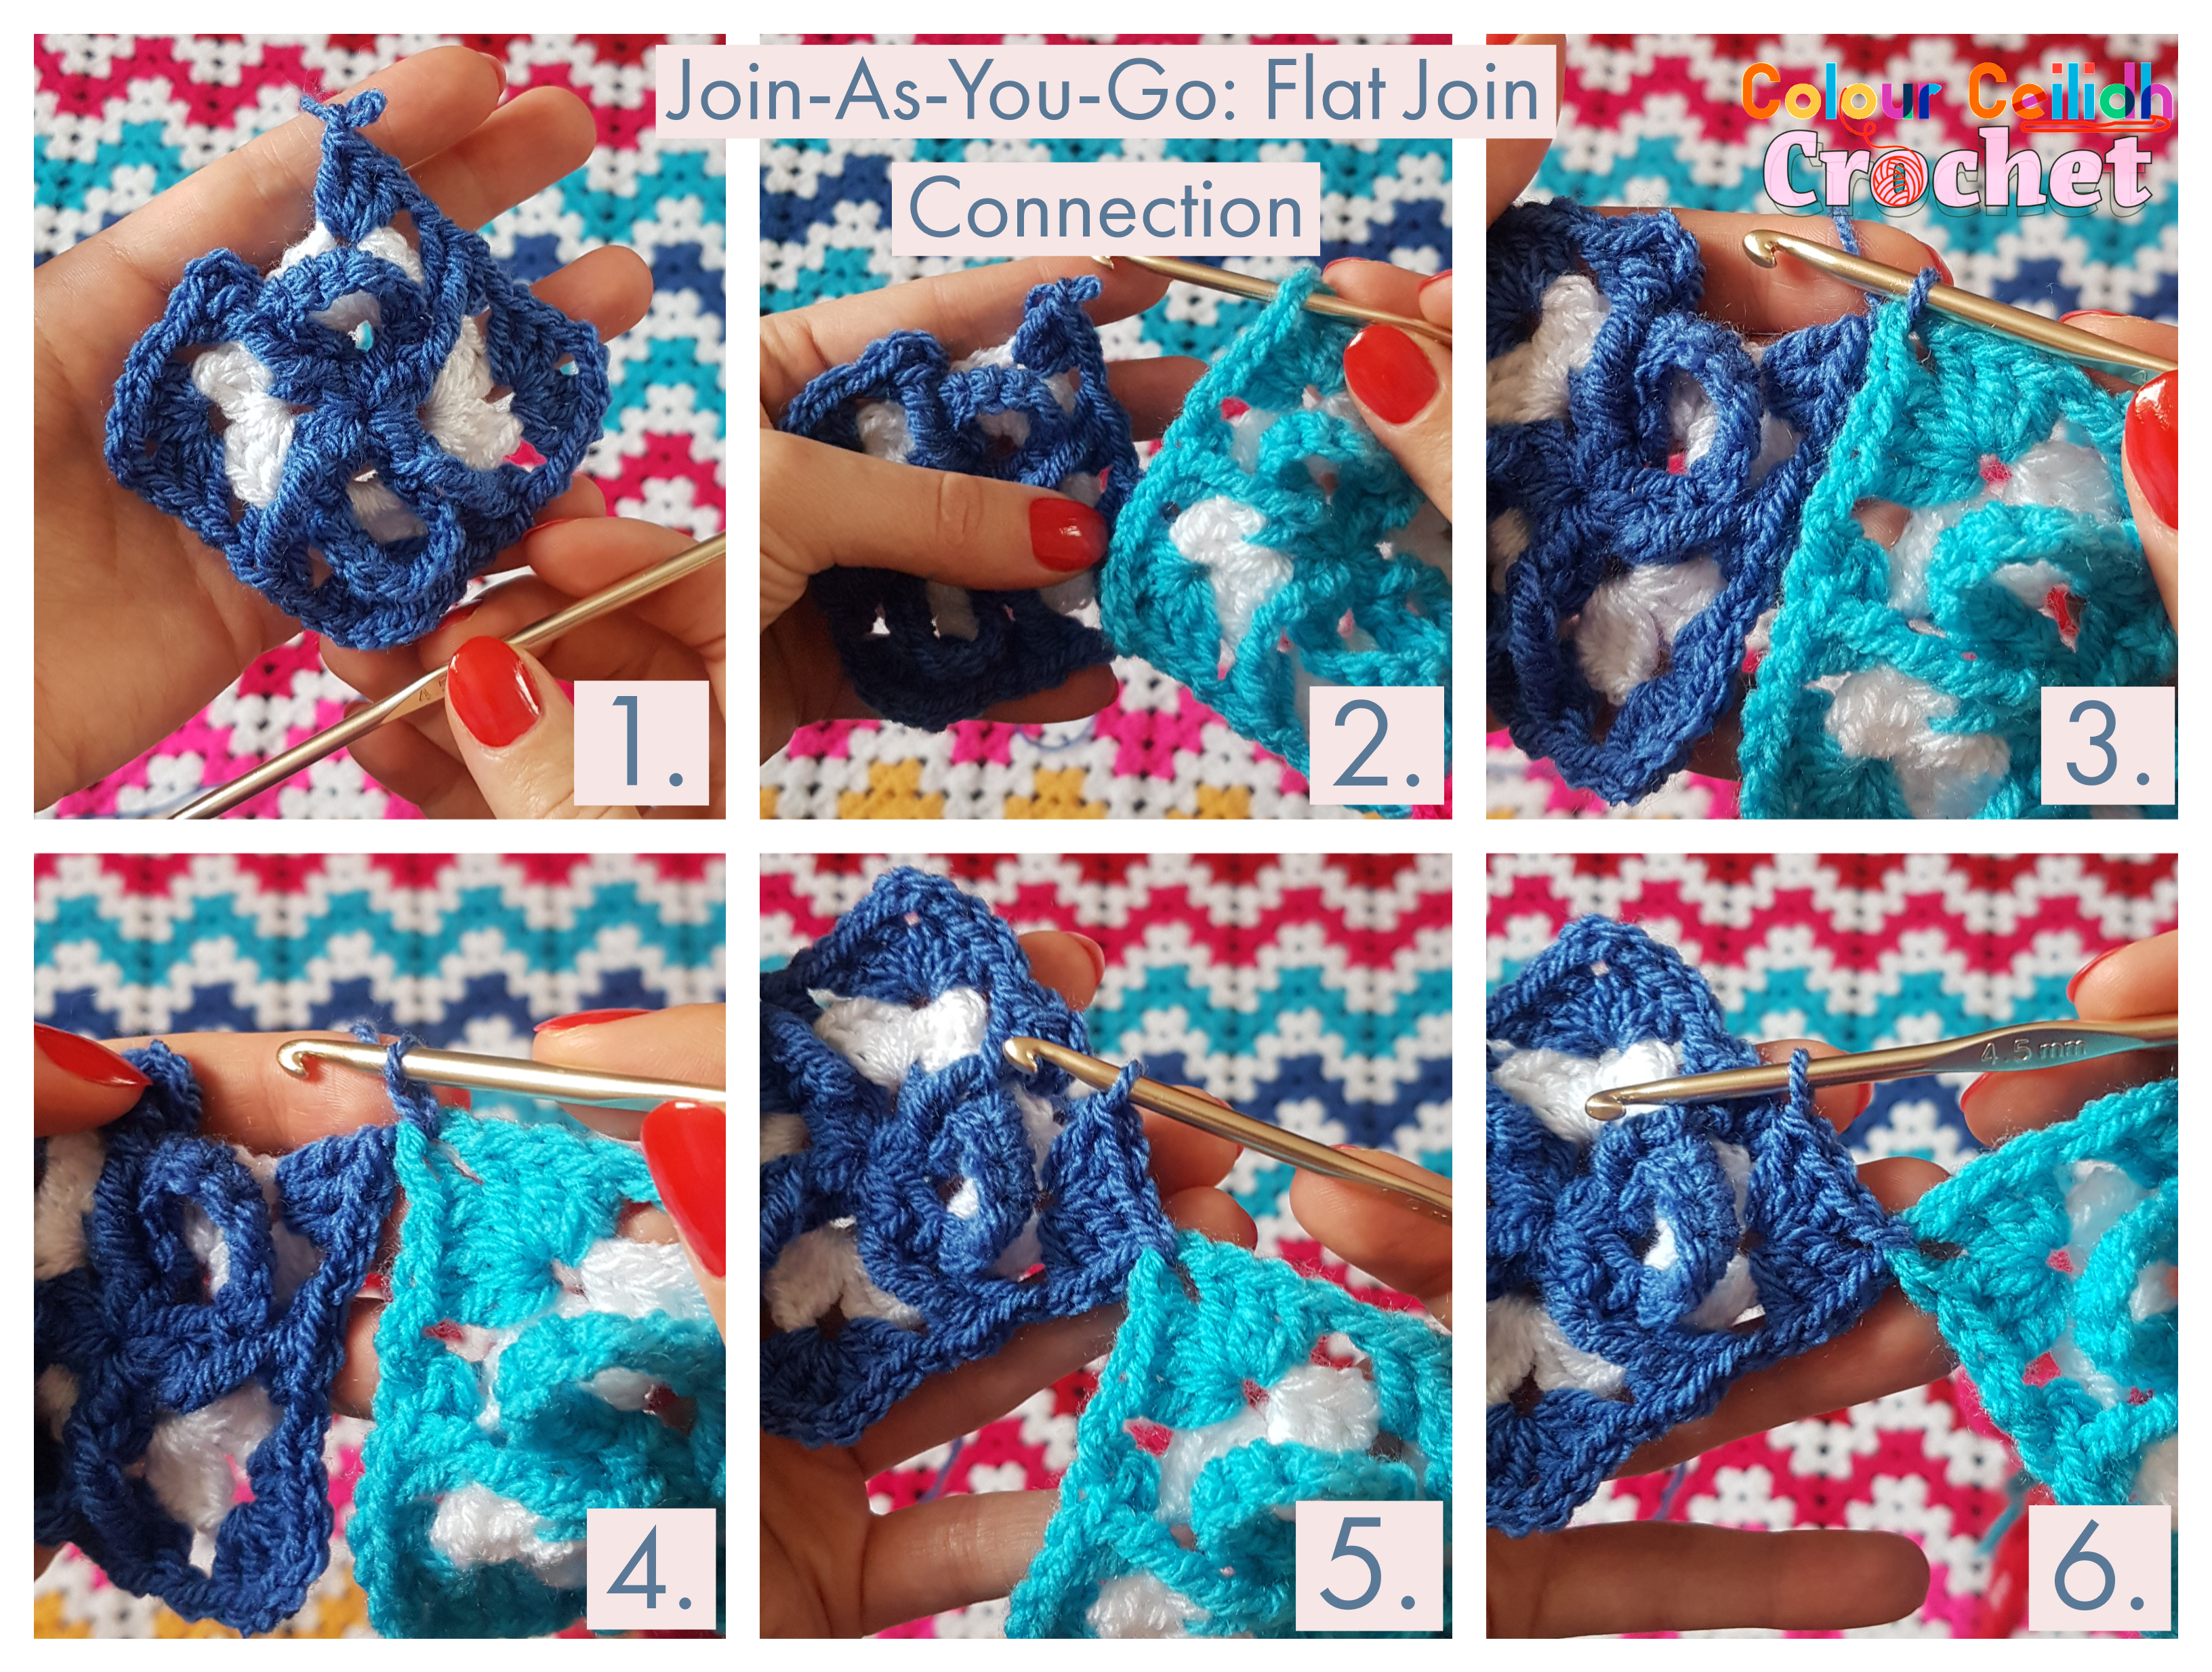
Join-As-You-Go Flat Join Crochet Tutorial
To join the granny squares in opposite corners so they form a line for the bottom edge of the blanket we’re going to join in the ch-2 spaces in the granny square corners. When you are in your corner that you want to join with and you have made the 3 double crochet stitches in your ch-2 space, make chain 1, drop the loop from the hook, insert the crochet hook front to back through the ch-2 space (the joining point) in the corner of the other granny square, pull the dropped loop through the joining point, make chain 1 and continue as normal to finish the last round. When you’re picking your corners for joining make sure your crochet ribbons form the X shape and your crochet bows are alligned horizontally like an “8” lying sideways.
Once you joined 9 Granny Square Christmas Crochet Gift Parcels in a line for the bottom edge, TURN your work so that the ribbons and bows are facing down.
Granny Square Christmas Crochet Gift Parcel
Begin with sliding loop.
Rnd 1 Ch 3, 2 dc in ring, *ch 2, dc in ring, ch 7, sc in ch-2 space (far right side), 7 sc in ch-7 space, sl st in ch-2 space, 2 dc in ring, **ch 2, 3 dc in ring, rep from * to ** one more time, join with hdc to top of ch-3.
Rnd 2 Ch 3, (2 dc, ch 2, 3 dc) in same space, *ch 1, (3 dc, ch 2, 3 dc) in next space; rep from * two more times, join with hdc to top of ch-3.
Rnd 3 [Ch 3, FP(yo4times) around middle dc in 3-dc cluster from Rnd 1 below, dc] in same space, *ch 1, (3 dc, ch 2, 3 dc) in next space **, ch 1, [dc, FP(yo4times) around middle dc in 3-dc cluster from Rnd 1 below, dc] in next space; rep from * 3 around, ending last rep at **, join with hdc to top of ch-3. Fasten off.
I have a PHOTO TUTORIAL for making these Granny Square Christmas Crochet Gift Parcels here.
Blanket
For the first row of the blanket (once your work is turned so that the ribbons are facing down) we start at the ch-2 space of the far-right granny square’s right corner and we end at the ch-2 space of the far-left granny square’s left corner at the other end.
Here is my tutorial about how to join new yarn color for crochet projects like this.
Or you might want to check out my new method for joining new yarn with no tails, which promises that you’ll only have two yarn tails to weave in per entire blanket, the one you start with and the one you end with, and only one yarn tail per motif.
Rows 1- 76 Ch 3, 3 dc in next space two times, *(3 dc, ch 2. 3 dc) in next ch-2 space, 3 dc in next space two times**, skip the granny square joining point, 3 dc in next space two times; rep from * accross eight times ending last rep at **, tr in next space, t.
Colour Order
First and last rows are White. Then make two rows each of this colour sequence bottom- up and separate everything with two rows of White in between each colour:
Green – Kelly Green – Grass Green – Saffron – Fiesta – Bright Pink – Lipstick – Bright Pink – Turqoise – Lapis – Turqoise – Bright Pink – Lipstick – Bright Pink – Fiesta – Saffron – Grass Green – Kelly Green – Green
Top Edge
We’re going to make 8 Granny Square Christmas Crochet Gift Parcels for the top edge to finish off the blanket. Colours right to left:
Bright Pink – Turqoise – Lapis – Turqoise – Bright Pink – Lipstick – Bright Pink – Turqoise
You can make the top edge in two ways:
- Join the 8 squares in the opposite corners as-you-go so they form a line (as explained above) and simply sew them on to your blanket.
- Join your granny squares as-you-go to the top edge of the blanket with a crochet hook (that’s what I did, pictured).
Join-As-You-Go Top Edge
I tend to start joining squares for the top edge of the blanket in projects like this from the right side of the edge, which is the Bright Pink square here. Use the flat join as explained in the tutorial above (simply drop the loop from the hook and insert the hook from front to back through the joining point, pull up the dropped loop and continue as normal) in the joining points highlighted below but skip the chevron spikes’ ch-2 spaces except for the most far-left and the most far-right.
Have some leftover yarn from this project? Why not make my fun Granny Square Christmas Crochet Gift Parcel Decorations to complete the set!
I hope you enjoyed my little crochet blanket Christmas Present!
Don’t forget to PIN this as well as follow me on Pinterest, Facebook and Instagram to RECEIVE behind the scenes news, and SUBSCRIBE to my email list for more exciting posts and—
Happy crocheting!
Justina