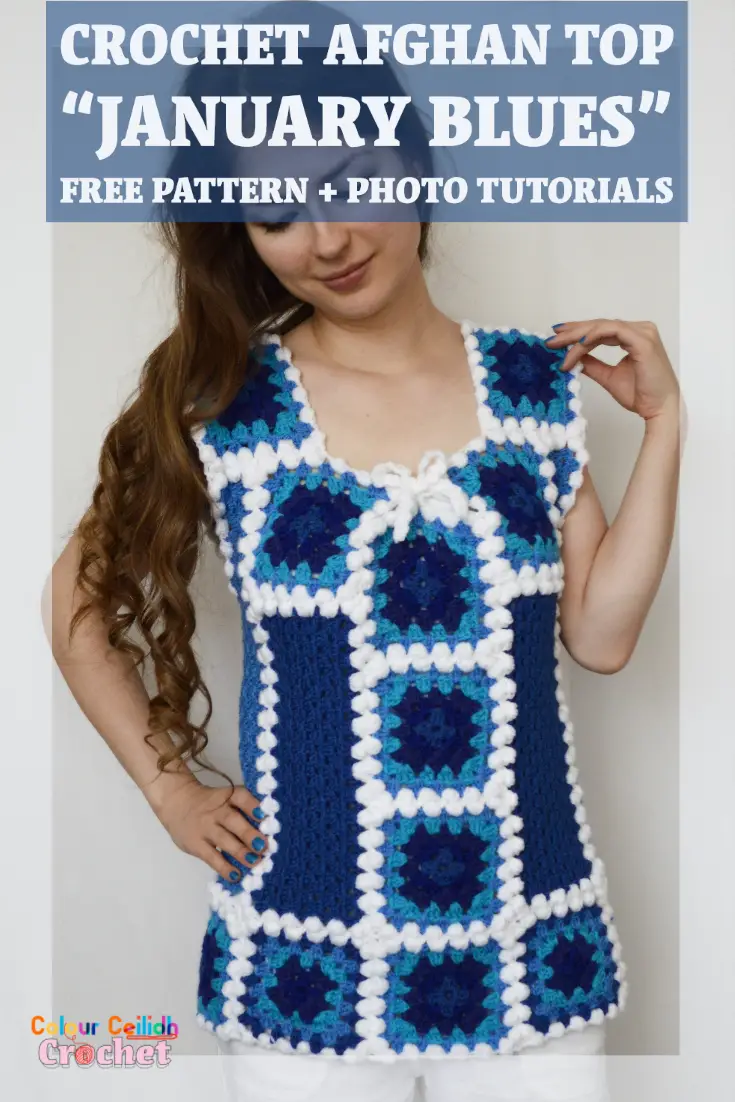
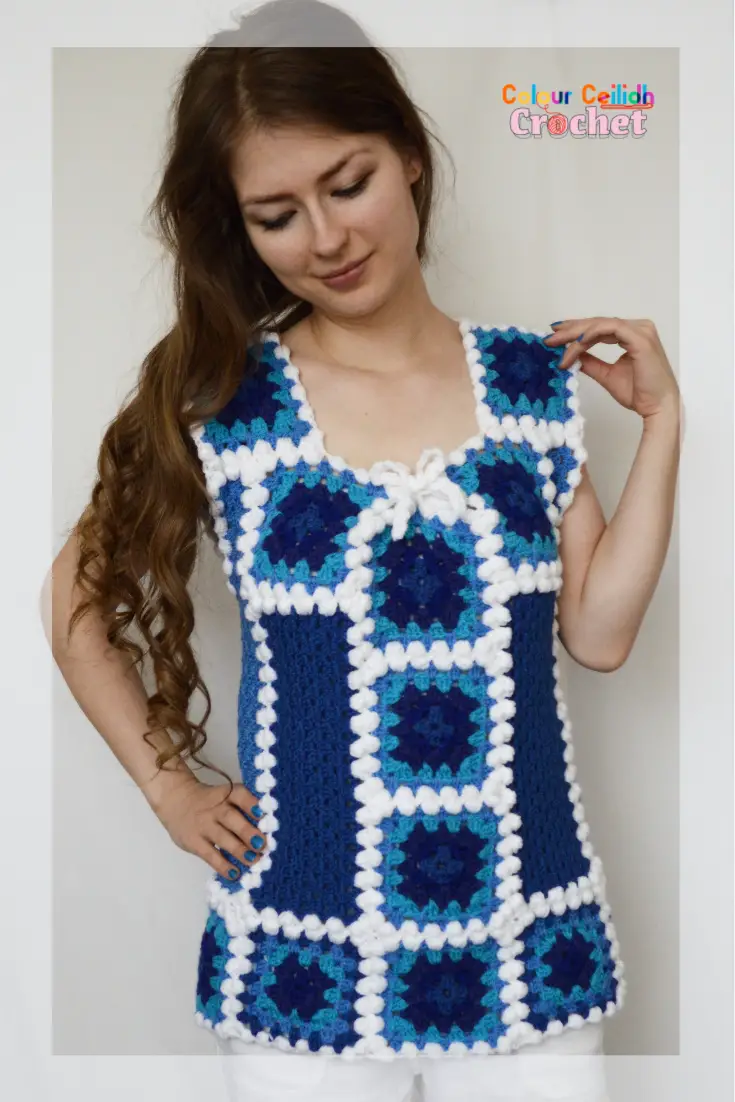
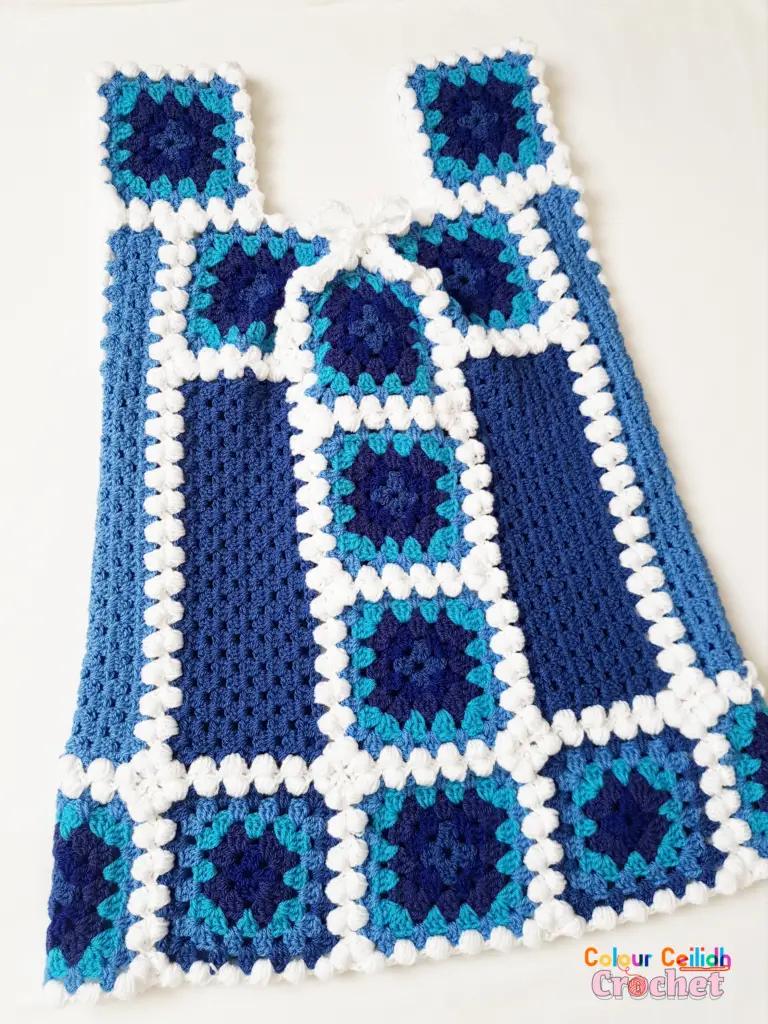
I love the colour BLUE but I don’t love BLUES so I made this crochet afghan top “January Blues” as a crochet therapy and colour therapy and a bit of TLC for myself and my wardrobe all rolled into one!
This post contains affiliate links to products. I may receive a commission for purchases made through these links.
Get your instant, printable & ad-free pattern pdf HERE on Etsy.
Afghan vs Afghan Top
How many granny squares or other crochet pieces do you usually join into an afghan?
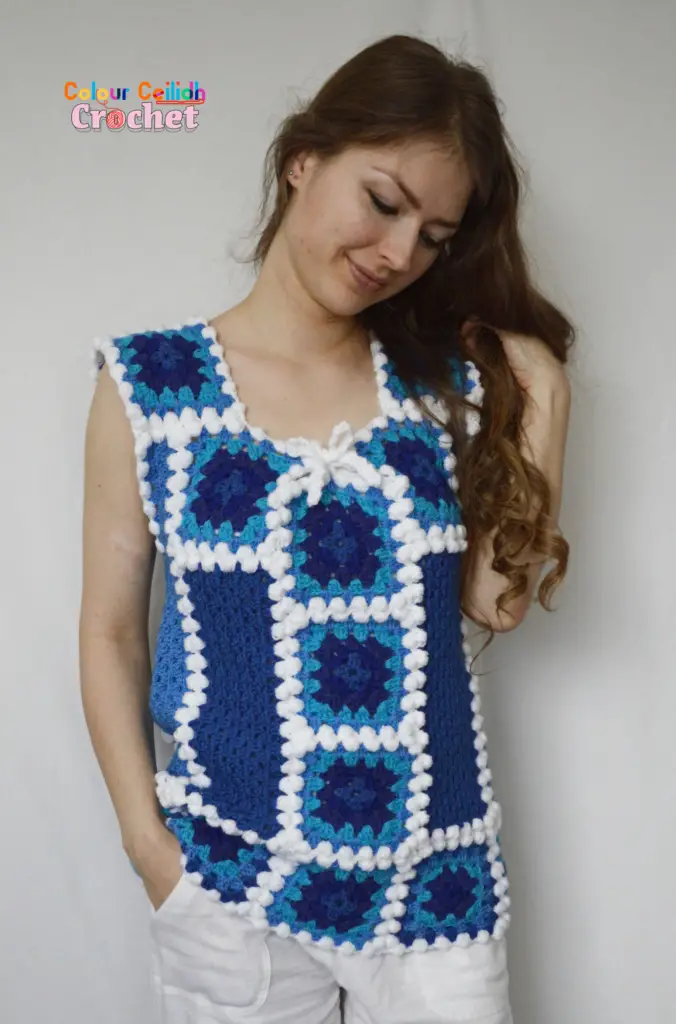
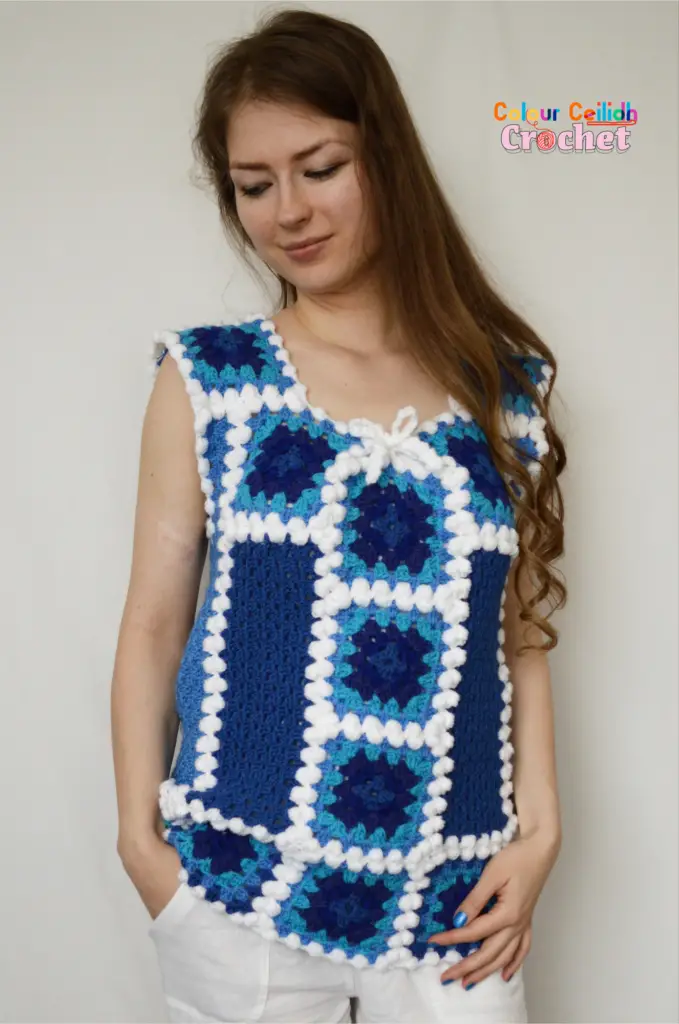
When I made my lacy crochet throw “Starry Halloween Night“, I joined 73 hexagons, and that was for a lapghan, which was quite small. Well this crochet afghan top “January Blues” is made of only 28 pieces that are joined together as-you-go with a puff stitch, so you’ll be done much faster, and you’ll have yourself a wearable afghan that you can wear outside!
Puff Stitch: Right Side vs Wrong Side
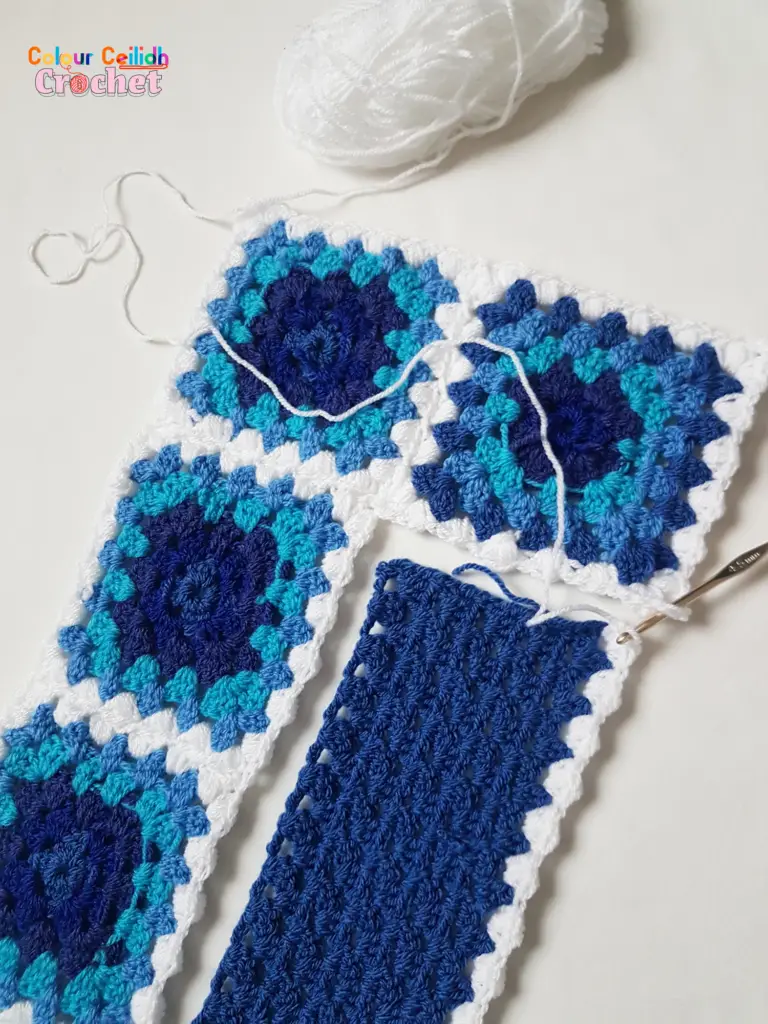
I chose to crochet my puff stitch from the reverse side just because I noticed that the stitch looked much puffier at the back (on the wrong side of your work) – have you ever noticed this with your crochet? Even if I tried to puff it out (to push it with my fingers) towards me when I crocheted from the right side, the stitches would still eventually go back to puffing out on the wrong side of the work where noone can see how gorgeous their little bums are, at least not so much. If you don’t have that problem, please feel free to join from the right side. And if you decide to join from the wrong side, there’s nothing to it! Simply flip all the pieces so they’re lieing on their fronts before beginning your puff stitch, and work it as you normally would.
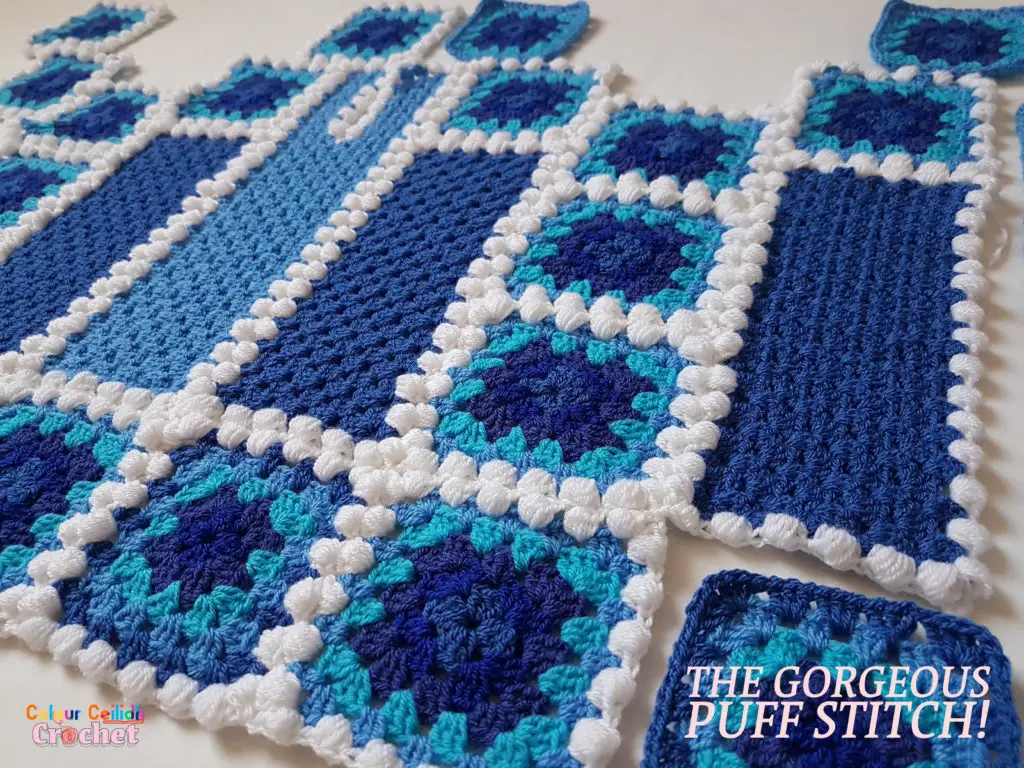
I do love to take a look at the reverse side of my crochet as I’m making something anyway, and I often love the different textures that stitches create on the reverse side. I love how versatile CROCHET can be!
Pattern Information
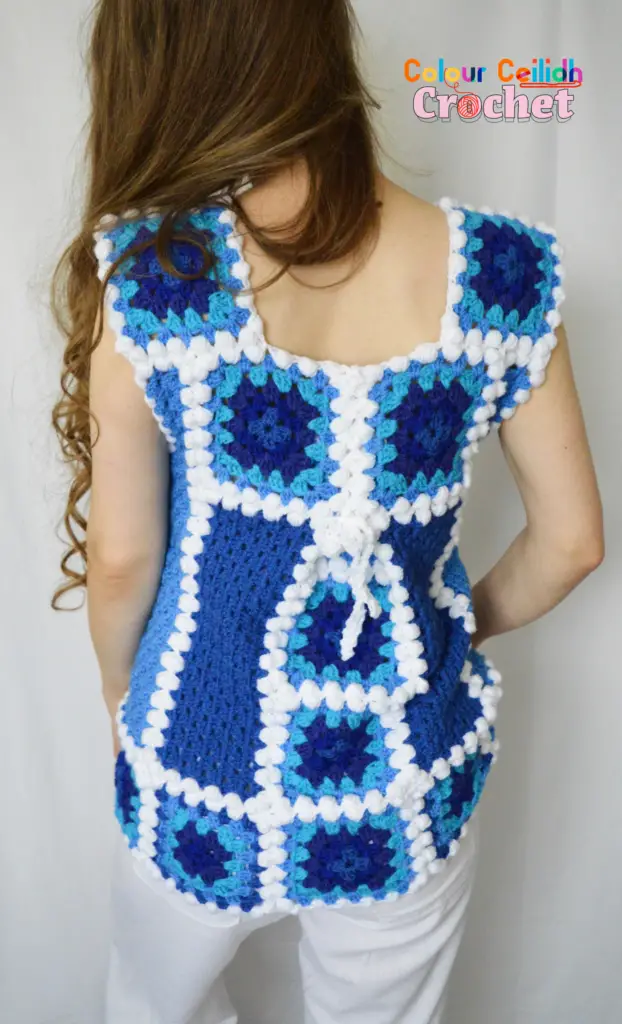
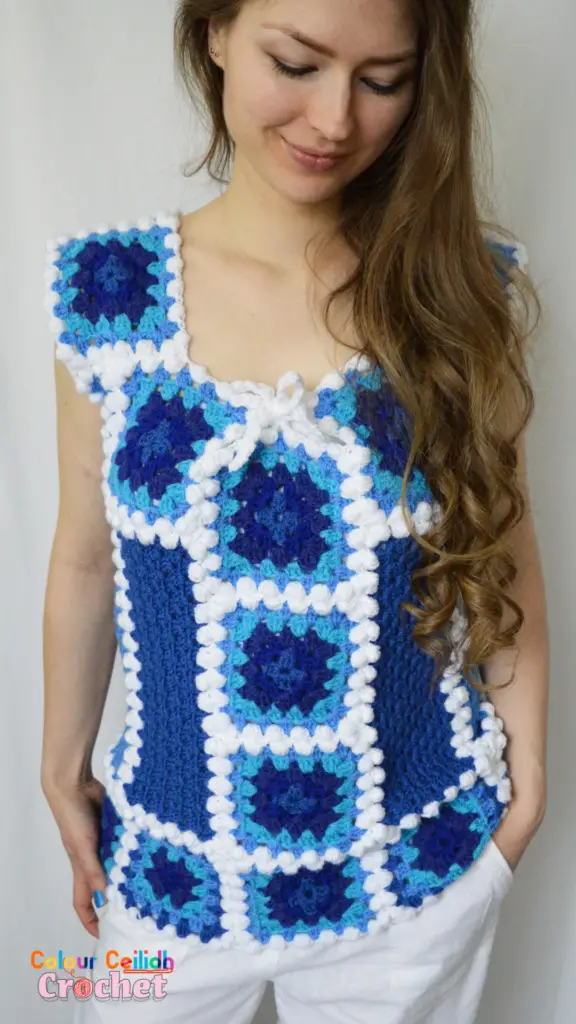
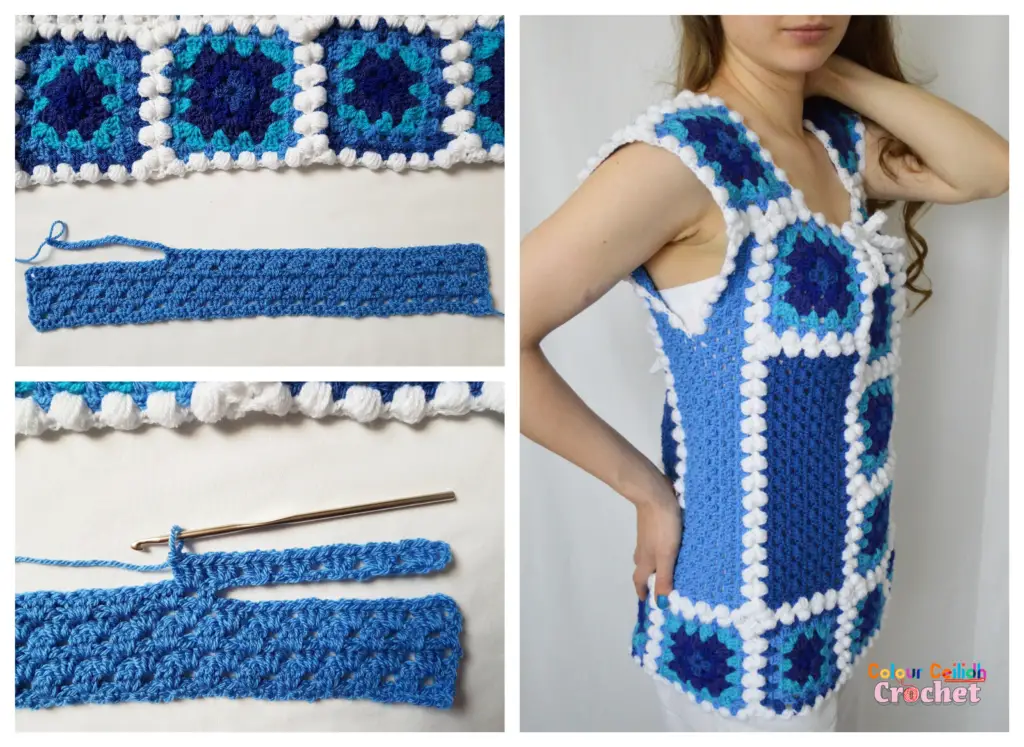
This crochet afghan top “January Blues” is bursting with shades of blue that are infused into the granny square neck detail especially and is full of texture thanks to the puff stitch. The gorgeous puff stitch is highlighted in white for a contrasting effect and is used as my method of joining the pieces together. It also gives my crochet afghan top a nice overall finish.
Overview
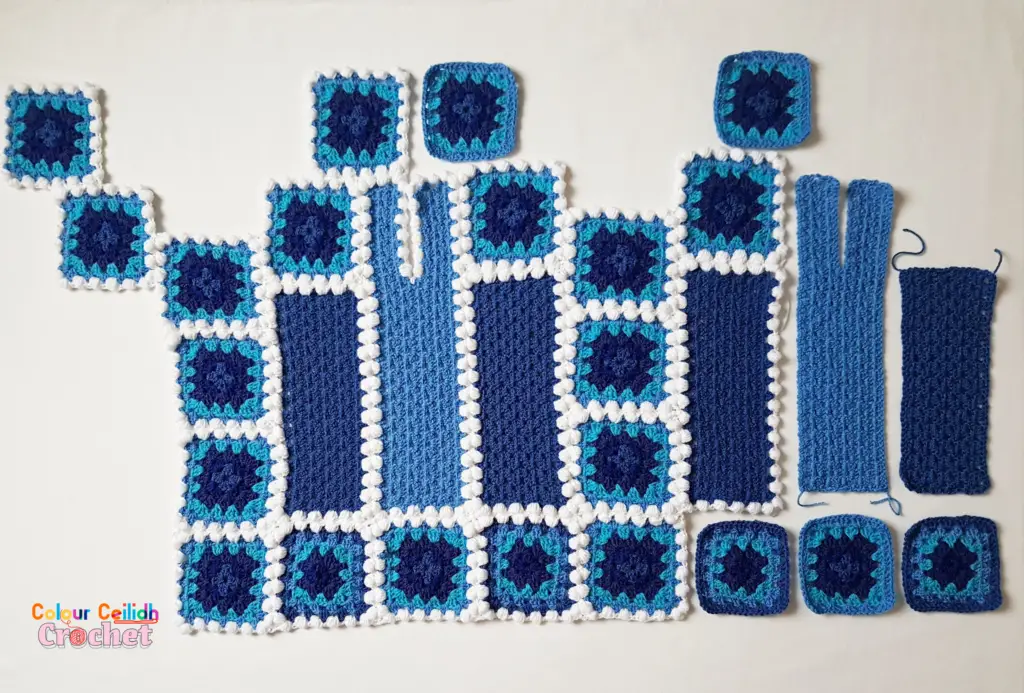
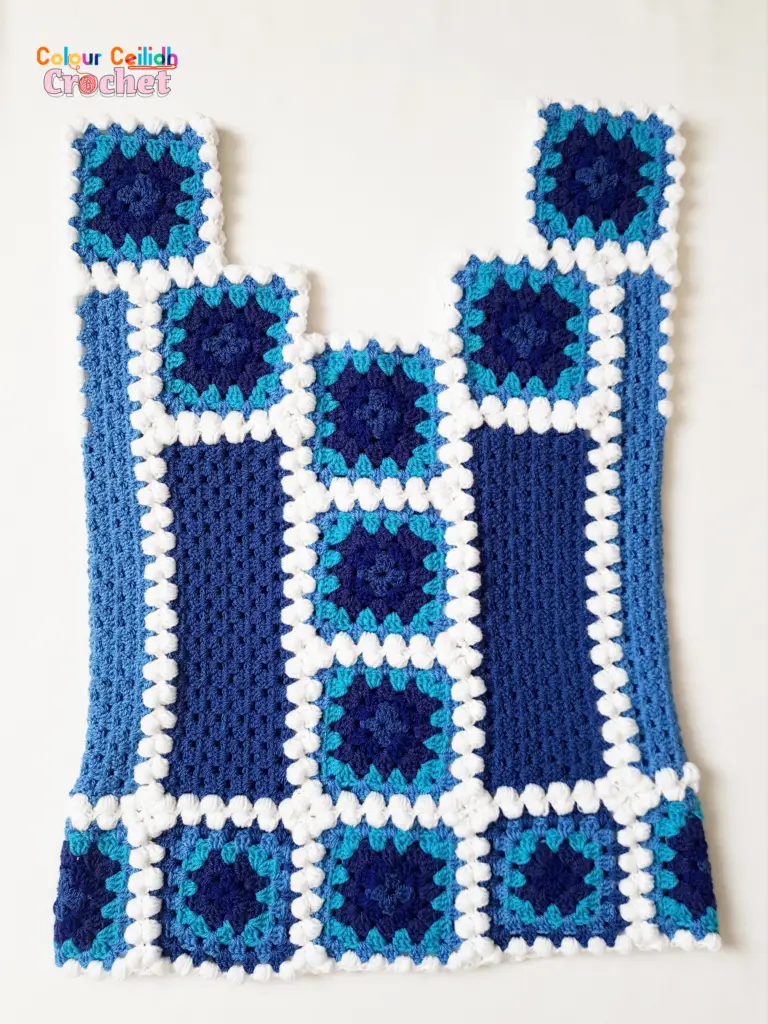
- Make 22 granny squares, 18 in Lapis – Aster, and 4 in Royal – Lapis.
- Make 4 rectangles in the simple granny stitch (1st row sc, 10 rows granny stitch) for your centre strips in Lapis.
- Then make 2 larger rectangles in granny stitch as well with slits for your armholes in Aster.
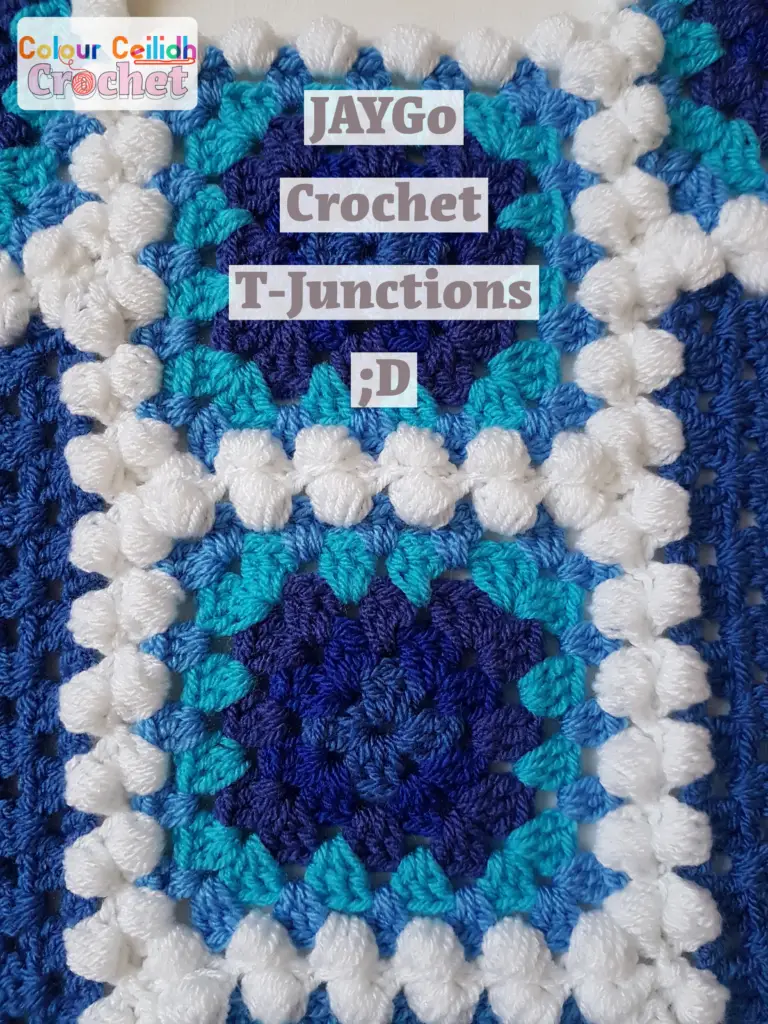
- Join-as-you-go with a puff stitch in White all your pieces together, either right side- or wrong side- facing. The puff stitch I’m using is hdc5tog (no ch 1) with hdc on either side of the puff stitch in the same space to tie it in with the granny stitch (can I call it the “granny puff” stitch? ;D).
- Make 2 crochet ribbons also in White for gathering your front neckline and your back detail.
Gauge
The gauge: my granny squares measure about 11.5 cm/ 4.5 in wide without the puff border (Rnds 1 – 5) and about 13 cm/ 5 in wide with the puff stitch added.
Finished Measurements
The garment is a size M/ UK size 10- 12/ US size 6- 8/ EU size 38- 40.
And the finished measurements are 68 cm/ 26.7 in shoulder to hem, 36 cm/ 14 in shoulder width, 45 cm/17.5 in waist (laid flat) & the flared “skirt” measures 53 cm/ 20.8 in at the bottom (laid flat).
For reference, model is 5’7″ with a 35″ bust.
Notes
For fast results, if you weave in the ends as-you-go (as My Poppet Blog describes it, tuck the yarn tail along the top of the row you’re crocheting over, and crochet right over it), you’ll only have one or two ends to weave in for each piece. And to weave in those ends, you can do so when you make your puff stitch. The puff stitch can also be where the last ends can be hidden, by looping the tails around the puffs on the wrong side of your top.
UPDATE: Here’s how I change yarn color now, so that there are no tails to weave in between rounds. If you use this method, you might not need to use the slip stitch join. Check out my tutorial How To Change Yarn Color In Crochet!
Materials
- Yarn, in weight 3/ light/ DK/ light worsted. I used Stylecraft Special DK in Lapis (2 X 100g skeins), Aster (2 X 100g skeins), White (2 X 100g skeins), Turquoise (1 X 100g skein, but might need 2), Lobelia (1 X 100g skein) and Royal (1 X 100g skein). OR GET YOUR YARN HERE AT LOVE CRAFTS!
- Crochet hook, size 7/ 4.5 mm
- Scissors
- Measuring tape
- Tapestry/ yarn needle
Abbreviations
- ch: chain
- dc: double crochet
- hdc: half double crochet
- hdc5tog: half double crochet 5 together. [Yarn over, insert hook into indicated stitch/ space, draw up a loop (stretch it to at least hdc height)] five times, yarn over, draw yarn through all 11 loops on hook
- rep: repeat
- rnd: round
- sc: single crochet
- sl: slip
- st: stitch
- t: turn
- yo: yarn over
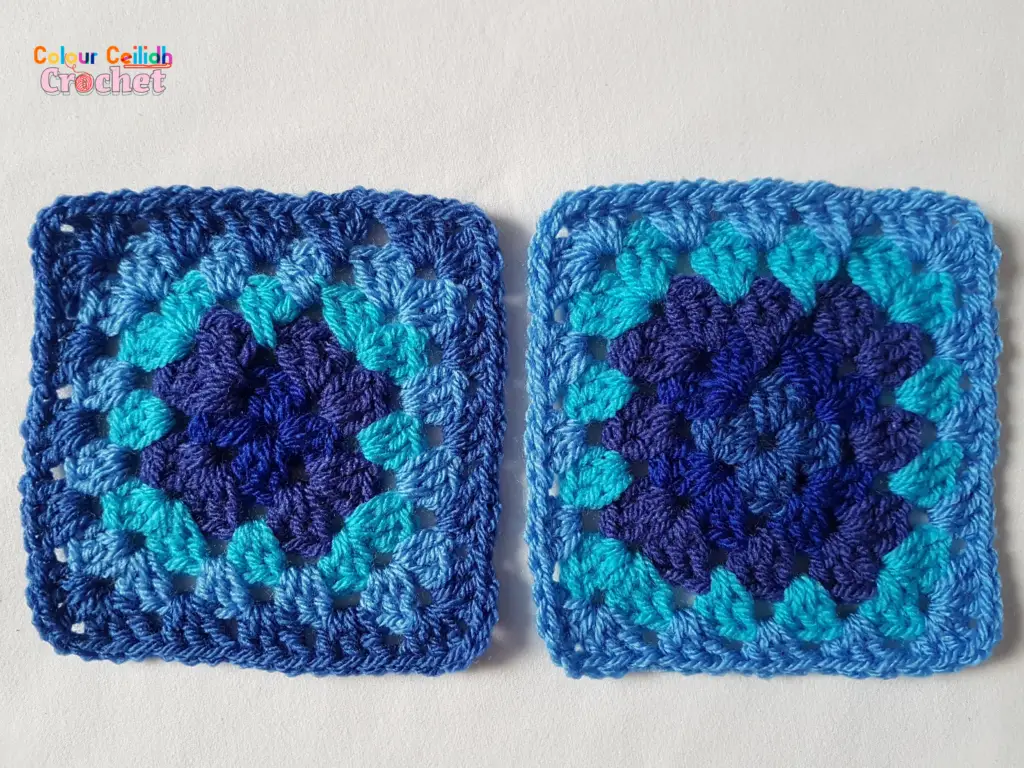
Granny Square Lapis – Aster
Make 22.
With Lapis, ch 5; sl st to ch-1 to form a ring.
Rnd1 Ch 3 (counts as dc), 2 dc in ring, *ch 1, 3 dc in ring; rep from * two more times, join with sc to top of ch-3. <12 dc and 4 spaces>
Rnd2 (Royal) Ch 3 (counts as dc), (2 dc, ch 1, 3 dc) in same space, *(3 dc, ch 1, 3 dc) in next space; rep from * two more times, join with sl st to top of ch-3.
Rnd3 (Lobelia) Ch 3 (counts as dc), 2 dc in same space between 3-dc groups, *(3 dc, ch 1, 3 dc) in next space**, 3 dc in next space between 3-dc groups, rep from * around, ending your last rep at **, join with sl st to top of ch-3.
Rnd4 (Turquoise) Ch 3 (counts as dc), 2 dc in same space between 3-dc groups, *3 dc in next space between 3-dc groups, (3 dc, ch 1, 3 dc) in next space**, 3 dc in next space between 3-dc groups; rep from * around, ending your last rep at **, join with sl st to top of ch-3.
Rnd5 (Aster) Ch 3 (counts as dc), 2 dc in same space between 3-dc groups, *3 dc in next space between 3-dc groups two times, (3 dc, ch 1, 3 dc) in next space**, 3 dc in next space between 3-dc groups; rep from * around, ending your last rep at **, join with sl st to top of ch-3. Fasten off.
Granny Square Royal – Lapis
Make 4. Follow the same pattern as Granny Square Lapis – Aster using the following colours for rounds 1 to 5 respectively:
Royal – Lobelia – Turquoise – Aster – Lapis
Centre Strip
Make 4.
With Lapis, ch 44.
Row1 Sc in 2nd ch from hook, sc across, t. <43 sc>
Row2 Ch 3 (counts as dc), dc in same st, *skip 2 st, 3 dc in next st; rep from * across, 2 dc in last st, t. <43 dc and 14 spaces>
Row3 Ch 3 (counts as dc), 3 dc in next space between 2-dc and 3-dc groups, *3 dc in next space between 3-dc groups; rep from * across, dc in top of ch-3, t. <44 dc and 15 spaces>
Row4 Ch 3 (counts as dc), dc in space below between dc and 3-dc group, *3 dc in next space between 3-dc groups; rep from * across, 2 dc in last space between ch-3 and 3-dc group, t. <43 dc and 14 spaces>
Rows 5, 7, 9, 11 Same as Row 3. Fasten off at the end of Row 11.
Rows 6, 8, 10 Same as Row 4
Side Strip With An Armslit
Make 2.
With Aster, ch 62.
Row1 Sc in 2nd ch from hook, sc across, t. <61 sc>
Row2 Ch 3 (counts as dc), dc in same st, *skip 2 st, 3 dc in next st; rep from * across, 2 dc in last st, t. <61 dc and 20 spaces>
Row3 Ch 3 (counts as dc), 3 dc in next space between 2-dc and 3-dc groups, *3 dc in next space between 3-dc groups; rep from * across, dc in top of ch-3, t. <62 dc and 21 spaces>
Row4 Ch 3 (counts as dc), dc in space below between dc and 3-dc group, *3 dc in next space between 3-dc groups; rep from * across, 2 dc in last space between ch-3 and 3-dc group, t. <61 dc and 20 spaces>
Row5 Same as Row 3.
Row6 (Making The Armslit) Ch 3 (counts as dc), dc in space below between dc and 3-dc group, *3 dc in next space between 3-dc groups; rep from * across but leave the last 6 spaces free, 2 dc in the 7th space from the end of the row/ the edge, ch 19, t. <43 dc and 14 spaces>
Row7 (Completing The Armslit) Dc into 4th ch from hook (counts as 2 dc and 1 space between them), 2 dc in same st, *skip 2 st, 3 dc in next st; rep from * across, dc in top of ch-3, t. <62 dc and 21 spaces>
Rows 8 & 10 Same as Row 4.
Rows 9 & 11 Same as Row 3. Fasten off at the end of Row 11.
Joining-As-You-Go With The Puff Stitch
Arrange your pieces as shown in the picture below, all pieces facing up or down according to your puff stitch crocheting preferences.
Types Of Crochet Spaces To Join-As-You-Go Into
With White and preferred side (right or wrong) facing: make a slip knot on your hook and insert the hook into any space as follows:
- between 3-dc groups for granny squares and top edges of rectangles;
- ch-3 spaces or spaces created by 1-dc on the sides of rectangles (skipping rows ending and beginning with 2-dc);
- for the bottom edges of your rectangles, spaces directly below 2-dc and 3-dc clusters from Rnd 2 and NOT the gaps in between. Your corner spaces are spaces directly below 2-dc clusters;
- for the actual armslit (the slit inside your side strip with an armslit), we’re working in the gaps between 3-dc clusters and we’re also making a sl st into the last dc of the 2-dc cluster in Row 6 (picture below);
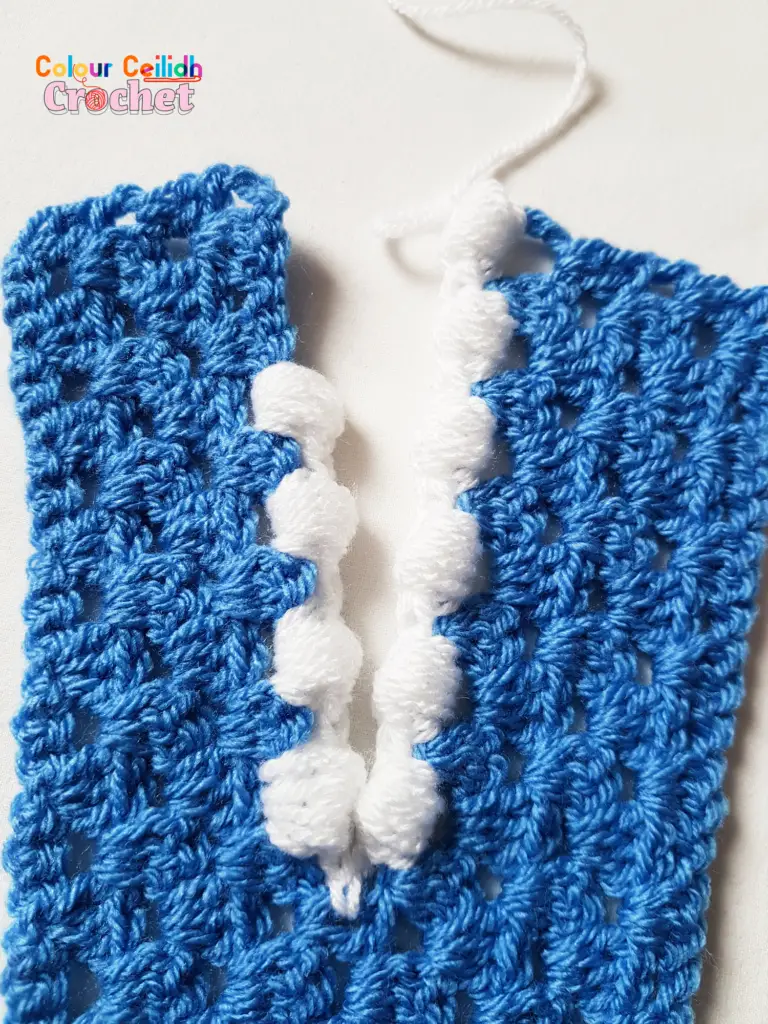
yarn over and pull through both your work and the slip knot & proceed with the puff stitch.
You can find my tutorial for how to join new color here.
The Puff Stitch
Rnd1 (White) [ch 2 (counts as hdc), hdc5tog, hdc] in same space between 3-dc groups, *(hdc, hdc5tog, hdc) in next space between 3-dc groups; rep from * around making (hdc, hdc5tog, hdc, ch 3, hdc, hdc5tog, hdc) in corner spaces, join with a sl st to top of ch-2. Fasten off.
If you need more help with using the slip knot to start your round or finding the spaces to crochet into at the bottom & the sides of your granny stitch rectangles, why not check out my Crochet Blanket “Candy Cane Lane” and scroll down to “The Crochet Slip Stitch Method” photo tutorial.
How To Join-As-You-Go
We join the granny squares together in between the “puffs” of the puff stitch. So make your “puff” (hdc, hdc5tog, hdc), then drop the loop from your hook, insert the hook front to back through the other granny square’s gap between the “puffs”, pull the loop through, yarn over, pull through the loop on the hook, and continue with the next “puff”.
For more information you can refer to the tutorial How To Join Granny Squares As You Go With A Flat Join, and instead of the 3 dc clusters you would be making the “puff” (hdc, hdc5tog, hdc).
How To Join-As-You-Go In Corner Spaces
In your corner space make your first “puff” (hdc, hdc5tog, hdc), ch 1, drop your loop from the hook, insert the hook front to back through the other granny square’s corner space, pull the loop through, yarn over, pull through the loop on the hook, ch 1, make the second corner “puff”.
When it comes to choosing which granny square’s corner space to crochet into when there are 2 or 3, I usually choose the diagonally opposite one.
Finishing & Assembly
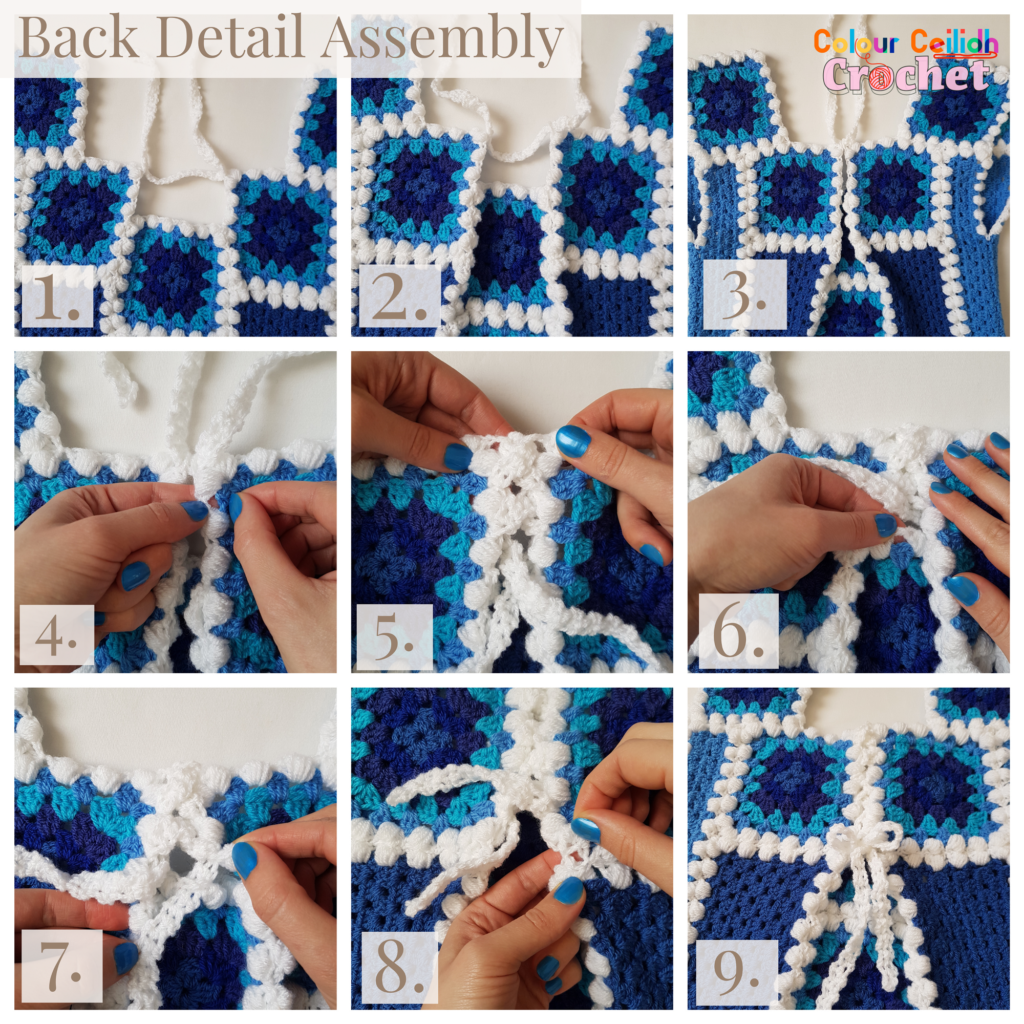
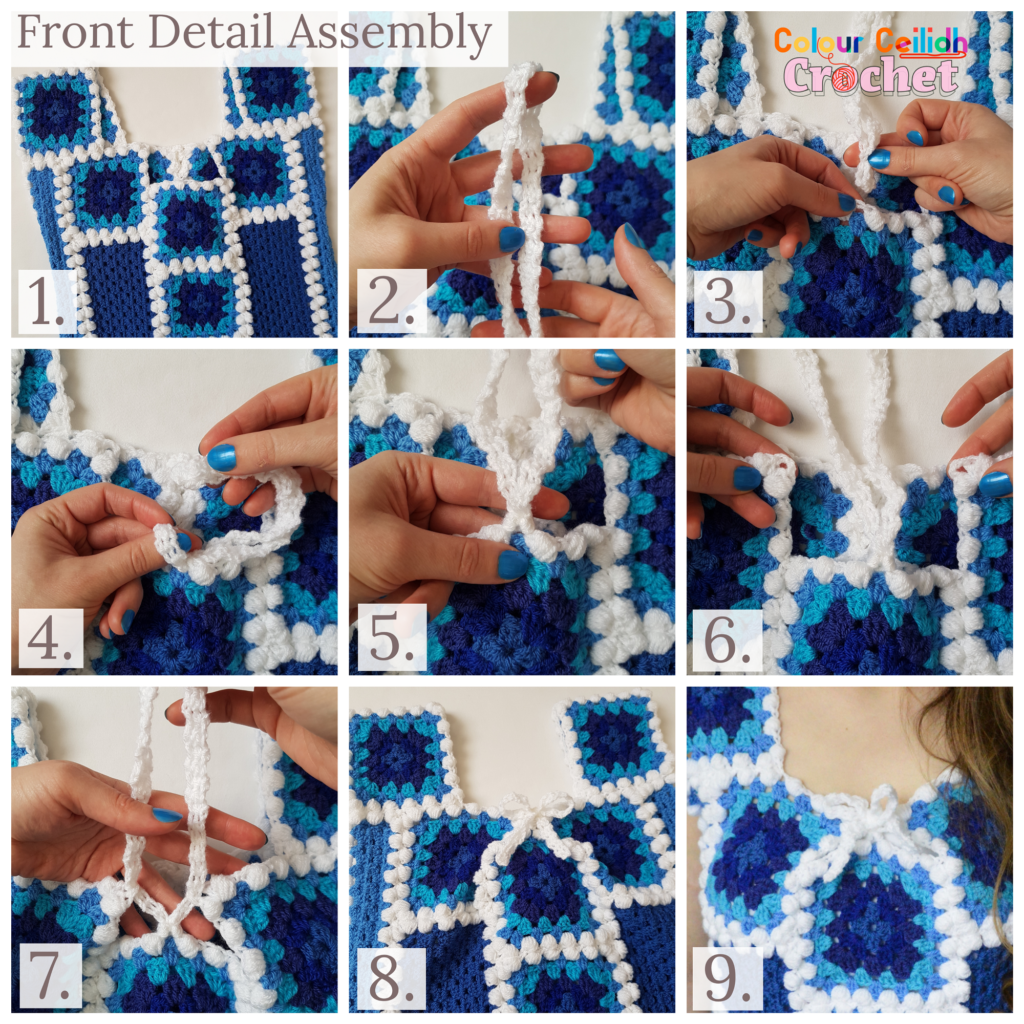
Make 2 crochet ribbons also in White for gathering your front neckline and your back detail.
Crochet Ribbon
Make 2. Crochet about 50 rows (~30 cm/ 12 in) of single crochet for the front ribbon and about 110 rows (~66 cm/ 26 in) for the back detail ribbon.
With White, ch 3.
Row1 Sc into 2nd ch from hook, sc in next st, t.
All Other Rows Ch 1, sc in next st two times, t. Fasten off when you reach the required length.
Back Detail Assembly
Front Detail Assembly
Well Done!
I really appreciate you visiting here, so a big thank you!
If you enjoyed my crochet afghan top January Blues free pattern, please share the link to this post with your friends, subscribe to my email list (the form pops up when you click around or come back again), Pin your favourite image by hovering over it and follow me on Pinterest so you never miss a pin, like my Facebook page and follow me on Instagram to see behind the scenes and for more color in your life.
Happy Crocheting!
Justina
