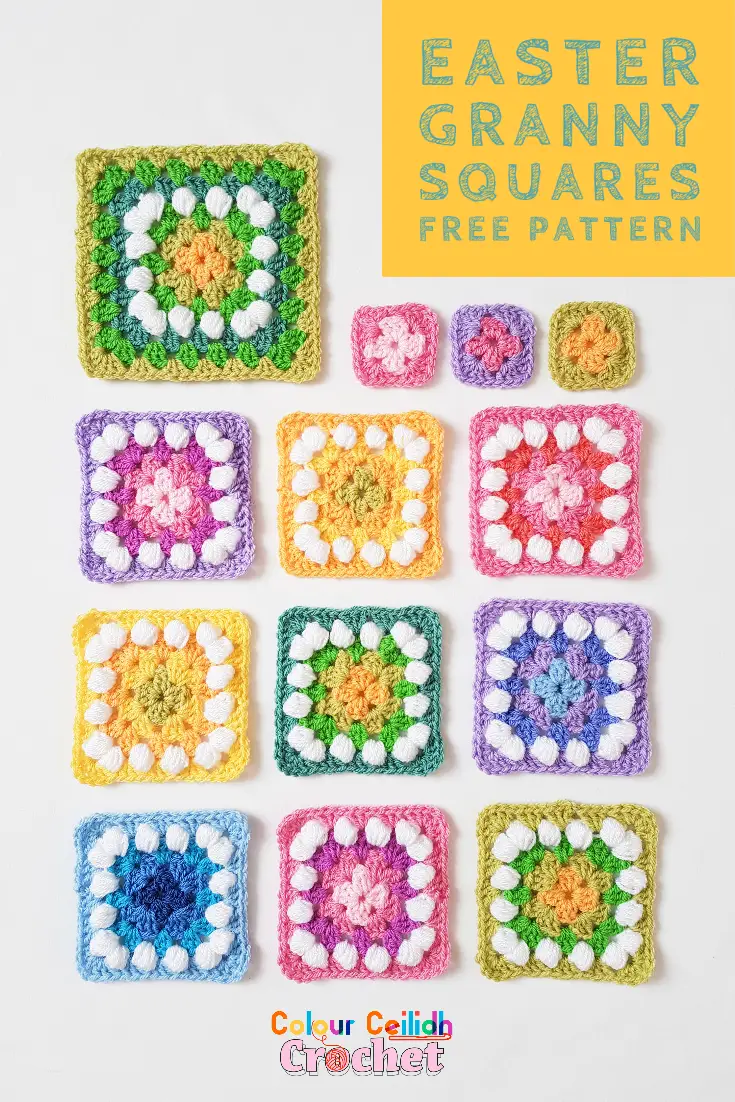
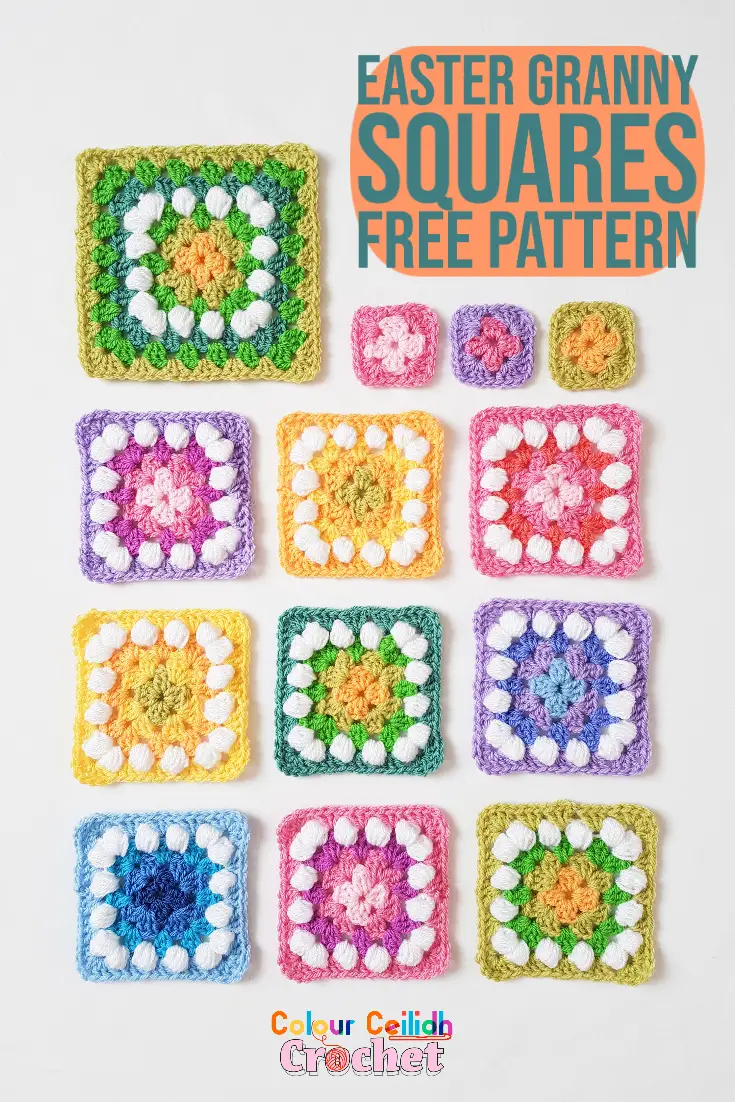
I created this free crochet pattern for these Easter Granny Squares because I had enough of the winter blues! I loved playing with these cheerful yarn colours and matching them together while I was waiting for that spring feeling to arrive…
This post contains affiliate links to products. I may receive a commission for purchases made through these links.
Don’t these skeins of yarn look like little Easter eggs?.. These colours kept calling to me to be created with until I could resist no more.

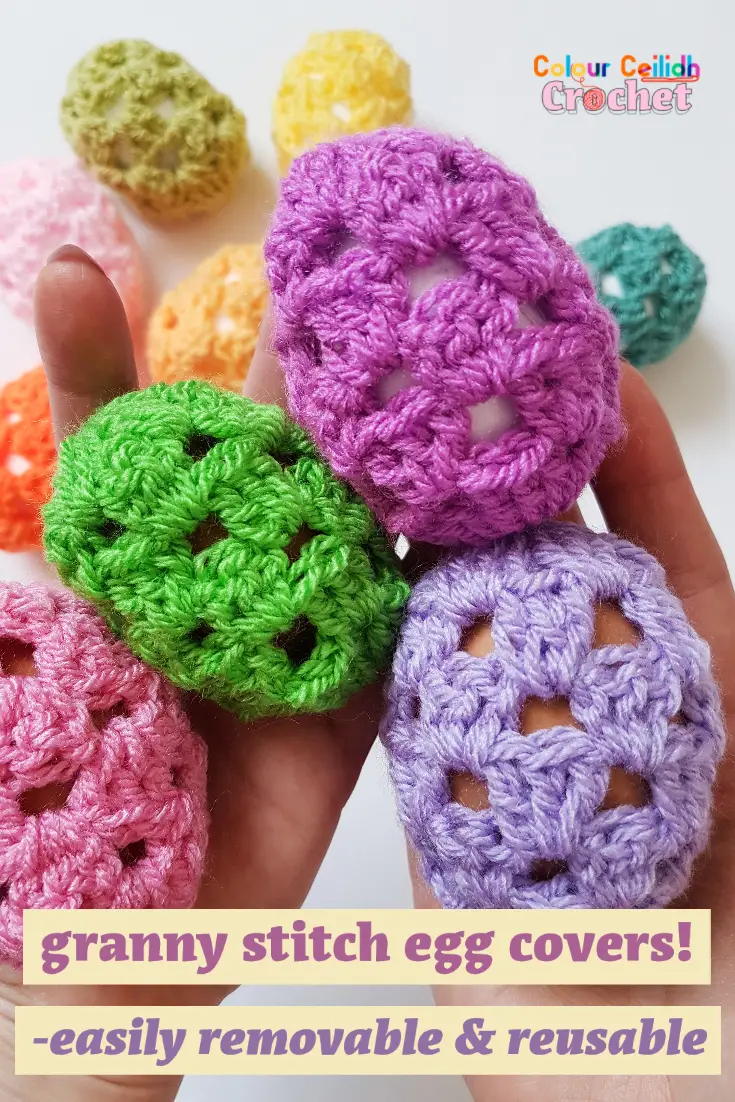
By the way, here are my crochet Easter egg covers in case you were looking for an easy Easter project!
Granny Squares & Puff Stitch
In my previous projects, my crochet summer top and my granny square scarf, I used the puff stitch as my joining-as-you-go method. I also extended my grannies, just like in this pattern, by inserting rounds of the puff stitch between rounds of the granny stitch so that the puff stitch was sitting in the middle of the squares, forming “squares within squares”. I think it’s pretty cool!
Pattern Notes
If you change the yarn colour every round, soon there might be too many ends to weave in which might make you feel defeated. Not to worry though, try crocheting over your yarn tails as-you-go. To do this, simply lay your yarn ends on top of the previous row, and crochet right over them. This way they’ll blend in and disappear out of sight in no time. My Poppet explains it well.
[UPDATE: Here’s how I change yarn color now, so that there are no tails to weave in between rounds. If you use this method, you might not need to use the slip stitch join. Check out my tutorial How To Change Yarn Color In Crochet!]
For more details about joining the yarn after fastening off in the previous row or how to make the puff stitch, click here and scroll down to the handy photo tutorial.
This is a simple granny square crochet pattern, and if you find the puff stitch is not working for you, skip turning after round 3 and simply make a round of granny stitch instead.
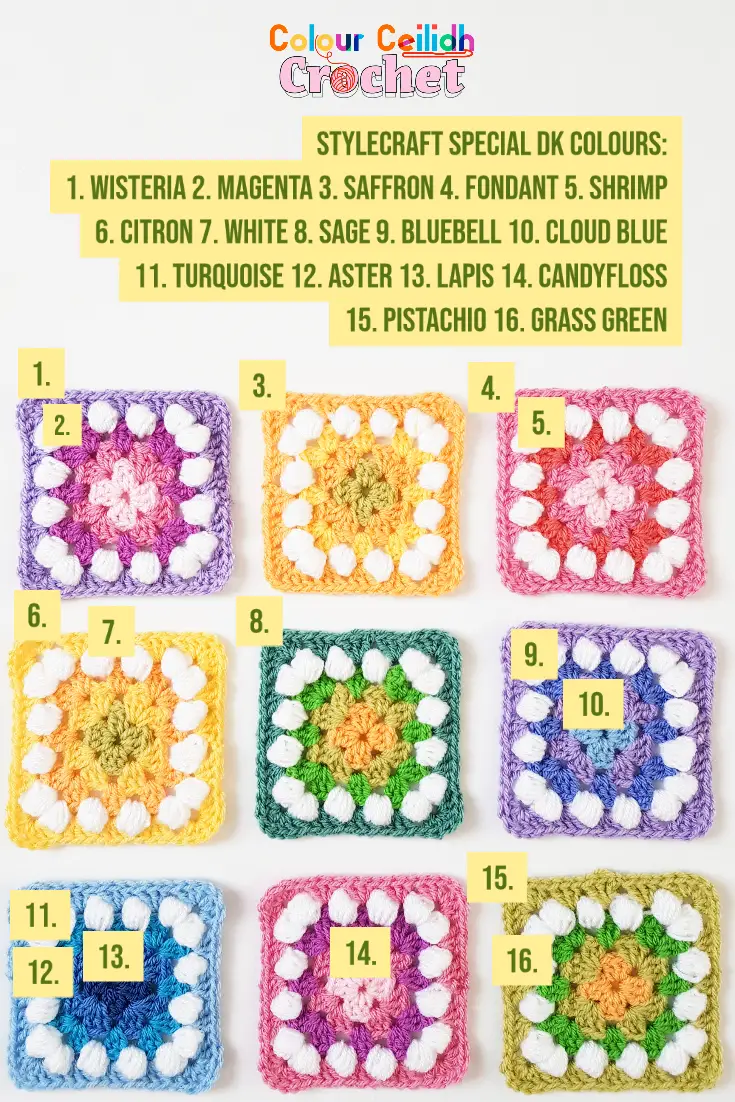
I’m using acrylic yarn which is softer and lighter than cotton yarn, and it’s practical as well because the colour doesn’t run after washing. This yarn I’m using, Stylecraft Special DK, is perfect for making colourful blankets with. Below are the colour combinations I chose for my cheerful Easter granny squares.
Materials
- Yarn, in weight 3/ light/ DK/ light worsted. I used Stylecraft Special DK in White, Citron, Saffron, Pistachio, Candyfloss, Fondant, Magenta, Wisteria, Shrimp, Grass Green, Sage, Lapis, Turquoise, Aster, Bluebell and Cloud Blue. OR GET YOUR YARN HERE AT LOVE CRAFTS!
- Crochet hook, size H/ 6/ 5 mm.
- Scissors.
Gauge
These granny squares measure about 11 cm/ 4.3 in wide.
Abbreviations
- ch: chain
- dc: double crochet
- hdc: half double crochet
- hdc5tog (puff stitch): half double crochet 5 together. [Yarn over, insert hook into indicated stitch/ space, draw up a loop (stretch it to at least hdc height)] five times, yarn over, draw yarn through all 11 loops on hook
- rep: repeat
- rnd: round
- sc: single crochet
- sl: slip
- slip stitch join: with the new colour yarn make a slip knot on your hook, insert the hook into the indicated stitch/space, yarn over, draw up a loop and pull through the slip knot. You’ve just joined a new colour. Continue as per pattern, for example, ch 3 etc. Check out my tutorial How To Join New Yarn With A Slip Stitch.
- st: stitch
- t: turn
- yo: yarn over
Easter Granny Square
For your favourite cheerful Easter colour combinations, refer tot he picture above! Begin with ch 5, sl st to ch-1 to form a ring.
Rnd1 Ch 3 (counts as dc), 2 dc in ring, *ch 1, 3 dc in ring; rep from * two more times, join with sc to top of ch-3.
Rnd2 Ch 3 (counts as dc), (2 dc, ch 1, 3 dc) in same space, *(3 dc, ch 1, 3 dc) in next space; rep from * two more times, join with sl st to top of ch-3.
It’s already looking pretty isn’t it?
Rnd3 Ch 3 (counts as dc), 2 dc in same space, *(3 dc, ch 1, 3 dc) in next space, **3 dc in next space; rep from * around, ending your last rep at **, join with sl st to top of ch-3. Fasten off and turn.
Join White with a slip stitch in any space.
Rnd4 [Work ch 2 the first time, and hdc thereafter (counts as hdc), hdc5tog, hdc] in every non-corner space and (hdc, hdc5tog, hdc, ch 3, hdc, hdc5tog, hdc) in every corner space around, join with sl st to top of ch-2. Fasten off, t.
Join the next colour with a slip stitch in any space.
Rnd5 and above [Work ch 3 the first time, and dc thereafter (counts as dc), 2 dc] in every non-corner space and (3 dc, ch 1, 3 dc) in every corner space around, join with sl st to top of ch-3. Fasten off.
Granny Square Ideas
You can choose to grow your granny square round after round indefinitely! For more ideas, just search giant/ large/ continuous/ never ending granny square on the net.
Or you can stop after round 2 and you’ll have adorable mini granny squares that are fun too.
Here are some more granny square ideas for you, including the bow tie pasta join, how to join granny squares as you go, a granny square top, a rectangular shawl, a granny scarf, puff daisy granny square and some more granny blankets.
This is crochet blanket Spring Landscape.

Well Done!
I really appreciate you visiting here, so a big thank you!
If you enjoyed my Easter Granny Squares free crochet pattern, please share the link to this post with your friends, subscribe to my email list (the form pops up when you click around or come back again), Pin your favourite image by hovering over it and follow me on Pinterest so you never miss a pin, like my Facebook page and follow me on Instagram to see behind the scenes and for more color in your life.
Happy Crocheting!
Justina